Injury Prevention

Avoid These Common Mistakes When Doing Lunges

The lunge is one of the seven primal movements — foundational patterns your body needs to perform life’s activities. It shows up in everything from walking up stairs to playing sports. But despite its importance, most people do it wrong. And improper lunges can lead to dysfunction, pain, and eventually injury.

Let’s break this down holistically — the way your body is meant to be understood.

Click on the image to watch the full video
Why Lunges Matter (And Why Most People Get Them Wrong)

Lunges are a global movement, meaning they involve many joints, muscles, and fascia chains working together. But too many people skip the prep work and just jump into reps. That leads the body to “cheat” the movement — finding ways to make it happen, but not necessarily the right way.

And those cheats? They lead to bad movement patterns, compensation, and eventually breakdowns like knee pain or low back strain.

Before doing lunges, your body needs to be trained for them — especially in the areas that stabilize and coordinate your leg and pelvis.


Key Muscles You’re Probably Not Training Properly

Two of the most important muscles for safe, strong lunges are the glute medius and adductor longus. These muscles are opposites — one on the outside of the hip and one on the inside of the thigh — and they work together to stabilize your leg and pelvis.

Most people train the glute med with exercises like the “clam.” But here’s the issue:

  • The clam only targets part of the glute med (there are three fibers).
  • It usually involves hip external rotation, which recruits the piriformis — not what you want if you’re trying to isolate glute med.
  • It doesn’t train the fascia chain that connects the glute med to your entire body.

A better approach? Train each fiber of the glute med specifically, and in a position that mimics how your body moves in life — like during a lunge.

The same goes for the adductor longus. To train it properly, use motions that involve hip flexion, internal rotation, and adduction — not just squeezing your legs together.


Lunges don’t fail because your quads aren’t strong. They fail because one link in your movement chain is weak or misfiring. That’s why I teach segmental training — working specific muscles in their purest form so they can do their job when it matters.

You’re only as strong as your weakest link. If the glute med can’t stabilize your pelvis, no amount of squats, step-ups, or lunges will fix the imbalance.


Micro Movements Drive Macro Success

The lunge isn’t just a bend of the hip and knee — it involves rotation, weight transfer, balance, and fascia coordination. That’s why I always say:

“The micro movements manage the macro movements.”

When you walk or lunge, your foot and knee rotate slightly — it’s subtle, but critical. If that rotational control isn’t trained first, you’re building a house on a shaky foundation.


Fascia: The Secret Ingredient

Your fascia — the connective tissue that wraps around and links your muscles — plays a huge role in lunging. For example, the tractus iliotibial (IT) band connects fascia from the glute med, thigh, and hip down to your knee.

If that fascial line isn’t trained, it guesses what to do — which means your knee may twist, shift, or compensate.

Training fascia means educating it — not smashing it with foam rollers. That’s why our method incorporates myofascial stretches and specific movements that guide the fascia to behave correctly.


Mastering the Lunge (Once Your Body’s Ready)

Once your body is prepared, here’s how to progress your lunge safely:

🔹 Supported Lunge

Start with one leg forward, most of your weight on the front leg (90/10 split). Let the front knee bend first, followed by the back. Focus on clean, vertical motion — no tipping or twisting.

🔹 Stepping Lunge

Now add movement. Step out with your heel first, not your toe (avoid “ballerina steps”). Your step should be slightly longer than a normal stride for better alignment and control.

🔹 Multiplanar Lunges

Life doesn’t happen in a straight line — neither should your training. Practice lunges:

  • Forward
  • Diagonal forward
  • Lateral
  • Diagonal backward
  • Backward

This prepares your body for real-world movements like hiking, skiing, or playing with your kids.


Lunges Are More Than a Gym Exercise

When done right, lunges teach your body to move efficiently, absorb force, and transfer energy through your whole system. But when done wrong — with poor prep or misaligned form — they cause more harm than good.


Need Help Getting This Right?

If you want expert guidance tailored to your body, I’ve got two options for you:

See you next week — and take care of your movement!

Building a foundation for a better life.

Find out more @

Facebook

BlueSky

Pinterest

Instagram

Youtube

Gardening. The Unwanted Effects On Your Body.

🌱 Gardening Hurts? How to Protect Your Body While Doing What You Love

Gardening brings joy to so many people — the satisfaction of growing your own food or flowers, the quiet peace of working in the soil. But for many, it also brings back pain, neck stiffness, sore knees, or overall fatigue. It doesn’t have to be that way.

I’m Ekemba Sooh, owner of SolCore Fitness. I’ve been in the health and fitness field for over 30 years, working under the osteopathic model. And here’s what I want you to know:

Gardening is a sport. It’s physically demanding. And like any sport, if you don’t prepare your body for it, you’ll pay for it.

In this blog, I’ll break down:

Simple things you can do to avoid injury and feel better

Why gardening leads to pain

What’s really happening to your knees, back, and spine

Click on the image to watch the video

🌻 Gardening is More Demanding Than You Think

Here’s what most people miss: gardening places a huge load on the body.

You’re squatting, bending, twisting, lifting, and often holding these positions for long periods. That’s a combination of:

  • External load (heavy pots, rocks, plants)
  • Postural load (static crouching, awkward angles)
  • Repetitive strain (hours of weeding, digging)

One of my clients — an art teacher — came to me years ago with chronic pain. After months of work, she felt great and was living her life again… until one weekend she gardened for five hours straight. No warm-up. No cool-down. She undid months of progress in one afternoon.

This isn’t about fear — it’s about awareness.


🦵 Your Knees: Why Squatting Hurts Later

Gardening involves constant squatting, both dynamic and static. The knee joint is most stable at 90 degrees — but once you drop lower, things start to rub.

A law in biomechanics called Delpech’s Law tells us that high pressure on a surface leads to the body producing more tissue. In the knees, this can lead to roughened cartilage, causing pain, grinding, and inflammation — especially if you do it over and over without support.


🧍‍♂️ Your Lower Back: Lever Arms & Fascia Fatigue

Ever notice how heavy things feel when you’re bent forward? That’s the lever arm principle. The further out the weight (or your torso), the more strain on your lower back.

From your belly button to your pelvis, you don’t have bones to hold things together. Your fascia — soft tissue layers — does the job. But fascia needs to be hydrated, supple, and trained to support load.

If your fascia isn’t prepped, long hours in bent-over positions can overwhelm it. That leads to tightness, spasms, or worse.


🌀 Your Spine: Why Flexing and Twisting Are Dangerous

Most gardening tasks involve two risky combinations:

  • Flexion + Rotation (scooping dirt, weeding)
  • Extension + Rotation (reaching up and twisting)

Both compress the spine’s joints and increase the risk of disc issues like bulges, herniations, or pinched nerves — especially if your spine isn’t stabilized by surrounding muscles and fascia.

This isn’t about avoiding movement. It’s about training your body to handle those movements safely.


🏋️‍♀️ What You Can Do to Prevent Gardening Injuries

Here are the three keys to keeping your body pain-free while gardening:

1. Train Like It’s a Sport

You wouldn’t try to deadlift 500 pounds without a program, right? Gardening is no different. Your body needs a holistic strength and mobility plan based on what you’re asking it to do — not just general workouts, but targeted prep for your spine, knees, pelvis, and fascia.

2. Warm Up Before Gardening

Your body is like an old car — it needs a few minutes to “rev the engine.” A proper warm-up turns on your muscular and neurological systems, thins out the fluids in your joints and fascia, and helps prevent injury.

Here’s a short warm-up that targets the most stressed areas:

👣 Knees

  • Knee Circles (clockwise and counterclockwise)
  • Figure 8s (vertical and horizontal)
    These gentle movements lubricate the joint and prep ligaments for squatting.

🧘 Pelvis

  • Pelvic Rocks in a wide-stance position with knees bent and torso upright. Helps activate the hips and lumbar spine.

🌀 Spine

  • Torso Translations & Tilts with arms in external rotation. Warms the ribcage and mid-back while protecting from over-compression.

Just 5–7 minutes of this can drastically improve how your body handles the demands of gardening.

3. Recover After Gardening

You’ve loaded the system — now you have to unload it. Stretch the areas you used. Use fascia-specific movements or myofascial stretches to rebalance the body. Don’t just sit down and let it tighten up.


🌿 Want to Keep Gardening for Life?

If gardening brings you joy, it’s worth protecting. And if you want help, I’ve got 3 easy ways to start:

Let me help you garden smarter, not harder — and keep doing what you love for years to come.

Building a foundation for a better life.

Find out more @

Facebook

BlueSky

Pinterest

Instagram

Youtube

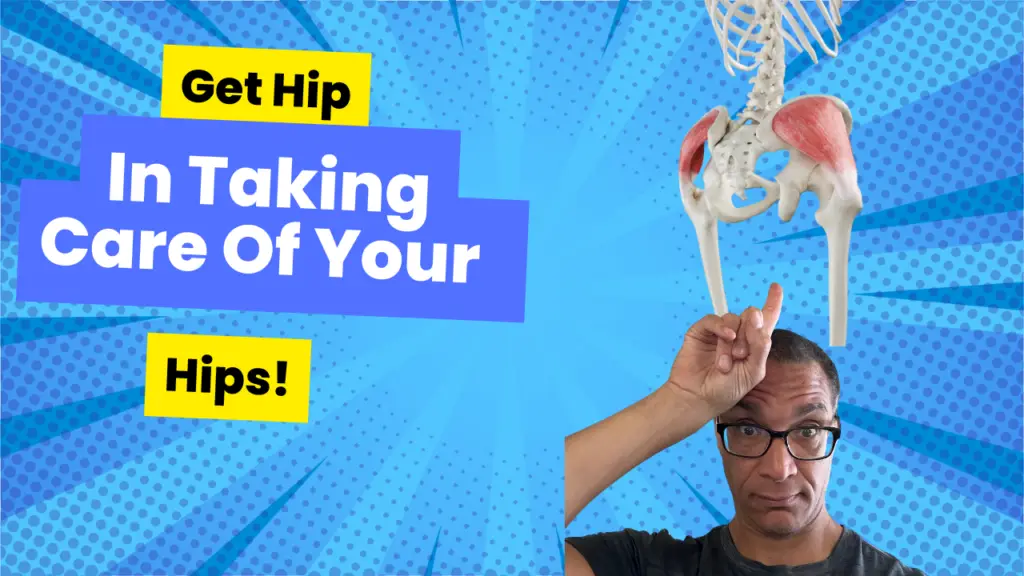
3 Steps To Strong Mobile Hips. Avoid Hip Surgery!

We’re seeing it more and more — hip replacements at younger and younger ages. In fact, over 544,000 people get hip replacements every year. That’s wild.

But here’s the thing: surgery isn’t your only option.

Whether you’re dealing with hip pain, trying to prevent it, or just want to move better and stay strong, the key is training your hips proactively — not reactively.

Let’s talk about why most people end up under the knife, and how you can avoid it by taking control of your body with a holistic plan that actually works.

Click the image to watch the video

Why Most Hips Break Down

It usually starts slow. You feel a little something, go to PT for 10 sessions, maybe take some pain meds or anti-inflammatories. Then cortisone shots. Then, one day, surgery.

It doesn’t have to go that way.

As someone who’s been in this field for 30 years — first as a personal trainer, now as a SomaTrainer and SomaTherapist — I’ve seen this cycle play out too many times. But I’ve also seen how the right training can keep your hips healthy for decades.


The 3 Factors That Destroy Hip Health

Let’s look at what really causes hips to break down:


1. Load: The Hidden Stress in Your Hips

Every time you move — walk, stand, sit — your hips absorb massive force. There’s an actual equation (called Pauwels’ Balance) that shows just how much pressure goes through your hips with every step.

If your muscles aren’t trained to handle that force, the cartilage in your hips starts to wear down layer by layer. And once it’s gone, it’s gone.

That’s what leads to arthritis, bone spurs, and joint degeneration — not old age, but untrained structure under constant load.

If you’re overweight, that force multiplies dramatically.


2. Imbalance: The Silent Saboteur

When your body is out of alignment — tight on one side, weak on the other — that force doesn’t distribute evenly. Instead, it grinds into your joints.

You might notice pain or tightness in your hips, or maybe you just feel a little off.

Most people ignore these signs or treat them as “normal.” But they’re messages from your body: “Help me get back in balance.”

Muscles like your glute medius, pelvic rotators, adductors, and deep hip stabilizers must work together. If even one of them is off, your hip health suffers.

This is why clamshells and cookie-cutter PT routines don’t work. You need a plan that understands how the body really functions — holistically and fascia-connected.


3. Time: The Slow Creep of Wear and Tear

If you’re not proactively training your hips, time will catch up with you.

People often tell me, “It just started hurting out of nowhere.” But unless there was trauma, that’s rarely true. It’s years of imbalance and neglect that finally surface.

Pain isn’t the problem. It’s the signal that something deeper has been brewing for a long time.


What a Holistic Hip Program Actually Looks Like

Most programs only treat the symptom or isolate muscles. But your body doesn’t work in pieces — it’s an integrated system.

A holistic approach does two things:

Macro Work: Full-Body Support

You need a foundation. That means training your body as a whole — posture, fascia tension lines, spine, core, hips — so your system supports itself from the ground up.

Micro Work: Targeted Hip Support

Then, focus on areas that get the most load — hips, spine, deep stabilizers. You need to:

  • Strengthen all fibers of key muscles (e.g. glute med: anterior, middle, posterior)
  • Stretch strategically (e.g. pelvic rotators, iliopsoas, spinal extensors)
  • Integrate movement so your nervous system knows how to use what you’ve built

The way you train is the way your body behaves in life.


Stop Waiting. Start Building.

If you want to avoid surgery and move better for life, now is the time.

And you don’t have to do it alone.

I offer 3 free ways to start:

Let’s build a body that can keep up with the life you want to live.

Building a foundation for a better life.

Find out more @

Facebook

BlueSky

Pinterest

Instagram

Youtube

The Pelvic Floor: A Holistic Approach to Strength and Mobility

Whether you’re a man or a woman, your pelvic floor is essential for a strong, mobile body — yet it’s one of the most overlooked systems in human movement. Your pelvic floor isn’t just “down there” — it’s the foundation for your spine, hips, and core.

But here’s the truth: Most people don’t know how to train it. They rely on outdated approaches or ignore it completely… until something goes wrong.

So let’s take a look at what your pelvic floor really does — and how to support it through a truly holistic approach.

Click on the image to watch the full video

Your Pelvic Floor: A Dynamic Foundation

Think of your pelvic floor like the foundation of a house. It needs to be solid to support everything above — and adaptable to handle pressure from above and below.

Every day, your pelvic floor supports both:

  • Descending forces — gravity, body weight, internal organ pressure
  • Ascending forces — from walking, standing, lifting, and movement

If your pelvic floor isn’t strong and balanced, your whole body compensates.


Why Most Pelvic Floor Training Fails

Most people only hear about Kegels — and usually just for women. But men need pelvic floor training too. And even then, Kegels alone won’t fix dysfunction.

A true pelvic floor program:

  • Goes beyond isolated contraction
  • Addresses the muscles, fascia, and ligaments
  • Respects the nervous system and joint balance (especially the SI joint)

What Muscles Make Up the Pelvic Floor?

It’s more than just one muscle. Your pelvic floor includes:

  • Levator Ani group (puborectalis, pubococcygeus, iliococcygeus)
  • Coccygeus
  • Piriformis & Obturator Internus (side/posterior pelvic walls)
  • Glute max (deep fibers)
  • Iliopsoas (passing through the pelvis to your spine)

These all work together. But they don’t function in isolation. You must also consider the fascia and ligaments that interconnect everything.


Ligaments: The “Smart Tissue” That Guides Your Body

Ligaments do more than hold bones together. They’re the intelligent sensors that tell your body how to move — or how not to.

Key ligaments affecting your pelvic floor:

  • Cooper’s ligament (connects pelvic fascia to hip stabilizers)
  • Pubofemoral ligament
  • The sacro-recto-genital-vesicle-pubic ligament (yes, that’s one ligament!)
  • Anterior sacroiliac ligaments
  • Iliolumbar & pubic ligaments

These aren’t just structural — they’re sensory. If your ligaments aren’t healthy, your body loses its ability to move smartly.


Fascia: The Connective Highway

Fascia connects your pelvic floor to:

  • Your diaphragm
  • Your spine
  • Your abdominal wall
  • Your hips, legs, and shoulders

That’s why holistic pelvic floor care can’t stop at squeezing muscles. You must address how fascia tensions pull and support the whole structure.


Start Here: How to Rebuild Pelvic Floor Health

1. Begin With the Ligaments

Healthy ligaments guide healthy movement. In my osteopathic practice, I use manual therapy techniques like pumping and double TLS to:

  • Improve fluid flow
  • Activate proprioceptors
  • Reset the tissue’s baseline tone

This sets the stage for real, sustainable strength.


2. Use ELDOA to Reinforce & Integrate

ELDOA (a unique form of fascial tension exercise) is one of the best ways to train the joints, ligaments, and fascia together.

It helps:

  • Open restricted spaces
  • Activate deep stabilizers
  • Improve spinal and pelvic floor communication

3. Strengthen and Stretch the Muscles (Holistically)

Once the ligaments are awake, you can start training the key muscles:

  • Piriformis
  • Obturator internus
  • Glute max (medial fibers)
  • Iliopsoas

Use Hill’s Muscle Model: work the fibers, the fascia, and the ligament to train effectively.


4. Now Add Kegels — the Right Way

Only once you’ve built a strong base should you begin isolated Kegel contractions. And even then, you must avoid compensation patterns.

When doing Kegels:

  • Do not squeeze your glutes, abs, or adductors
  • Train your brain to activate just the pelvic floor
  • Separate contractions from surrounding muscle groups
  • Progress to coordination patterns using glutes, adductors, and diaphragm separately

This is crucial — especially for women during childbirth or anyone recovering from dysfunction.


Final Thoughts: The Pelvic Floor Is a Whole-Body System

Most people treat the pelvic floor like a switch — either it’s “on” or it’s “off.” But the truth is, your pelvic floor reflects your entire body’s condition.

If your SI joint is off, if your glutes are weak, if your diaphragm is tight — your pelvic floor will suffer. And if you ignore it? You’ll feel the effects in your strength, mobility, and long-term health.


Ready to Train Smarter?

If you’re ready to go deeper — not just with your pelvic floor, but your whole-body health and longevity — I’ve got 3 free ways to help:

Let’s stop isolating and start integrating.

See you next week.

it’s not just working out, it’s building a foundation for a better life.

Find out more @

Facebook

Twitter

Pinterest

Instagram

Youtube

Unlocking Sarcopenia: A Holistic Approach to Building Strength and Mobility

Sarcopenia doesn’t just happen overnight. It’s a progressive condition that weakens your muscles, damages your posture, and erodes your ability to move and live freely. While most people associate sarcopenia with aging, research shows it can begin as early as your 30s. And despite common advice, lifting weights, eating more protein, or taking hormone supplements won’t be enough to stop it.

So what’s the missing link? A holistic, fascia-based approach that addresses your body’s structure, balance, and communication systems — not just the muscles themselves.

Click on the image to watch the full video

What Is Sarcopenia, Really?

Sarcopenia is the gradual loss of muscle mass and neuromuscular connection. It leads to weakness, fatigue, poor balance, difficulty with stairs, and decreased mobility. Contributing factors can include:

  • Inactivity or lack of intentional movement
  • Hormonal imbalance
  • Ineffective protein synthesis
  • Inadequate nutrition

Most people respond with a linear strategy: eat more, move more, and take supplements. But the body doesn’t operate in straight lines — it’s a web of interdependent systems. If you don’t address your structure and internal communication, even the best supplements won’t get absorbed properly. That’s where a holistic model comes in.


The Fascia-Based Framework That Changes Everything

To build real strength and protect against sarcopenia, you need to train your fascia — the connective tissue network that holds your muscles and skeleton in place. Your muscles don’t operate alone. They rely on:

  • Contractile fibers (your muscle tissue)
  • Series and parallel elastic components (your fascia, ligaments, and periosteum)

This system is described in Hill’s Muscle Model and supported by osteopathic principles. When fascia is stiff, unbalanced, or misaligned, your muscles lose their efficiency — no matter how hard you train.


Balance Your Structure Before You Build Strength

Structure dictates function. If your posture is collapsing, your digestion, hormone production, and movement all suffer. That’s why people with sarcopenia often show signs like:

  • Kyphotic (hunched) posture
  • Decreased height
  • Poor digestion or hormonal imbalance
  • Limited strength despite working out

Building strength on top of dysfunction won’t work. You must first correct your structure through fascia-based methods — which brings us to the two most powerful tools for long-term change.


Myofascial Stretching and ELDOA: Your Secret Weapons

Myofascial Stretching realigns your tensegrity structure — the interconnected web that holds your body together. It creates space and balance through precise tension in the fascia.

ELDOA strengthens and decompresses your spine, restoring efficient communication between your brain and body. A healthy spine boosts hormonal signals and neuromuscular coordination — exactly what sarcopenia disrupts.

Together, these tools form the foundation of a fascia-centered program that not only restores strength but builds it intelligently, sustainably, and holistically.


Train the Whole Chain, Not Just the Muscle

Muscles have multiple fiber directions. For example, your glutes have anterior, middle, and posterior fibers — each needing a different position and movement pattern to train effectively.

By using fascia-informed postures and loading the full myofascial chain (not just isolated muscles), you teach your body to move better, not just harder.


Go Beyond 10 Reps — Challenge the System

To reverse sarcopenia, you must go beyond your comfort zone — not recklessly, but with purpose. That means pushing past 10 reps when appropriate, training to near-exhaustion in a safe way, and challenging your nervous system to adapt and grow.

This stimulates the exact responses you want:

  • Muscle growth (even without heavy weights)
  • Improved neuromuscular coordination
  • Greater hormonal efficiency
  • More connection, awareness, and control

Start Where You Are, Then Build Up

Yes, this may sound complex — fascia, hormones, structural balance, different muscle fibers — but it all starts in one place: where you are right now.

Find the tightest, weakest, or most disconnected part of your body and begin there. With the right strategy, your body will adapt faster than you expect. Overwhelm fades as progress builds. And each step unlocks a little more strength, confidence, and freedom from the grip of sarcopenia.


Want Help? I’ve Got You.


Free Ebook4 Steps to Live the Life of Your Choosing: Get Stronger, More Mobile & Pain-Free.
Book a Call – If you’re ready for a deeper transformation, I’ll assess where you are and where you want to go — and we’ll see if my program is a fit.

Building a foundation for a better life.

Find out more @

Facebook

BlueSky

Pinterest

Instagram

Youtube

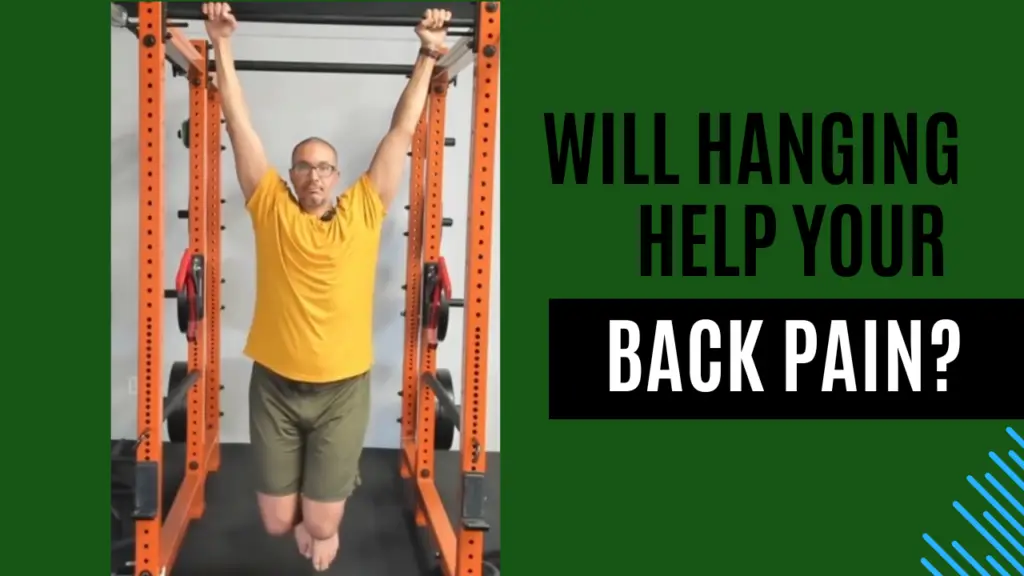
Is Hanging For Back Pain A Real And Safe Solution? 🧐

Back pain affects over 550 million people worldwide, and with that kind of number, it’s no surprise people are searching for relief—fast. One of the more popular trends? Hanging from a pull-up bar to decompress the spine. But is this method really helping, or could it be doing more harm than good?

Let’s break it down through a holistic, fascia-informed lens, so you can understand what’s really happening when you hang—and whether it’s a smart choice for your back.

Click on the image to watch the full video

🔍 Why People Hang for Back Pain

The theory is simple: when you hang, your body weight creates a gentle pull on the spine, which seems to decompress the vertebrae. It’s popular among physical therapists and fitness influencers who promote spinal decompression as a fix for bulging discs, tight backs, or just general discomfort.

But like most things in health and fitness, simple doesn’t mean effective—and it certainly doesn’t mean safe for everyone.


🚫 When Hanging Might Do More Harm Than Good

Let’s start by understanding what kind of back pain you’re dealing with. Here’s a simple breakdown:

  1. No pain – Fine for general feel-good movement
  2. Semi-chronic – Occasional flare-ups
  3. Chronic – Consistent daily discomfort
  4. Acute – Sharp, intense pain or injury

🔴 Acute or chronic pain? Avoid hanging. Your body is already inflamed and dysregulated. Hanging adds unpredictable force to an unstable system—it’s not specific, and it can worsen the problem.

🟡 Semi-chronic? Maybe—but only for brief relief, not correction.

🟢 No pain? You’re free to experiment, but don’t expect it to fix much.


🌀 What Really Happens When You Hang?

When you lift your feet and hang from a bar, your body wobbles. That instability triggers your core and spinal muscles to contract constantly in small ways just to keep you from falling.

That means instead of fully relaxing and lengthening your spine, your body is busy protecting itself. And contraction ≠ decompression.


📌 The Specificity Problem

Even if hanging did decompress the spine, it doesn’t target where you need it most.

Back pain often shows up in specific areas—like L4-L5, T12-L1, or T8-T9. But when you hang, your body moves where it’s already free and open—not where it’s stuck.

➡️ Correction requires specificity. If you can’t direct the force to the exact spinal segment in need, you’re just stretching the wrong places.


🪢 No Fixed Point = No Progress

To correct posture or decompress a joint, your body needs fixed points above and below the target area. Hanging removes that control. It’s like trying to stretch a rubber band without holding the ends.

You can’t direct the force. You can’t stabilize. You can’t be specific. And without that, no real change happens.


🔄 Twisting While Hanging? Please Don’t.

Some videos promote twisting your body while hanging. That’s biomechanically dangerous.

When you twist your spine under load (yes, hanging counts), you create compression, not decompression. The spinal discs and surrounding ligaments are not built to rotate freely under tension—especially not in a compromised state.


🏗️ Hanging Is a Closed Kinetic Chain

If you’re trying to create space in your spine, you need open kinetic chain movement—freedom at the end joint. But hanging is closed-chain. Your arms are fixed; your spine becomes the weak link under tension.

That’s the opposite of what you want if your goal is spinal decompression.


🔧 So What Should You Do Instead?

Back pain isn’t always caused by your back. Common culprits include:

  • Herniated or bulging discs
  • Pinched nerves or blood vessels
  • Structural imbalance
  • Weakness or asymmetry in trunk muscles
  • Poor fascial tension distribution

You need to balance strength and mobility across your entire structure. That includes your spine, diaphragm, abs, ribs, back muscles, and everything connected via fascia.

🧠 And most importantly—you must re-educate your body. Passive hanging doesn’t do that. You need specific exercises and postures that restore function, reduce compression, and create stability through proper alignment.


✅ Here’s What Works Better

  • ELDOA – Targeted spinal decompression with fascial tension
  • Myofascial Stretching – Postural rebalancing to relieve tension
  • Holistic Training – Programs designed to move you from dysfunction to function
  • Structural Assessment – To identify where to start and how to build safely

💬 Final Word: Hanging Feels Easy—But That Doesn’t Make It Effective

It’s tempting to think hanging can fix your back pain. It’s quick. It’s simple. But the body isn’t simple—it’s complex, interconnected, and intelligent.

If you want sustainable relief and a stronger, more mobile spine, don’t rely on hacks. Invest in your body’s full system.


🎁 Want Help?

Get started for free:

Let’s move beyond hacks—and help your body become something greater.

it’s not just working out, it’s building a foundation for a better life.

Find out more @

Facebook

Twitter

Pinterest

Instagram

Youtube

Lower back Pain: 3 BIG Reasons Why!

Are you searching for lower back pain relief? Googling lower back pain exercises, stretches, or massages? You’re not alone—lower back pain affects over 619 million people worldwide and is one of the leading causes of disability.

I know the frustration personally. About 16 years ago, I fell into that statistic. I tried doctors, PTs, chiropractors, acupuncture, yoga, Pilates—you name it. Some helped temporarily. Others made things worse. None gave me long-term results… until I took a holistic approach to my body.

I’m Ekemba Sooh, owner of SolCore Fitness in Santa Fe. I’m a SomaTrainer and SomaTherapist trained in a unique, osteopathic method of working with the body. After 30+ years in this field, I’ve helped countless people who were failed by symptom-focused care finally find relief—and get their lives back.

If you’re tired of lower back pain running your life, here are 3 major reasons you’re stuck—and what to do about it.

Click the image to watch

1. Poor Posture: Structure Dictates Function

Bad posture does more than look sloppy—it breaks down your entire system. Structure dictates function. That means your body only works as well as it’s aligned.

Having poor posture compresses joints, disturbs your fascia, restricts movement, and stresses your nervous system. And it’s not just about “standing up straight”—you need to stack your ear, shoulder, hip, and ankle vertically (plumb line), and be able to maintain that inside a 40° gravity cone.

If your posture’s off, everything else—training, therapy, diet—can only take you so far.

2. Bad Training: What Are You Actually Teaching Your Body?

Your body adapts to what you do—constantly. Whether you’re standing, sitting, or lifting weights, you’re always “training” it. The problem? Most people unknowingly teach their body to break down.

Take sitting, for example. It shortens and weakens your hip flexors and rotators, rounds your spine, and shuts off your glutes. This creates a chain reaction that leads straight to lower back pain. Most training programs don’t undo this damage—they reinforce it.

Effective training must be holistic and specific. You need to work not just the muscles that hurt, but the fascia and chains that surround them. That means targeted stretching, segmental strengthening, and spinal decompression like ELDOA—not generic “core” exercises or trendy workouts.


3. Bad Treatment Models: Are You Chasing Symptoms or Solving Causes?

Most conventional treatments focus on symptoms. You’re in pain, so you get pain meds, ice, or maybe some stretches on a sheet. That might help for a few days—but it doesn’t fix the cause.

Symptom-based care creates a cycle: Pain → Treatment → Temporary Relief → Pain Returns.

Cause-based therapy works differently. It asks:

  • Why did this pain start in the first place?
  • What movement patterns, lifestyle habits, or dysfunctions are at play?
  • What does your body specifically need to correct the problem?

In a cause-based model like mine, we assess how you move, how your spine functions, what your fascia is doing, and what your nervous system is compensating for. The goal isn’t just “feeling better”—it’s functioning better for life.


Bonus: Food, Hydration & Your Disc Health

Your lower back is only as healthy as what you feed it. Junk food, dehydration, and inflammation weaken your tissues—especially your discs. These shock-absorbing structures are 70% water. If they’re dehydrated, they shrink and lose strength.

Good food and proper hydration are not extras—they’re part of the solution.


So What Now?

Ask yourself:
Do you want to just feel less pain—or do you want to function better?

If it’s the latter, you need a program that:

  • Works holistically (not just locally)
  • Targets the cause, not just the symptoms
  • Evolves with your body over time

That’s the work I do. And if you’re ready, I’ve got a few options:

Lower back pain isn’t just about your back. It’s your posture, your habits, your beliefs, your biology. You can heal it—but only if you take a complete approach..

it’s not just working out, it’s building a foundation for a better life.

Find out more @
Facebook

BlueSky

Pinterest

Instagram

Youtube

AI and exercise. Is it leading you down the wrong path?

Using AI for fitness may seem like a modern-day solution. Brands like Peloton and Tonal promise an at-home personal trainer experience powered by smart technology. But is that program really right for your body? Will it help you progress—or leave you frustrated and stuck?

Hi, I’m Ekemba Sooh, owner of SolCore Fitness. I’ve spent 30 years helping people move, heal, and grow through a unique system based on osteopathy. That means I approach the body as a whole, with every part affecting the next. So when I see people relying on AI for their workouts, I can’t help but ask: is this truly helping?

Watch the video by clicking on the image below to find out more.

Why AI Alone Falls Short in Fitness

AI—artificial intelligence—is smart. It can write content, answer questions, and automate tasks. I even use it myself to help outline articles. But when it comes to fitness, things get complicated. Most AI-powered fitness systems use general programming pulled from a shallow pool of traditional exercise science.

That’s a problem. Because if traditional fitness programs worked well on their own, we wouldn’t have an obesity epidemic, chronic pain issues, or confusion about how to train properly. You can be motivated and consistent, but if the program itself is misaligned with your body’s needs, you won’t get far.

Fitness companies saw a shortcut. They cut out human trainers and replaced them with tech. And because many people are already familiar with the exercises AI promotes—squats, deadlifts, pushups—it feels safe and familiar. But familiarity isn’t the same as effectiveness.


What AI Can’t See

AI doesn’t know your fascial restrictions, your structural imbalances, or your injury history. It doesn’t know if your pecs are tight or weak, or if your hip joint is compressed. It gives you a squat whether or not your body can do it safely.

Those “seven primal movements” (squat, bend, push, pull, lunge, twist, gait) are great—but only if your body is ready. Most people have compensations and limitations that need to be addressed first. Without that prep work, AI is just automating dysfunction.

For example, say you’re doing pushups. If your pecs are underdeveloped or overly tight, your body will still complete the movement—but it will cheat. And no amount of AI coaching will correct that unless it also includes isolation, fascial work, and joint mobility training.


A Holistic Approach Technology Can’t Replicate

I’m not anti-tech. I use Zoom to work with clients, spreadsheets to track progress, and video to educate. But I don’t let AI drive the program. I use human insight, years of study, and real-time feedback to shape each client’s path.

True holistic training means knowing which chains of movement are involved, how fascia influences motion, and how one area can throw off the whole system. It’s not just about what exercises you do, but how and when you do them—and what comes before.

Osteopathy embraces complexity, not generic templates. And while that makes it harder for big companies to scale, it’s also why it works.


Should You Use AI for Exercise?

If your goal is to move your body a few times a week and you’re not looking for deep transformation, then yes—AI can offer a convenient, affordable option. But if you want long-term results, sustainable change, and to actually understand and work with your body, it falls short.

Fitness isn’t about just “doing workouts.” It’s about building a relationship with your body—knowing what it needs, how it responds, and how to support it fully.


Want to Learn More?

If you’re ready to explore a smarter, deeper way to train, check out the resources below:

I’d also love to hear from you—have you tried AI-driven fitness tools? What was your experience like? Drop a comment or reach out and let’s have a real conversation about it.

Until next time,
Ekemba

it’s not just working out, it’s building a foundation for a better life.

Find out more @
Facebook

Twitter

Pinterest

Instagram

Youtube

Discover the Hidden Dangers of Anterior Pelvic Tilt

“Duck butt” might sound funny, but anterior pelvic tilt is no joke.

It’s a common postural issue where your pelvis tilts too far forward—and it’s one of the main reasons people suffer from chronic lower back pain, disc bulges, SI joint instability, and more.

I’m Ekemba Sooh, SomaTherapist and SomaTrainer. I had anterior pelvic tilt myself—and it played a major role in my L4-L5 disc bulge and sciatic pain. No trainer, therapist, or doctor ever told me the tilt was the root cause.

They were treating symptoms. Not the source.

Click on the image to watch

What Is Anterior Pelvic Tilt?

Your pelvis naturally tilts slightly forward to support upright movement. But anterior pelvic tilt happens when this angle becomes exaggerated and stuck—creating a “duck butt” posture.

This tilt disrupts your body’s alignment and sets the stage for chronic compensation patterns. Over time, these compensations become permanent dysfunctions.


How It Becomes a Problem

Your body is a biotensegrity structure—meaning it’s designed to distribute force efficiently across the entire system. If one area tightens or weakens, your body adjusts to keep you moving. That’s compensation.

Compensation isn’t bad at first. But if left unchecked, it snowballs into bigger problems:

  • Chronic lower back pain
  • Lumbar disc issues (bulges, herniations, stenosis)
  • SI joint dysfunction
  • Pelvic floor and organ dysfunction
  • Reduced performance and poor energy transfer

It all stems from the inability to attenuate force efficiently—because the structure is compromised.


What Causes Anterior Pelvic Tilt?

Too much sitting is a big culprit. It shortens the hip flexors (especially the psoas) and weakens the posterior chain (glutes, hamstrings, spinal stabilizers).

Over time, your body learns this dysfunctional position—and your nervous system adopts it as your default.

For some, it’s even genetic. But genetics just mean you have to be more intentional—not that you’re doomed.


Why Most Approaches Fail

Typical solutions focus on isolated muscles. But your body doesn’t work in isolation—it moves as an integrated system through fascia.

That’s why general exercise, yoga, and stretching routines often fail. You feel good temporarily, but your body snaps right back to the same pattern the next day.

Why? Because you didn’t train the fascia to support a new pattern.


The Real Solution: Train Fascia + Function

To fix anterior pelvic tilt, you need to retrain your entire structure:

  • Stretch the shortened hip flexors (especially the psoas)
  • Strengthen the weakened glutes, hamstrings, and back muscles
  • Activate fascia chains, not just muscles, to build intelligent, whole-body control

The best tools I’ve found for this are osteopathic-based etiology exercises—like the ELDOA and my full training system. These methods respect how the body actually works: as a connected, intelligent, adaptable structure.


When to Start? Now.

If you’re in your 20s or 30s—start now and prevent future issues.
If you’re in your 40s, 50s, or 60s—and already feeling pain—this needs to be your primary focus.

You can’t afford to ignore anterior pelvic tilt. It’s not just a posture issue—it’s a performance killer, a pain amplifier, and a hidden driver of long-term health problems.


What to Do Next

If this resonates, here are a few ways to go deeper:


Final Thought

Anterior pelvic tilt is a structural dysfunction—but it’s also an opportunity.

It’s your body’s way of asking for smarter input. When you respond with the right training, you’ll not only relieve pain—you’ll become stronger, more mobile, and more connected to your body than ever before.

Don’t wait until things break down. Train holistically. Train intelligently. Train to support the life you want to live..

Building a foundation for a better life.

Find out more @

Facebook

BlueSKy

Pinterest

Instagram

Youtube

Shoulder Strengthening Exercises for Strength, Mobility, and Injury Prevention

Having strong, mobile shoulders is essential—not just for lifting or sports, but for your entire body’s health.

But most shoulder pain solutions and “best rotator cuff” workouts you find online are incomplete. They miss critical pieces of the puzzle—especially the joints involved and the two most forgotten muscles you must train for real results.

Let’s break it down.

Click on the image to watch the video.

Your Shoulder Is More Than One Joint

Most people think of the shoulder as just the glenohumeral joint—where your arm bone (humerus) meets the socket in your shoulder blade (glenoid). But that’s only one piece.

There are five distinct joints that make up the shoulder complex:

  • Glenohumeral joint
  • Subdeltoid joint
  • Sterno-chondral-costal-clavicular (SCCC) joint
  • AC (acromioclavicular) joint
  • Serratic joint (under the shoulder blade)

Each joint plays a role in shoulder mobility and strength. If even one is off, your whole shoulder can suffer—often leading to pain or dysfunction on the opposite side of the problem area.


You Need More Than Muscles—But the Right Ones Matter

Your rotator cuff and deltoid muscles are essential, but they’re just the beginning.

The long head of the bicep and long head of the tricep attach to the glenoid from above and below. When you lose function in either (like after bicep surgery), you sacrifice major stability.

Other important players:

  • Pec major/minor
  • Latissimus dorsi
  • Trapezius
  • Levator scapulae
  • Serratus posterior superior

But two muscles stand out as most neglected and critical:


The Most Important Muscles You’re Probably Ignoring

1. Serratus Anterior

Fans out from your ribs to your shoulder blade. It helps anchor and stabilize the scapula while allowing fluid movement.

2. Rhomboids (major and minor)

Run from your spine to your scapula and work as antagonists to the serratus anterior. Together, these two maintain the neutral, retracted position of your shoulder blades—which affects everything from head posture to pelvic balance.

If your shoulder blades are unstable or misaligned, it can trigger a cascade of dysfunction:

  • Forward head posture
  • Decreased mobility
  • Increased injury risk
  • Compensations in your spine and opposite hip

The Joint Must Be “Smart” and “Fluid”

It’s not enough to strengthen muscles. Your joints need:

  • Fluidity (healthy fascia)
  • Neurological engagement (a “smart” joint)

If your serratic joint is stiff and disconnected, your shoulder gets noisy—literally. That cracking/popping you hear? That’s congealed fascia, not bones moving.


Smart Shoulder Training: What It Takes

Train with Hill’s muscle model in mind:
Every muscle needs its fibers, fascia, and joint working together for full function.

✅ Serratus anterior training must include multi-angle work and differentiate between the rib and scapular attachments.
✅ Rhomboid work must target both the major and minor and be done above the glenohumeral line, where the scapula locks and moves as one with the arm.

Most programs miss this. They focus on the “burn,” not the biomechanics.


Don’t Forget the Spine

A kyphotic (overly rounded) upper spine pushes the head and shoulders forward—undermining even the best exercises.

You can work your serratus and rhomboids all day, but without spinal mobility and scapular positioning, your results will be limited.


Want Help?

If you’re ready to take a holistic approach to shoulder health:

I’ve been doing this for 30 years under an osteopathic paradigm. I don’t guess—I assess, and I train with the full body in mind.

Let’s get those shoulders strong, stable, and pain-free.

Building a foundation for a better life.

Find out more @
Facebook

BlueSKy

Pinterest

Instagram

Youtube