SolCoreFitness

Osteoporosis AND Bending Over: What’s Safe, What’s Not, and How to Move Better

osteoporosis bending over safety

If you’ve been diagnosed with osteoporosis, chances are you’ve heard some version of this warning: “Don’t bend over you might break your back!” But is it really that simple? What if you drop something, need to garden or vacuum, or want to play with your grandkids? Does having osteoporosis mean you’re forever doomed to a life of restricted movement or is there a more balanced, empowering approach?

[The Ultimate Guide For A Holistic Exercises And Fitness Program]

The Standard Warning and Why It Exists

Osteoporosis thins your bones and makes them more fragile, especially at the spine. Standard advice is to avoid:

  • Forward flexion (bending at the waist with a rounded back)
  • Twisting (especially while flexed)
  • Lifting heavy items with poor body mechanics

The reason is simple: These moves sharply increase compressive forces on your spine, particularly the front part of your vertebral bodies, and this is exactly where bone is most fragile with osteoporosis. In fact, statistics show the majority of osteoporosis-related spinal fractures happen with simple, daily movements—not from falls or accidents. Even something as simple as bending to tie your shoes or pick up a pet can trigger a vertebral fracture if your posture is poor and your bones are weak.

Why This Advice Isn’t the Whole Story

But real life isn’t lived in a bubble. You WILL need to bend, reach, and twist from time to time. And here’s the truth: No two people with osteoporosis are exactly alike. Your risk of fracture is determined by far more than just your diagnosis. It’s about your overall bone density (as measured by your T-score), your history of fractures (or lack thereof), your balance and strength levels, your soft tissue health, your nutrition, and even your hydration and stress levels.

Did you know…?

  • A T-score from −1 to −2.5 is considered osteopenia (lower than average bone mass but not yet true osteoporosis).
  • Osteoporosis is diagnosed at −2.5 or below, and deeper negatives signal greater risk.
  • If you have had a previous spinal fracture, your risk of another is much higher.

What About Everyday Life?

Imagine you have beginning osteoporosis or osteopenia. You still want to hike, garden, travel, and play with your grandkids. Should you be terrified to bend? No! But should you move with greater awareness and make smart modifications? Absolutely.

Let’s break down the top considerations:

  1. Your Bone Density and History
    If your osteoporosis is advanced (lower T-score and/or history of spinal fractures), you must be extra cautious—especially with high-risk, forceful, or repetitive bends. If you’re earlier in the process and otherwise active, movement is critical for maintaining bone and muscle!
  2. Your Current Fitness and Mobility
    How balanced and strong is your body right now? If you have good posture, strong legs and hips, and flexible fascia, you’re already more resilient. If you’re already a little frail, dehydrated, or consistently out of alignment, your risk is higher—and so your plan needs to start with foundations.
  3. Your Technique: Bending Smart
    The key for everyone—regardless of bone density—is learning and practicing safe movement patterns:
  4. Hip hinge, not spine curl: Bend at the hips and knees, sticking your chest out, so your back stays straight and the force is safely absorbed in your larger stabilizer muscles.
  5. Keep movement slow and controlled: No quick, abrupt bends. Avoid bouncing or twisting motions.
  6. Keep weight close to your body: Don’t reach, stretch, and twist while holding something heavy or awkward.
  7. The Power of Whole-Body Training
    Here’s what’s often missing from most online advice: Total body balance, hydration, fascia health, and postural training are all crucial. Balance helps prevent falls. Hydration and soft tissue health support bone health, nutrient delivery, and safe movement.
  8. Training for balance and stability protects you from both falls and spinal stress.
  9. Maintaining your four spinal curves and strengthening your deep core (abs, back, and trunk muscles) disperses forces more safely.
  10. Hydration supports disc “fluffiness” and joint health—reducing spinal compression and painful movements.
  11. You CAN Build (or Re-Build) Bone Strength Safely!
    Safe weight-bearing, resistance, and low-impact exercises (like walking, light resistance, Nordic walking, and gentle yoga—avoiding loaded flexion and twisting) stimulate new bone growth, help you maintain muscle, and boost confidence.
  12. Every Program Must Be Personal
    Your daily routine, goals (hiking, playing, gardening, or just remaining independent), nutrition, supplement needs, and even sleep and stress must be considered together—not just one-size-fits-all rules. If you’re deeper into osteoporosis, all activity should be customized, and for some people, only micro-movements and balance work are appropriate.

Practical “Yes/No” for Bending Over With Osteoporosis

  • Beginning osteopenia, active & balanced: Yes—with good technique, body awareness, and gradual progression.
  • Moderate osteoporosis, no previous fractures, working on fitness & nutrition: Cautious yes, with modifications and under expert supervision.
  • Advanced osteoporosis with previous fractures or other serious risk factors: Very limited—avoid flexion, get expert advice, focus on postural and functional strength, microstimulation, and sustainable movement patterns.

Never try to “push through” pain, round your back under load, or perform high-impact, jerky, or twisting exercises without guidance.

The Bottom Line

Bending over with osteoporosis is NOT an all-or-nothing rule. It’s a nuanced, highly individual decision, and it’s about good technique, foundational strength, and building your resilience over time. Most importantly, it’s about creating balance—throughout your day, your body, and your routine. With the right plan, support, and progression, you can stay strong, independent, and active for life.

it’s not just working out, it’s building a foundation for a better life.

Find out more @

Facebook

LinkedIn

Pinterest

Instagram

Youtube

Bluesky

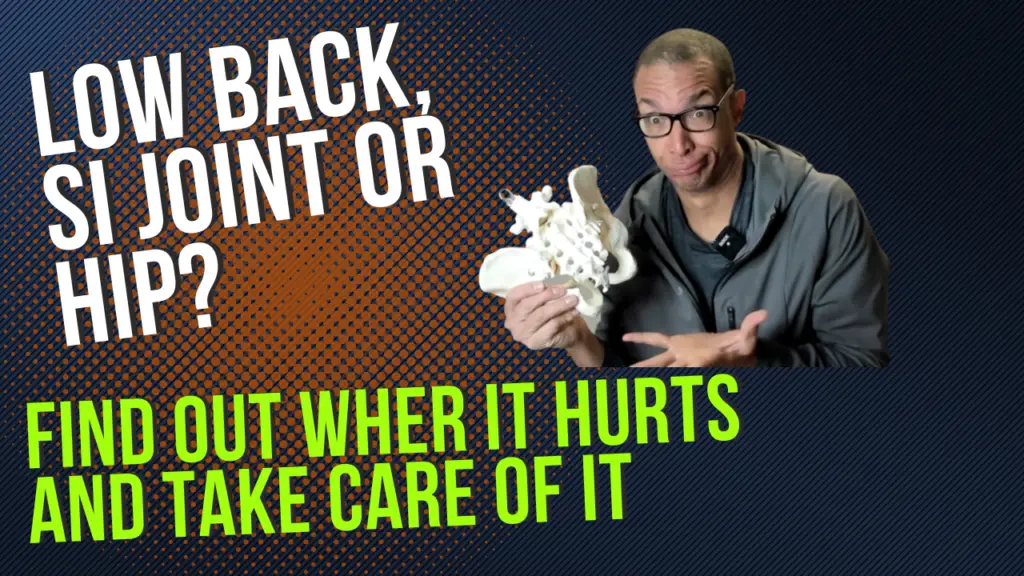
How to Tell if It’s Low Back, SI Joint, or Hip Pain

back pain diagnosis

Click on the image to watch the full video

Ever feel a nagging ache, sharp jolt, or deep stiffness somewhere around your lower back, hip, or pelvis—but can’t tell exactly where it’s coming from? You’re not alone. These areas are interconnected and can easily “refer” pain to each other. Pinpointing the true source is key—since the wrong approach may not only fail to solve your pain, but actually make it worse.

Why Accurate Diagnosis Matters

Each area low back, SI joint, hip has its own causes, pain patterns, and best next steps. Back pain can show up from disc/herniation, strained ligaments, facet joints, or nerve compression, often signaled by pain with bending, twisting, or sitting. SI joint issues cause sharp or aching pain at the dimples above your buttocks, sometimes radiating to the hip or thigh, usually worse with transitions like standing, stairs, or getting up from a chair. Hip pain tends to show deep, achy, or sharp pain in the groin, outer hip, or buttock, and is aggravated by walking, weight bearing, or rotating the leg.

[OMT: Osteopathic Manual Therapy]

Where Does Your Pain Fit?

  • Low Back: Pain between lower ribs and pelvis, worse with bending/lifting, may radiate down into the buttocks or leg (sciatica).
  • SI Joint: Achy, stabbing pain at the upper buttock “dimples,” worse with sitting, stairs, standing from a chair, or rolling in bed.
  • Hip: Deep, aching or sharp pain in front of the groin, outer hip, or buttock, worse walking or rotating the leg, or standing up.

Because these tissues share nerves and muscle attachments, problems frequently overlap. SI joint instability can create tension and pain in both the low back and hip, and vice versa.

What to Do Next

  • Get Assessed Holistically: A great intake includes physical tests, history, movement screening, posture, past injuries, and lifestyle.
  • Prioritize Mobility and Balance: Include corrective exercises for the suspected culprit, but address every link in the chain—muscles, joints, connective tissue, and posture.
  • Integrate Injury Prevention: Pain in these regions can lead to compensation injuries, so proactive balance, core work, and muscle activation are essential.
  • Choose the Right Help: If your symptoms persist, get help from a pro who specializes in holistic, functional movement (not just isolated fixes).

Takeaway:

The right approach starts with locating your pain and understanding your personal pattern. With clear information and targeted training, you can restore efficient movement without setbacks or guesswork.

it’s not just working out, it’s building a foundation for a better life.

Find out more @

Facebook

LinkedIn

Pinterest

Instagram

Youtube

Bluesky

Neck Pain After Sleeping: 4 Reasons Why and What To Do About It

Neck Pain After Sleeping

Click on the image to watch the video

Did you wake up this morning with a stiff neck—the kind where you can’t look over your shoulder or tilt your head comfortably? Neck pain after sleeping is extremely common, with several possible causes and, thankfully, multiple ways to address and prevent it.

  1. Underlying Trauma
    A history of trauma, like whiplash or a sports injury, can leave tissues tight, tender, or misaligned for years. Sometimes, the pain only shows up after sleeping when the body relaxes, cools down, and habitual tension “sets” into bad alignment. Not addressing acute issues right away can make future correction more difficult. Early, targeted mobility training and corrective exercise are key—even if the pain doesn’t seem urgent at first.
  2. Postural or Overuse Strain
    Desk work, smartphone use, and “tech neck” (forward head posture) retrain the body into poor alignment and chronic muscle tension. If you spend 8+ hours daily hunched forward, but only do an hour of corrective work (at best), the imbalance accumulates. This commonly leads to stiffness and pain after sleeping, when tissues contract and “remember” their imbalances. Address this by restoring shoulder, mid-back, and neck alignment; balance technology habits with posture- and flexibility-focused routines.
  3. Pathology
    Conditions like cervical radiculopathy, stenosis, or arthritis can all manifest overnight or in the morning as nerve signaling and disc pressures change with position. Persistent or worsening pain—especially with numbness, tingling, or weakness—deserves prompt professional assessment and a customized plan.
  4. Sleep Position, Pillow, and Recovery
    A poor sleep setup (too many pillows, sleeping on your stomach, or a lumpy mattress) disrupts healthy neck curves and strains muscles. Too little sleep or constant sleep interruption impairs tissue repair and healing, leading to more frequent or severe neck pain. The right pillow, good alignment, and consistent sleep hygiene are foundational for prevention.

What To Do About It

  • Start with gentle mobility: Hot showers, light stretching, and slow, easy neck movements can help “wake up” the tissues.
  • Consider alternating ice and heat to manage acute pain or inflammation.
  • Prioritize a balanced sleep setup: Neutral head/neck alignment, supportive pillows, and sleeping on your back or side (not your stomach).
  • Incorporate posture-focused, corrective, and mobility exercises throughout the day, not just after the pain sets in.
  • Seek professional help for persistent, severe, or radiating pain, especially if it comes with other symptoms.

[ELDOA: The Ultimate Spine And Joint Exercises]

Don’t let neck pain after sleep become your “normal.” Discover and address the true cause, and build sustainable habits to wake up pain-free and ready for life.

it’s not just working out, it’s building a foundation for a better life.

Find out more @
Facebook

LinkedIn

Pinterest

Instagram

Youtube

Bluesky

How To Brace Your Core To Protect Your Lower Back!

core bracing for back pain

Click on the image to watch the video

Bracing the core is one of the most effective ways to stabilize and protect the lower back—during heavy lifting, dynamic movement, or simply daily tasks. But “bracing” is more than just squeezing your abs. To truly protect your spine, you need to know which core muscles matter, how to train them, and how to integrate them into all movement—not just during workouts.

What Is Core Bracing (And Why Should You Care)?

Core bracing simply means contracting all the muscles of your trunk front, sides, back, even the pelvic floor to create a “girdle” of stability around your spine. Think of how the body naturally tenses before a big exertion or if someone is about to punch you in the stomach—this helps distribute forces evenly and prevents sudden overload on any single spot in the spine.

Which Muscles Are Involved?

True bracing integrates:

  • All four layers of the abdominals (rectus, obliques, transversus, internal/external)
  • Deep spinal stabilizers (multifidi, transversospinalis)
  • The diaphragm (breathing muscle)
  • Pelvic floor
  • Back muscles (erectors, lats, serratus, etc.)

These muscles must function as a coordinated system to evenly “brace” the spine—so no one link becomes the weak point.

The Keys to Smart Bracing and Injury Prevention

  • Start With Deep Muscles: Deep stabilizers (like the TVA and deep back muscles) activate first to prepare the body for movement.
  • Progress to Superficial Muscles: Once deep muscles are awake, train global movers like obliques and erectors in different planes—flexion, extension, rotation, lateral stability.
  • The Beam Phenomenon: During squats and deadlifts, bracing helps the spine act like a strong beam—so force moves through the trunk, instead of collapsing onto the lower back.
  • Don’t Overuse Bracing: You don’t need to brace every second of the day—only before higher-effort movements or when lifting, twisting, or reaching. For daily life, your core should work reflexively after proper training.

How To Learn (And Progress) Core Bracing

  • Awareness: Practice “bracing for a punch” lying on your back, feeling your abs, sides, and lower back tighten in unison.
  • Breathe While Braced: It’s crucial to maintain breathing—a true brace allows for expansion and natural breath, not holding.
  • Segmentally Strengthen: Build up reps of basic holds, then layer in movements (squat, hinge, carry, overhead press).
  • Stretch and Normalize Weak Links: Segmentally train deep stabilizers, then all layers of abs and back, then global movements.
  • Integrate Into Your Life: The real win is a core that reflexively supports you during life—not one that needs constant conscious effort.

With a systematic approach—segmental strength, fascial training, posture work—bracing becomes second nature, and lower back injuries become far less likely—whether you’re working at a desk or lifting heavy in the gym.

If you want a holistic program that’s more than “just another ab workout” and addresses your needs down to the weak links, we can help. Book a [free consult] to get a custom plan for a strong, pain-free back and a core that keeps you resilient for life.

it’s not just working out, it’s building a foundation for a better life.

Find out more @
Facebook

LinkedIn

Pinterest

Instagram

Youtube

Bluesky

4 Steps On How Not To Get Frustrated With A Corrective Exercise Program

frustration corrective exercise

Click on the image to watch the video

Getting injured isn’t just painful it’s often maddening, especially when a corrective exercise program seems slow, confusing, or never-ending. The good news? There are concrete ways to break the cycle of frustration, so you can move forward in your recovery and come back stronger than ever.

Step 1: Get Specific and Get Curious

Most frustration comes from generic, surface-level advice—“just do X for your knee,” or “try this for your back.” But lasting results require a specific, holistic perspective. Zoom out: assess all the tissues, joints, and habits involved, not just the “squeaky wheel.” Don’t be afraid to ask more questions of your coach, read beyond the basics, or demand an individualized approach that’s tailored to the real cause of your issue—not just the symptoms.

Step 2: Stop the Comparison Game Own Your Pace

Corrective exercise takes time. Symptoms often last because underlying compensations have built up for months or years. Don’t get stuck comparing yourself to “fast healers” or internet testimonials. Accept that the process is nonlinear, and that small, focused wins build the fastest long-term progress. The less negative self-talk, the easier it gets to keep showing up and doing the right things every day.

Step 3: Expect “Productive” Discomfort Not Suffering

It’s totally normal for corrective exercises to feel challenging, awkward, or sometimes uncomfortable—especially if soft tissue is stiff, joints are sticky, or new patterns are required. But true suffering means you’re doing the wrong exercise, too much, too soon, or fighting the process. Learn to distinguish between healthy training discomfort and bad pain. Treat each session as a chance to practice patience, breathe deeply, and learn from experience—not just to “grind through.”

Step 4: Find Acceptance and Focus on What You Control

Frustration around injury often comes from wanting to skip steps or fast-forward the process. Instead, accept your current state, focus on consistent progress, and get curious about deeper aspects of health, movement, or mindset you may have previously overlooked. The more you accept and fully engage, the faster—and more lasting—your results will be. (And if you get stuck, find a trusted guide or support community.)

[Segmental Muscle Strengthening]

Corrective exercise is much more than a fix for a body part it’s a mindset and a toolkit for lifelong mobility, injury-prevention, and lasting change. Embrace the journey, adjust your expectations, and celebrate progress one step at a time.

it’s not just working out, it’s building a foundation for a better life.

Find out more @
Facebook

LinkedIn

Pinterest

Instagram

Youtube

Bluesky

Back Pain After Covid

back pain after covid

Click on the image to watch the video

Are you dealing with back pain after COVID-19? You’re not alone. Back pain is one of the most common lingering symptoms after both infection and recovery a challenge felt by people of all ages and activity levels.

Why Back Pain Happens After Covid

Back pain can be a direct effect of COVID due to myalgia—generalized muscle and soft tissue pain caused by your body’s inflammatory response to fighting off the virus or as a side effect of the vaccine. Inflammation doesn’t always end when you test negative; your body might continue “defending” for weeks or even months, causing ongoing aches and back pain. This is part of what is known as “long COVID”.

Indirect causes are just as important:
Many people become more sedentary after (or during) illness—sitting more, working from home, and losing their regular movement and exercise routines.
Stress and lack of work-life balance increase tension, particularly in the spine, neck, and back.
Dehydration, already a common problem, is made worse as your body uses more water during infection and healing, leaving your discs and fascia less resilient.

Is It “Just” Covid, or Something Else?

If you notice new or worsening back pain after COVID, ask:

  • Was the pain present before, and is it worse now?
  • Are there other aches, joint issues, or general body pain? If so, it could be “long COVID.”
  • If you’re simply sitting more, skipping movement, or under new types of stress—those factors can be just as powerful.

Always follow up with your healthcare team to rule out reinfection or other health issues. For most, the pain is NOT dangerous, but persistent inflammation, dehydration, inactivity, or stress must be addressed for full recovery.

What Should You Do?

  1. Hydrate thoroughly. Start each day with water and keep drinking throughout the day to rehydrate the spine, joints, and fascia.
  2. Rebuild your work/life boundaries. Set opening/closing routines (especially if working from home), get up regularly, and don’t allow “life creep” into all hours.
  3. Move more—gently and consistently. Aim for general daily activity (steps, gentle walks), not just “weekend warrior” blasts. Progress specific corrective exercises for your back, core, and posture as you recover.
  4. Mind your stress. Take time to rest, get outside, meditate, and actively de-stress—your body and back will thank you.
  5. Start or restart a balanced corrective/exercise program. Don’t jump right into intense workouts; first, restore foundational control and flexibility so your body adapts, not just compensates.

[Myofascial Stretching: The Best Total Body Active Stretches]

Persistent back pain after COVID is often multifactorial and almost always holistic in solution hydration, gentle movement, stress management, and a sustainable corrective program are key.

it’s not just working out, it’s building a foundation for a better life.

Find out more @
Facebook

LinkedIn

Pinterest

Instagram

Youtube

Bluesky

Sciatic Pain Secrets

sciatic pain

Click on the image to watch the full video

Sciatic pain isn’t just a pain in the hip, butt, or leg—it’s a debilitating problem that can take over every aspect of daily life. If you’ve been searching for a cure and nothing works, you’re not alone: the sciatic nerve can be irritated or compressed at many different points, so a generic program will almost never be enough.

Why Formulaic Treatments Fail

Most conventional protocols target one or two common areas: the lumbar spine (disc herniation, bone spurs) or piriformis syndrome. But the real “secret” is that problems can start anywhere along the nerve’s path—from the lower back to the hip, fascial chains, hamstrings, or even the calf. If your care only focuses on one link, you might see little change—or even make things worse.

A Personal Story

Having suffered sciatic pain for years, I went through the checklist: imaging, painkillers, physical therapy, chiropractic care, acupuncture, yoga, pilates, and endless McKenzie exercises. Like many, I found partial, temporary relief—but never truly got my life back until I learned to assess the whole body and embrace a holistic, structure-first approach.

The Real Underlying Causes

  • Nerve root compression: Lumbar disc bulges, herniation, or spinal stenosis pinch the root of the nerve, sending radiating pain downward.
  • Piriformis & fascial entrapment: The nerve can be compressed as it passes through or alongside the piriformis, gluteal, or hamstring muscles, or by tight and fibrotic fascia.
  • Connective tissue “stickiness”: Fascia or scar tissue can tether or irritate the nerve anywhere in its course from the spine to the foot.
  • Other contributors: Poor hydration, poor posture, weak links in the core or lower chain, and poor movement mechanics can all keep the nerve “on edge” even after the initial injury.

What Actually Works

  • Pinpoint the true source of your pain with proper testing—don’t just trust imaging reports. Functional nerve tests and hands-on evaluations unveil what really needs work.
  • Address the whole kinetic chain:
  • Stretch and normalize not just the low back or piriformis, but also the glutes, hamstrings, and calf muscles (especially in cases where the sciatic nerve gets “tethered”).
    • Use mobility training, fascia-focused techniques, and segmentally-strong corrective exercises to restore healthy nerve gliding.
  • Stay patient and persistent: The longer pain has been present, the deeper the compensation and the longer re-education will take. Good “hurts” (tightness, stretch, mild ache from exercise) are necessary; avoid sharp, worsening zaps or numbness.
  • Holistic support matters: Hydration, sleep, mindful movement, and stress management are all essential for full nerve recovery and prevention of relapse.

[Fascia Normalization: Fascia Massage]

If you’re exhausted by “recipe” approaches and want truly personalized help, book a diagnostic call. We’ll uncover where your stuck points really are, create a sustainable plan, and help you reclaim real mobility and comfort.

it’s not just working out, it’s building a foundation for a better life.

Find out more @
Facebook

LinkedIn

Pinterest

Instagram

Youtube

Bluesky

BACK PAIN, HERNIATIONS, VISCERAL PROBLEMS, FATIGUE: Signs Your Core Muscles Are Weak

weak core signs

Weakness in your core is about much more than just missing “six-pack” abs. It’s the foundation of how your body functions daily impacting pain, injury risk, posture, digestion, and energy. Here’s how a truly weak core reveals itself, how these problems are connected, and what to do about it.

What Actually Is the Core And Why Does It Matter?

Your true core is a wide, complex system: four layers of abdominals, three layers of spinal erectors, the diaphragm, pelvic floor, intercostals, lats, pecs, and even parts of your glutes and hip flexors. These muscles are surrounded and integrated by robust fascia, forming your body’s “corset” for stability, movement, and organ support.

A strong core anchors your upper and lower body—power ripples out through it whether you’re running, lifting, cleaning, or simply standing and turning. When your core is weak, force doesn’t distribute through your system and ends up causing strain, injury, or dysfunction elsewhere.

1. Back Pain and Why You Can’t Fix It from the Outside

Back pain is the most classic sign of a weak or deconditioned core. Your abdominal muscles (especially the deep TVA) and the layers of back extensors are responsible for keeping the natural spinal curves and providing “active stability” to every vertebra. When the core can’t do this job, small muscles and ligaments are overloaded, discs degenerate, and pain is inevitable.

Chronic sitting, stress, and dehydration make this even worse: the discs between the vertebrae need water and dynamic core support to stay “fluffy” and absorb shock. If your core coordination is off, those discs flatten, allow unnatural movement, and eventually trigger pain—no matter how often you stretch or see a chiropractor.

2. Herniations Spinal and Visceral

Core weakness doesn’t just set you up for spinal disc herniations. If there’s a literal or functional “hole” (from weak, stretched, or deconditioned tissues), your thoracic and abdominal organs can shift and even herniate out of their natural compartments. Classic examples include weak points in the abdominal wall (inguinal or umbilical hernias) and “internal” herniations, where organs slip through diaphragmatic or pelvic floor defects.

Pascal’s Law—the principle that pressure applied to a fluid spreads equally in every direction—applies here. When your core can’t “hold pressure,” force escapes through the path of least resistance, causing pain, tissue strain, or an actual bulge. Keeping the abdominal wall strong, coordinated, and flexible gives you a true “wall,” not a revolving door.

3. Visceral and Digestive Problems

The core is also your body’s anchor for digestive health and internal motility. Weakness or loss of tension in the deeper tissues—especially the diaphragm and abdominal wall—reduces both the stability and movement of your organs, affecting drainage, blood flow, and bowel motility. That can mean sluggish digestion, bloating, or a feeling of heaviness that no medication seems to fix.

If your core is “loose,” your organs aren’t supported and can’t do their job. When you retrain the diaphragm, address core strength and posture, and restore balance, digestion and energy improve.

4. Fatigue, Poor Balance, and Posture Problems

Your core is at the center of every movement supporting your skeleton and acting as the communication hub for balance, agility, and force transfer. If it’s weak, bigger, less efficient muscle groups work overtime just to maintain basic positions (like standing, sitting, or picking something up), resulting in rapid fatigue and muscle aches.

Poor core strength also contributes directly to slouching, “tech neck,” and postural collapse. Good alignment spreads workloads efficiently, while slouched or tilted posture focuses them in harmful areas—creating a vicious cycle of pain and tiredness.

Building Your Core The Right Way

Start from the deepest muscles—train your TVA, diaphragm, and multifidi for internal control before progressing to external movers like obliques and erectors. Exercises that integrate breathing, maintain alignment, and combine both strength and flexibility give you durable protection and performance. Segmental strength work, myofascial stretching, and consistent attention to hydration and posture are cornerstones for rebuilding a core that lasts.

[Segmental Muscle Strengthening]

If chronic pain, fatigue, or internal issues are holding you back, don’t just “work out” address your foundation. For a completely customized approach, book a diagnostic consult or download our expert core-strength guide below.

it’s not just working out, it’s building a foundation for a better life.

Find out more @
Facebook

LinkedIn

Pinterest

Instagram

Youtube

Bluesky