Injury Prevention

Train Your Fascia to Avoid Getting Hurt During Your Activities

Happy Friday. Let’s talk about what may be the most important thing you can do to avoid injury and maximize performance in your sports and daily activities: train your fascia.

What Is Fascia, and Why Does It Matter?

Your body isn’t just a collection of muscles, bones, joints, and viscera that operate in isolation. All these systems are integrated and connected via fascia a web-like soft tissue network that unites every part of your body. Imagine one continuous sheet of connective tissue weaving through and wrapping around bones, muscles, ligaments, and even organs. The more this “fabric” is balanced, the more balanced and functional your entire body becomes.

Rods—your bones—form the framework, while joints act as junction points and the fascia is the ever-present, adaptable tissue holding it all together. This system doesn’t just run through the muscles and bones, but actually connects deeper into the joints, ligaments (like the periosteum along your bones), and even the layers of nerves. When your fascia is connected and hydrated, you have a body “suspension system” that’s resilient, responsive, and strong.

“What holds you up isn’t just bones; it’s the many layers of fascia. When trained, healthy, and hydrated, these layers help distribute forces and keep you moving pain-free even under stress or repetitive activities.” (Transcript excerpt)

Balance & Integrity: The Secret of Injury Prevention

So why do people get hurt—during sports, movement, or even ordinary activities like walking? It’s usually not because a single part fails, but because the balance and integrity of the entire fascial network has been compromised. When fascia is out of place, dried out, or not functioning, force from movement isn’t properly distributed. This results in overload, compensation, and—eventually—pain or injury, especially during higher-demand activities like running, skiing, or cycling.

In other words, healthy fascia is your insurance policy against injury. You’re “good” if this system works. You’re at risk if you neglect it.

“The more balanced your fascia is, the more likely you are to move without pain and build strength and coordination in everything you do.” (Transcript)

How to Train Your Fascia (and Why It’s For Everyone)

The good news: anyone can train fascia. You don’t need fancy equipment. You don’t have to be an elite athlete. It’s for active people of all backgrounds—especially anyone feeling slowed down by pain, stiffness, or lack of mobility.

Here’s what fascia-focused training involves:

  • Targeted Stretching and Strengthening: Not your average stretching. These are specialized movements (like ELDOA, myofascial stretching, segmentation, and GPS exercises) designed to mobilize the entire connective network, not just a single muscle or joint.
  • Layered Progressions: Fascia needs multi-planar, multi-layered work. The same way your hip or spine has layers of fascia, training builds up each layer so you create long-lasting resilience, not just fleeting flexibility.
  • Hydration and Recovery: Hydrated fascia is pliable and responsive. Drink plenty of water and prioritize restorative practices like bodywork and massage.
  • Connection and Awareness: Every stretch, movement, or exercise should be done with attention—mind-body connection is crucial! Awareness enhances neuromuscular re-patterning and the effectiveness of the fascia work.
  • Holistic Strength: Fascia supports and integrates strength—when you train the whole system, you improve posture, energy transfer, and even joint health.

If you think you’re “just not flexible,” or that your body is different or too old to move well, think again. Fascia adapts at every age if trained with a program tailored to YOUR needs and movement patterns.

Why Most Injury-Prevention Programs Miss the Mark

Most injury-prevention routines focus just on muscles, joints, or isolated corrective exercises. But if you leave out the fascial connection, you’ll always be working uphill.

Our holistic program is different. We assess and address your entire fascial landscape pinpointing weak, restricted, or dehydrated areas and integrating strength, mobility, and balance training that gets YOU moving, pain-free and confident.

This approach has helped hundreds just like you not through magic, but through a sustainable, individualized plan that respects your unique body and goals.

Ready to Move With Freedom?

If you’re active but slowed by pain or stiffness, it’s time to do something different and smarter. Focus on exactly what your body needs, not generic programs from YouTube or quick fixes from friends.

[Book a free consult] to talk with me about a holistic fascia program available both in-person and online customized to get you back to the life and activities you love.

it’s not just working out, it’s building a foundation for a better life.

Find out more @

Facebook

LinkedIn

Pinterest

Instagram

Youtube

Bluesky

Knee Pain After Running? Don’t Forget These 3 Areas!

Knee pain after running

Is knee pain after running slowing you down—or keeping you from your favorite workouts altogether? Are you frustrated because you’re diligently doing the preventive and corrective exercises you think you “should,” yet the pain keeps returning?

You’re not alone, and you’re not wrong in your effort. You’re just likely missing three specific, essential areas every runner must address to stay truly pain-free your Patellofemoral Joint, Vastus Medialis Oblique (VMO), and Articular Genu.

Why Does Knee Pain After Running Happen?

Knee pain during or after running is incredibly common, and often strikes when you least expect it. Maybe you’re feeling great on one run then, out of nowhere, that familiar ache or sharp pain flares up. Most knee pain from running is due to overuse and improper distribution of force not necessarily a traumatic injury. Common causes include weak muscles, alignment issues, worn-down cartilage (patellofemoral syndrome/chondromalacia), or tight fascia and tendons.

The reality is: Running is a dynamic, full-body movement. Every stride sends tons (literally!) of force through your legs, up your hips and spine, and across your entire kinetic chain. If your muscles, ligaments, and critically your fascia and joint structures aren’t working optimally, that force gets lost or stuck at the knee, causing pain and, eventually, injury.

The Common Mistakes

Standard “solutions” typically target the symptoms instead of the source: ice, pain meds, generic foam rolling, or a few basic stretches. While these may help a little short-term, they don’t address the deeper mechanical misalignments or the most important stabilization muscles and connective tissues.

The 3 Areas Every Runner Needs to Address

1. Patellofemoral Joint
This is the joint between your kneecap (patella) and your femur. It’s responsible for smooth, efficient motion every time you bend or straighten your knee. When it gets “asleep” (i.e., isn’t actively engaged or well-lubricated), pain and tracking issues become inevitable. Training the Patellofemoral Joint through specific balance and mobility exercises “wakes it up,” helping it communicate with your brain and spinal cord so each stride aligns and functions correctly.

2. Vastus Medialis Oblique (VMO)
The VMO is a part of the quadriceps that attaches to the kneecap and is largely responsible for holding the patella in the right position as you move. Most traditional leg workouts and stretches miss the unique activation needed for the VMO. For running, this small, oblique section is critical—its proper firing pattern keeps your kneecap tracking smoothly and prevents it from drifting to the outside, which is a root cause of runner’s knee. Think: targeted, soccer-kick style resistance or functional movements—not just generic quad extensions.

3. Articular Genu
This lesser-known but vital structure sits deep in the thigh and attaches to the synovial membrane beneath the kneecap. Its role is to generate fluid movement under the kneecap (critical for nutrition, waste removal, and shock absorption). Standard knee routines will never touch the articular genu. Specific exercises are needed to activate this area—typically by fixing the kneecap and using isolated, precise tension to target only the articular genu fibers. When this muscle is strong and flexible, your knees recover and function properly after every run.

The Power of a Specific, Holistic Approach

Fixing knee pain after running isn’t about one stretch or trendy treatment. It’s about a targeted, holistic program that addresses not only the muscles and joints, but the connective tissue and the hidden stabilizers and fluid channels.
If you’re stuck in the pain–rest–relapse loop, or you’re always trying a mix of magazine or YouTube workouts, you’re missing the specific, lasting solution your body needs to thrive as a runner and stay active as you age.

Here’s Your Action Plan:

  1. Warm Up the Right Areas: Before you run, activate the ankles, knees, hips, and spine. Use dynamic movements and gently increase internal body temp and mobility.
  2. Stretch and Normalize Afterwards: After running, use myofascial and specific chain stretches to address shins, calves, hamstrings, deep hip rotators, glutes, and trunk—all crucial for knee function.
  3. Target the 3 Key Areas: Add corrective, focused exercises for your Patellofemoral Joint, VMO, and Articular Genu. If you’re not sure how, don’t guess—this is where specialized coaching makes all the difference.

Real Results Happen With the Right Focus

Remember, pain doesn’t disappear from generic advice or random routines. One client—a dedicated runner plagued for years by “patellofemoral syndrome”—saw her pain vanish completely within three months of following a true corrective routine. Best of all, her overall mobility and confidence soared, proving that targeted training builds more than just pain relief: it’s the foundation for lifelong activity and enjoyment.

You are only as strong and mobile as your weakest area. Instead of letting knee pain sideline your progress, address the real drivers. Your daily routine should empower you to not just manage but transform your running experience.

If you’re ready to stop cycling through ineffective fixes and finally address the root of your knee pain, the next step is simple:
[Book a free consult] to get access to individualized evaluation and a proven, practical path forward so you can return to running, exercise, and the activities you love with lasting comfort and strength.

it’s not just working out, it’s building a foundation for a better life.

Find out more @

Facebook

LinkedIn

Pinterest

Instagram

Youtube

Bluesky

Bungee Workout?! Why Fad Fitness Hurts More Than It Helps

bungee workout risks

Click on the image to watch the video

The flashy world of bungee workouts seems to promise a shortcut to the body—and the life—you want. Maybe you’ve seen ads with people bouncing in harnesses, grinning from ear to ear. Sure, it looks exciting, novel, and fun. But before you sign up, let’s get real: as a 25+ year fitness and manual therapy pro, I can assure you this approach is more likely to set you back than move you forward.

[The Ultimate Guide For A Holistic Exercises And Fitness Program]

The Fad Fitness Problem

This industry is littered with quick-fix fitness fads and miracle solutions—bungee workouts are just the latest example. Fads catch our attention, make wild promises with clever marketing, and always seem to parade a handful of “success stories” and cherry-picked scientific stats. But here’s the catch: they’re built on half-truths, not the tested foundations that keep you healthy, strong, and mobile over a lifetime.

The issue with fads:

  • They’re not sustainable
  • They rarely deliver long-term results
  • They rely on hype instead of foundational science
  • Most dangerously, they can increase your risk of pain and injury

Bungee Workouts: Fun… But Safe or Smart?

While bungee cord workouts might have entertainment value for some, they introduce multiple risks and rarely develop the most important aspects of a functional, pain-free body. Wearing a bungee harness places significant, dynamic force through your body—fast shifts in direction, instability, and jerking motions that can trigger pain or worsen pre-existing imbalances.
The harness can place uncomfortable pressure on the abdomen and lower back, posing extra risks for people with back issues, cardiovascular conditions, or if you’re pregnant. Vertigo, joint and ligament strain, and loss of balance are all common complaints.

Because the harness “reduces” apparent weight, it can mask true deficiencies, letting you move through advanced planes of motion without ever developing the foundation your body needs. This leads to:

  • Compensation patterns going unnoticed
  • Weak links getting weaker
  • Forces accumulating in the wrong areas—like your knees, back, or neck
  • Increased chances of strain, sprains, or even falls

Bungee workouts can give you a false sense of accomplishment, but underneath, you haven’t strengthened the stabilizers or “deep system” that keeps your body aligned, resilient, and pain-free.

“Stimulating your body is good. Jumping around from trend to trend without respecting progression or foundational integrity is a recipe for injury.”

Build Your Foundation—the “Boring” Secret to Real Results

Think of your body like a pyramid—without a strong base, the top will never stand tall. Your foundation is built from:

  • Mobility and strength in deep muscles
  • Balanced myofascial chains and connective tissues
  • True neuromuscular connection—awareness, coordination, balance

If you’re missing any piece, your system breaks down with more activity or, worse, the more complicated or “fun” (read: advanced) the workout. It’s no different than stacking heavy loads on a wobbly table. Eventually, you’ll see dysfunction, pain, or injury.

“If your muscles and fascia aren’t aligned, if you don’t feel connected in your movement, every new challenge will magnify your weak link. Maybe that’s your back, your knees, your digestion, or just your motivation.”

How Do Fads Gain So Much Traction?

These programs are built to sell—slick marketing and “success” testimonials pull you in, get you emotionally excited, and make you think this is the missing link. But most people quickly realize: gimmicks may bring quick entertainment, but never sustainable, functional change.

Do What Works Even if It’s Not Flashy

If you truly want to build a body that moves well, is pain-free, and is up for life’s adventures, you need:

  • A scientific, systematic approach
  • A strong, mobile, and balanced musculoskeletal and fascial system
  • Movement progression rooted in your actual needs, not hype
  • Persistence, education, and a tailored plan for your unique body

It’s not always “sexy” or instant but the rewards are exponential. You get the skills to stay out of pain, keep up with your favorite activities, and become your own best trainer and therapist for life.

it’s not just working out, it’s building a foundation for a better life.

Find out more @
Facebook

LinkedIn

Pinterest

Instagram

Youtube

Bluesky

Leg Length Discrepancy DO You Have It? WHY It Matters. WHAT To Do.

leg length discrepancy

Ever feel like your body is off-balance one hip higher, your shoes wear unevenly, or odd aches pop up in your knees, hips, or back? If so, you might have a leg length discrepancy and yes, it matters more than you think. This issue can have a direct impact on movement, posture, and discomfort throughout your body.

[The Ultimate Guide For A Holistic Exercises And Fitness Program]

Why Does Leg Length Discrepancy Matter?

When one leg is longer or shorter than the other—even by a small margin—it can throw your whole body out of balance. This can create issues wherever your body is weakest: hips, knees, feet, spine, or even in your digestion or thinking (thanks to nervous system compensation). Research estimates that 90% of people have some difference, but most are mild. About 20% of adults have a difference above 9mm (about 3/4 inch), which is significant enough to need support.

True vs. Functional Leg Length Discrepancy

  • True Discrepancy: One leg bone is physically shorter or longer, due to genetics, injuries, or surgeries (congenital, trauma, or after hip replacements).
  • Functional (Apparent) Discrepancy: The legs are structurally equal, but soft tissue, joint misalignments (like in your SI joint), or muscle imbalances make one leg “act” shorter. This is far more common, and easily misdiagnosed.

How Do You Know Which Kind You Have?

  • True: Only confirmed by measurements between bony landmarks (greater trochanter to lateral knee, or by X-ray).
  • Functional: May appear shorter/longer with some measurements, but really reflect pelvis, SI joint, or muscle tightness.

What Causes Leg Length Discrepancy?

  • Congenital structural differences (from birth)
  • Traumas/fractures or damage to growth plates (especially in childhood)
  • Hip or knee replacements, bone infections, tumors
  • Muscle or ligament tightness (especially hip rotator cuff, SI joint imbalance)

How Much Is Too Much?

Small differences (<10mm or 1/2 inch) rarely cause problems. Above 10mm, you’ll likely feel symptoms—back/hip/knee pain, uneven wear on shoes, or even poor posture and gait changes. Significant differences may require lifts, physical therapy, or, rarely, surgery.

What Should You Do?

1.     Test & Measure
·       Compare both bone length (greater trochanter to ankle; not just ASIS-to-malleolus, due to joint effects).
·       Assess for SI joint or pelvic involvement: Often, a rotated or flared pelvis mimics a true discrepancy. Address this with appropriate therapy, not just a heel lift.
2.     Address Functional Discrepancies First
·       Target soft tissue and muscle imbalances, especially pelvic muscles and deep rotators (obturators, gemelli, piriformis, quadratus femoris).
·       Stretch AND strengthen—each muscle may need a different “counteraction” exercise. Check both sides to keep your pelvis balanced.
·       Avoid using heel lifts for purely functional causes, as they can reinforce imbalance.
3.     Stretching & Mobility Work
·       Find which stretches are hardest for you—those are probably your critical areas.
·       Don’t just focus on the “short” side—balance both.
4.     Know When to Involve a Specialist
   If you truly have a bone length difference >1/2 inch and symptoms persist, a skilled therapist or ortho can guide treatment, which may involve lifts, therapy, or rarely surgery.

Key Takeaway

Don’t assume all leg length differences need a “fix.” Find out whether yours is structural or functional, treat what you can, and always address muscle and joint imbalances alongside any other interventions. Your entire body from head to toe will thank you.

it’s not just working out, it’s building a foundation for a better life.

Find out more @
Facebook

LinkedIn

Pinterest

Instagram

Youtube

Bluesky

Osteoporosis AND Bending Over: What’s Safe, What’s Not, and How to Move Better

osteoporosis bending over safety

If you’ve been diagnosed with osteoporosis, chances are you’ve heard some version of this warning: “Don’t bend over you might break your back!” But is it really that simple? What if you drop something, need to garden or vacuum, or want to play with your grandkids? Does having osteoporosis mean you’re forever doomed to a life of restricted movement or is there a more balanced, empowering approach?

[The Ultimate Guide For A Holistic Exercises And Fitness Program]

The Standard Warning and Why It Exists

Osteoporosis thins your bones and makes them more fragile, especially at the spine. Standard advice is to avoid:

  • Forward flexion (bending at the waist with a rounded back)
  • Twisting (especially while flexed)
  • Lifting heavy items with poor body mechanics

The reason is simple: These moves sharply increase compressive forces on your spine, particularly the front part of your vertebral bodies, and this is exactly where bone is most fragile with osteoporosis. In fact, statistics show the majority of osteoporosis-related spinal fractures happen with simple, daily movements—not from falls or accidents. Even something as simple as bending to tie your shoes or pick up a pet can trigger a vertebral fracture if your posture is poor and your bones are weak.

Why This Advice Isn’t the Whole Story

But real life isn’t lived in a bubble. You WILL need to bend, reach, and twist from time to time. And here’s the truth: No two people with osteoporosis are exactly alike. Your risk of fracture is determined by far more than just your diagnosis. It’s about your overall bone density (as measured by your T-score), your history of fractures (or lack thereof), your balance and strength levels, your soft tissue health, your nutrition, and even your hydration and stress levels.

Did you know…?

  • A T-score from −1 to −2.5 is considered osteopenia (lower than average bone mass but not yet true osteoporosis).
  • Osteoporosis is diagnosed at −2.5 or below, and deeper negatives signal greater risk.
  • If you have had a previous spinal fracture, your risk of another is much higher.

What About Everyday Life?

Imagine you have beginning osteoporosis or osteopenia. You still want to hike, garden, travel, and play with your grandkids. Should you be terrified to bend? No! But should you move with greater awareness and make smart modifications? Absolutely.

Let’s break down the top considerations:

  1. Your Bone Density and History
    If your osteoporosis is advanced (lower T-score and/or history of spinal fractures), you must be extra cautious—especially with high-risk, forceful, or repetitive bends. If you’re earlier in the process and otherwise active, movement is critical for maintaining bone and muscle!
  2. Your Current Fitness and Mobility
    How balanced and strong is your body right now? If you have good posture, strong legs and hips, and flexible fascia, you’re already more resilient. If you’re already a little frail, dehydrated, or consistently out of alignment, your risk is higher—and so your plan needs to start with foundations.
  3. Your Technique: Bending Smart
    The key for everyone—regardless of bone density—is learning and practicing safe movement patterns:
  4. Hip hinge, not spine curl: Bend at the hips and knees, sticking your chest out, so your back stays straight and the force is safely absorbed in your larger stabilizer muscles.
  5. Keep movement slow and controlled: No quick, abrupt bends. Avoid bouncing or twisting motions.
  6. Keep weight close to your body: Don’t reach, stretch, and twist while holding something heavy or awkward.
  7. The Power of Whole-Body Training
    Here’s what’s often missing from most online advice: Total body balance, hydration, fascia health, and postural training are all crucial. Balance helps prevent falls. Hydration and soft tissue health support bone health, nutrient delivery, and safe movement.
  8. Training for balance and stability protects you from both falls and spinal stress.
  9. Maintaining your four spinal curves and strengthening your deep core (abs, back, and trunk muscles) disperses forces more safely.
  10. Hydration supports disc “fluffiness” and joint health—reducing spinal compression and painful movements.
  11. You CAN Build (or Re-Build) Bone Strength Safely!
    Safe weight-bearing, resistance, and low-impact exercises (like walking, light resistance, Nordic walking, and gentle yoga—avoiding loaded flexion and twisting) stimulate new bone growth, help you maintain muscle, and boost confidence.
  12. Every Program Must Be Personal
    Your daily routine, goals (hiking, playing, gardening, or just remaining independent), nutrition, supplement needs, and even sleep and stress must be considered together—not just one-size-fits-all rules. If you’re deeper into osteoporosis, all activity should be customized, and for some people, only micro-movements and balance work are appropriate.

Practical “Yes/No” for Bending Over With Osteoporosis

  • Beginning osteopenia, active & balanced: Yes—with good technique, body awareness, and gradual progression.
  • Moderate osteoporosis, no previous fractures, working on fitness & nutrition: Cautious yes, with modifications and under expert supervision.
  • Advanced osteoporosis with previous fractures or other serious risk factors: Very limited—avoid flexion, get expert advice, focus on postural and functional strength, microstimulation, and sustainable movement patterns.

Never try to “push through” pain, round your back under load, or perform high-impact, jerky, or twisting exercises without guidance.

The Bottom Line

Bending over with osteoporosis is NOT an all-or-nothing rule. It’s a nuanced, highly individual decision, and it’s about good technique, foundational strength, and building your resilience over time. Most importantly, it’s about creating balance—throughout your day, your body, and your routine. With the right plan, support, and progression, you can stay strong, independent, and active for life.

it’s not just working out, it’s building a foundation for a better life.

Find out more @

Facebook

LinkedIn

Pinterest

Instagram

Youtube

Bluesky

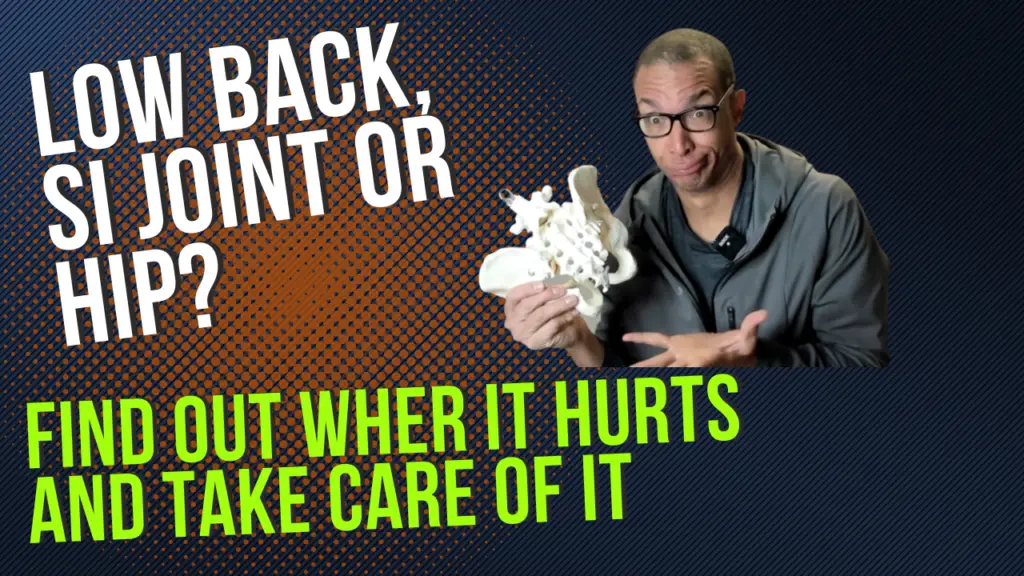
How to Tell if It’s Low Back, SI Joint, or Hip Pain

back pain diagnosis

Click on the image to watch the full video

Ever feel a nagging ache, sharp jolt, or deep stiffness somewhere around your lower back, hip, or pelvis—but can’t tell exactly where it’s coming from? You’re not alone. These areas are interconnected and can easily “refer” pain to each other. Pinpointing the true source is key—since the wrong approach may not only fail to solve your pain, but actually make it worse.

Why Accurate Diagnosis Matters

Each area low back, SI joint, hip has its own causes, pain patterns, and best next steps. Back pain can show up from disc/herniation, strained ligaments, facet joints, or nerve compression, often signaled by pain with bending, twisting, or sitting. SI joint issues cause sharp or aching pain at the dimples above your buttocks, sometimes radiating to the hip or thigh, usually worse with transitions like standing, stairs, or getting up from a chair. Hip pain tends to show deep, achy, or sharp pain in the groin, outer hip, or buttock, and is aggravated by walking, weight bearing, or rotating the leg.

[OMT: Osteopathic Manual Therapy]

Where Does Your Pain Fit?

  • Low Back: Pain between lower ribs and pelvis, worse with bending/lifting, may radiate down into the buttocks or leg (sciatica).
  • SI Joint: Achy, stabbing pain at the upper buttock “dimples,” worse with sitting, stairs, standing from a chair, or rolling in bed.
  • Hip: Deep, aching or sharp pain in front of the groin, outer hip, or buttock, worse walking or rotating the leg, or standing up.

Because these tissues share nerves and muscle attachments, problems frequently overlap. SI joint instability can create tension and pain in both the low back and hip, and vice versa.

What to Do Next

  • Get Assessed Holistically: A great intake includes physical tests, history, movement screening, posture, past injuries, and lifestyle.
  • Prioritize Mobility and Balance: Include corrective exercises for the suspected culprit, but address every link in the chain—muscles, joints, connective tissue, and posture.
  • Integrate Injury Prevention: Pain in these regions can lead to compensation injuries, so proactive balance, core work, and muscle activation are essential.
  • Choose the Right Help: If your symptoms persist, get help from a pro who specializes in holistic, functional movement (not just isolated fixes).

Takeaway:

The right approach starts with locating your pain and understanding your personal pattern. With clear information and targeted training, you can restore efficient movement without setbacks or guesswork.

it’s not just working out, it’s building a foundation for a better life.

Find out more @
Facebook

LinkedIn

Pinterest

Instagram

Youtube

Bluesky

Neck Pain After Sleeping: 4 Reasons Why and What To Do About It

Neck Pain After Sleeping

Click on the image to watch the video

Did you wake up this morning with a stiff neck—the kind where you can’t look over your shoulder or tilt your head comfortably? Neck pain after sleeping is extremely common, with several possible causes and, thankfully, multiple ways to address and prevent it.

  1. Underlying Trauma
    A history of trauma, like whiplash or a sports injury, can leave tissues tight, tender, or misaligned for years. Sometimes, the pain only shows up after sleeping when the body relaxes, cools down, and habitual tension “sets” into bad alignment. Not addressing acute issues right away can make future correction more difficult. Early, targeted mobility training and corrective exercise are key—even if the pain doesn’t seem urgent at first.
  2. Postural or Overuse Strain
    Desk work, smartphone use, and “tech neck” (forward head posture) retrain the body into poor alignment and chronic muscle tension. If you spend 8+ hours daily hunched forward, but only do an hour of corrective work (at best), the imbalance accumulates. This commonly leads to stiffness and pain after sleeping, when tissues contract and “remember” their imbalances. Address this by restoring shoulder, mid-back, and neck alignment; balance technology habits with posture- and flexibility-focused routines.
  3. Pathology
    Conditions like cervical radiculopathy, stenosis, or arthritis can all manifest overnight or in the morning as nerve signaling and disc pressures change with position. Persistent or worsening pain—especially with numbness, tingling, or weakness—deserves prompt professional assessment and a customized plan.
  4. Sleep Position, Pillow, and Recovery
    A poor sleep setup (too many pillows, sleeping on your stomach, or a lumpy mattress) disrupts healthy neck curves and strains muscles. Too little sleep or constant sleep interruption impairs tissue repair and healing, leading to more frequent or severe neck pain. The right pillow, good alignment, and consistent sleep hygiene are foundational for prevention.

What To Do About It

  • Start with gentle mobility: Hot showers, light stretching, and slow, easy neck movements can help “wake up” the tissues.
  • Consider alternating ice and heat to manage acute pain or inflammation.
  • Prioritize a balanced sleep setup: Neutral head/neck alignment, supportive pillows, and sleeping on your back or side (not your stomach).
  • Incorporate posture-focused, corrective, and mobility exercises throughout the day, not just after the pain sets in.
  • Seek professional help for persistent, severe, or radiating pain, especially if it comes with other symptoms.

[ELDOA: The Ultimate Spine And Joint Exercises]

Don’t let neck pain after sleep become your “normal.” Discover and address the true cause, and build sustainable habits to wake up pain-free and ready for life.

it’s not just working out, it’s building a foundation for a better life.

Find out more @
Facebook

LinkedIn

Pinterest

Instagram

Youtube

Bluesky

How To Brace Your Core To Protect Your Lower Back!

core bracing for back pain

Click on the image to watch the video

Bracing the core is one of the most effective ways to stabilize and protect the lower back—during heavy lifting, dynamic movement, or simply daily tasks. But “bracing” is more than just squeezing your abs. To truly protect your spine, you need to know which core muscles matter, how to train them, and how to integrate them into all movement—not just during workouts.

What Is Core Bracing (And Why Should You Care)?

Core bracing simply means contracting all the muscles of your trunk front, sides, back, even the pelvic floor to create a “girdle” of stability around your spine. Think of how the body naturally tenses before a big exertion or if someone is about to punch you in the stomach—this helps distribute forces evenly and prevents sudden overload on any single spot in the spine.

Which Muscles Are Involved?

True bracing integrates:

  • All four layers of the abdominals (rectus, obliques, transversus, internal/external)
  • Deep spinal stabilizers (multifidi, transversospinalis)
  • The diaphragm (breathing muscle)
  • Pelvic floor
  • Back muscles (erectors, lats, serratus, etc.)

These muscles must function as a coordinated system to evenly “brace” the spine—so no one link becomes the weak point.

The Keys to Smart Bracing and Injury Prevention

  • Start With Deep Muscles: Deep stabilizers (like the TVA and deep back muscles) activate first to prepare the body for movement.
  • Progress to Superficial Muscles: Once deep muscles are awake, train global movers like obliques and erectors in different planes—flexion, extension, rotation, lateral stability.
  • The Beam Phenomenon: During squats and deadlifts, bracing helps the spine act like a strong beam—so force moves through the trunk, instead of collapsing onto the lower back.
  • Don’t Overuse Bracing: You don’t need to brace every second of the day—only before higher-effort movements or when lifting, twisting, or reaching. For daily life, your core should work reflexively after proper training.

How To Learn (And Progress) Core Bracing

  • Awareness: Practice “bracing for a punch” lying on your back, feeling your abs, sides, and lower back tighten in unison.
  • Breathe While Braced: It’s crucial to maintain breathing—a true brace allows for expansion and natural breath, not holding.
  • Segmentally Strengthen: Build up reps of basic holds, then layer in movements (squat, hinge, carry, overhead press).
  • Stretch and Normalize Weak Links: Segmentally train deep stabilizers, then all layers of abs and back, then global movements.
  • Integrate Into Your Life: The real win is a core that reflexively supports you during life—not one that needs constant conscious effort.

With a systematic approach—segmental strength, fascial training, posture work—bracing becomes second nature, and lower back injuries become far less likely—whether you’re working at a desk or lifting heavy in the gym.

If you want a holistic program that’s more than “just another ab workout” and addresses your needs down to the weak links, we can help. Book a [free consult] to get a custom plan for a strong, pain-free back and a core that keeps you resilient for life.

it’s not just working out, it’s building a foundation for a better life.

Find out more @
Facebook

LinkedIn

Pinterest

Instagram

Youtube

Bluesky

4 Steps On How Not To Get Frustrated With A Corrective Exercise Program

frustration corrective exercise

Click on the image to watch the video

Getting injured isn’t just painful it’s often maddening, especially when a corrective exercise program seems slow, confusing, or never-ending. The good news? There are concrete ways to break the cycle of frustration, so you can move forward in your recovery and come back stronger than ever.

Step 1: Get Specific and Get Curious

Most frustration comes from generic, surface-level advice—“just do X for your knee,” or “try this for your back.” But lasting results require a specific, holistic perspective. Zoom out: assess all the tissues, joints, and habits involved, not just the “squeaky wheel.” Don’t be afraid to ask more questions of your coach, read beyond the basics, or demand an individualized approach that’s tailored to the real cause of your issue—not just the symptoms.

Step 2: Stop the Comparison Game Own Your Pace

Corrective exercise takes time. Symptoms often last because underlying compensations have built up for months or years. Don’t get stuck comparing yourself to “fast healers” or internet testimonials. Accept that the process is nonlinear, and that small, focused wins build the fastest long-term progress. The less negative self-talk, the easier it gets to keep showing up and doing the right things every day.

Step 3: Expect “Productive” Discomfort Not Suffering

It’s totally normal for corrective exercises to feel challenging, awkward, or sometimes uncomfortable—especially if soft tissue is stiff, joints are sticky, or new patterns are required. But true suffering means you’re doing the wrong exercise, too much, too soon, or fighting the process. Learn to distinguish between healthy training discomfort and bad pain. Treat each session as a chance to practice patience, breathe deeply, and learn from experience—not just to “grind through.”

Step 4: Find Acceptance and Focus on What You Control

Frustration around injury often comes from wanting to skip steps or fast-forward the process. Instead, accept your current state, focus on consistent progress, and get curious about deeper aspects of health, movement, or mindset you may have previously overlooked. The more you accept and fully engage, the faster—and more lasting—your results will be. (And if you get stuck, find a trusted guide or support community.)

[Segmental Muscle Strengthening]

Corrective exercise is much more than a fix for a body part it’s a mindset and a toolkit for lifelong mobility, injury-prevention, and lasting change. Embrace the journey, adjust your expectations, and celebrate progress one step at a time.

it’s not just working out, it’s building a foundation for a better life.

Find out more @
Facebook

LinkedIn

Pinterest

Instagram

Youtube

Bluesky

Back Pain After Covid

back pain after covid

Click on the image to watch the video

Are you dealing with back pain after COVID-19? You’re not alone. Back pain is one of the most common lingering symptoms after both infection and recovery a challenge felt by people of all ages and activity levels.

Why Back Pain Happens After Covid

Back pain can be a direct effect of COVID due to myalgia—generalized muscle and soft tissue pain caused by your body’s inflammatory response to fighting off the virus or as a side effect of the vaccine. Inflammation doesn’t always end when you test negative; your body might continue “defending” for weeks or even months, causing ongoing aches and back pain. This is part of what is known as “long COVID”.

Indirect causes are just as important:
Many people become more sedentary after (or during) illness—sitting more, working from home, and losing their regular movement and exercise routines.
Stress and lack of work-life balance increase tension, particularly in the spine, neck, and back.
Dehydration, already a common problem, is made worse as your body uses more water during infection and healing, leaving your discs and fascia less resilient.

Is It “Just” Covid, or Something Else?

If you notice new or worsening back pain after COVID, ask:

  • Was the pain present before, and is it worse now?
  • Are there other aches, joint issues, or general body pain? If so, it could be “long COVID.”
  • If you’re simply sitting more, skipping movement, or under new types of stress—those factors can be just as powerful.

Always follow up with your healthcare team to rule out reinfection or other health issues. For most, the pain is NOT dangerous, but persistent inflammation, dehydration, inactivity, or stress must be addressed for full recovery.

What Should You Do?

  1. Hydrate thoroughly. Start each day with water and keep drinking throughout the day to rehydrate the spine, joints, and fascia.
  2. Rebuild your work/life boundaries. Set opening/closing routines (especially if working from home), get up regularly, and don’t allow “life creep” into all hours.
  3. Move more—gently and consistently. Aim for general daily activity (steps, gentle walks), not just “weekend warrior” blasts. Progress specific corrective exercises for your back, core, and posture as you recover.
  4. Mind your stress. Take time to rest, get outside, meditate, and actively de-stress—your body and back will thank you.
  5. Start or restart a balanced corrective/exercise program. Don’t jump right into intense workouts; first, restore foundational control and flexibility so your body adapts, not just compensates.

[Myofascial Stretching: The Best Total Body Active Stretches]

Persistent back pain after COVID is often multifactorial and almost always holistic in solution hydration, gentle movement, stress management, and a sustainable corrective program are key.

it’s not just working out, it’s building a foundation for a better life.

Find out more @
Facebook

LinkedIn

Pinterest

Instagram

Youtube

Bluesky