Hip Pain

Who is Borelli and How Can His Muscle Range Of Motion Length Law Help You in Your Fitness Routine?

Muscle range of motion is an important factor in training yourself properly. But it’s not just about moving your body. There are different range of motions for different effects. Read more to find out.

Meet Borelli: The First Biomechanic

Borelli lived in the 1600s and was a true Renaissance man — a mathematician, physicist, and physiologist all rolled into one. He’s often called the Father of Biomechanics because he was one of the first to look at the human body and say, “Hey, our muscles and bones work like levers, springs, and pulleys!”

What is Borelli’s Length Law?

In a nutshell, Borelli’s Length Law states: The length of a muscle is proportional to the range of its contraction. Muscles behave differently — and produce different types of strength — depending on whether they’re shortened, lengthened, or somewhere in between. In short, it’s the Muscle range of motion and what they can do for you.

Borelli’s 5 Ranges of Muscle Motion (And How They Help You)

Internal Range Full flexion (muscle fully shortened), very little extension.

Why it matters: Builds stability, tight control, and joint protection.

External Range

Total extension with a bit of flexion.
Why it matters: Strengthens muscles in their stretched, vulnerable positions.

Middle Range

Partial flexion and partial extension.
Why it matters: Where muscles are strongest and most efficient — builds power.

Total Range

Moving from full flexion to full extension.
Why it matters: Trains adaptability and real-world functionality.

Extrem Range

Muscle stretched to max while still contracting — e.g. ELDOA.
Why it matters: Improves deep structural resilience and tissue quality.

Final Thought: Your Fitness Journey is Bigger Than 3 Sets of 10

The world of fitness is vast and full of possibilities. Muscle range of motion is just one factor that you can work with. If you’re willing to look beyond sitting on a machine and doing 3 sets of 10–15 reps.
By training all muscle ranges of motion, you open up new levels of strength, movement, and vitality that most people never tap into.

Borelli’s old-school insights still hold true today: “The body is a masterpiece of mechanics. Train it fully — and you’ll live fully.

When you start combining Borelli’s Length Law with other timeless principles — like Pascal’s Law, Hill’s Muscle Model, the Delmas Index — through the holistic lens of Biotensegrity, your training, your movement, and your life will expand exponentially.

Methods like ELDOA are modern reflections of this timeless science — helping you build not just strength, but deep, intelligent resilience.

Read more about how holistic exercise and fitness program can help you feel your best and have a body that can keep up with the way you want to live.

Follow the Thread—Where Movement, Fascia, and Freedom Align

Find more insight, reflection, and fascia-informed care across the platforms where we stay connected:

Facebook

Blue Sky

Pinterest

Instagram

Youtube

The Untold Truth About the SI Joint (And Why Most Fixes Fail)

The sacroiliac joint—or SI joint—is one of the most misunderstood areas in the body. And yet, it plays a massive role in your ability to move, feel good, and stay injury-free.

If you’ve ever looked for SI joint exercises or ways to relieve SI joint pain, chances are the info you found was generic, over-simplified, or just wrong. And that’s a problem.

A dysfunctional SI joint can prevent you from gaining strength, limit your mobility, and leave you stuck in a loop of recurring pain or injury.

Let’s fix that.

What Is the SI Joint (And Why Should You Care)?

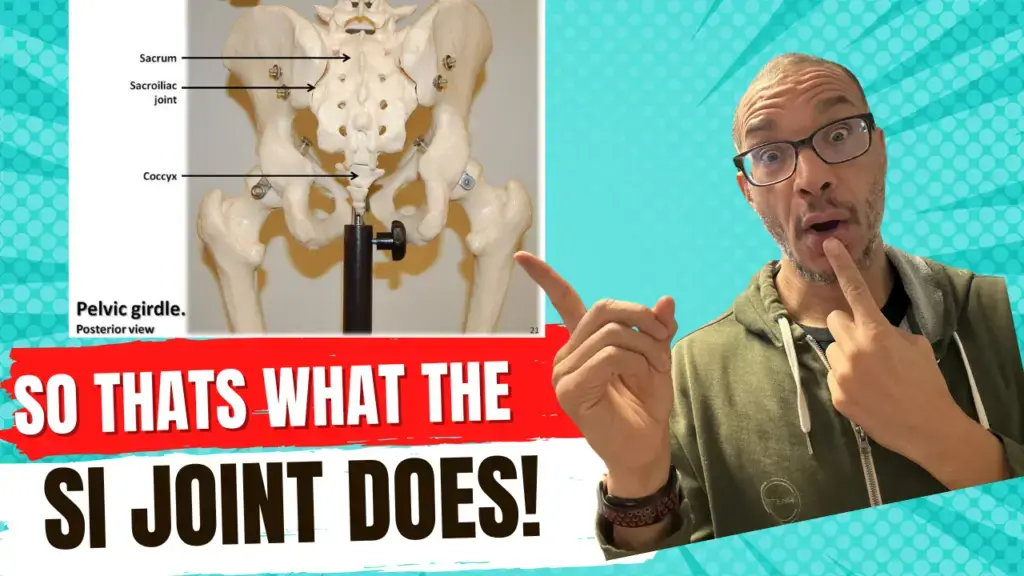
The SI joint connects your sacrum (the base of your spine) to your ilium (your pelvic bones). You have two of them—left and right—and together they form the foundation of your pelvis.

Think of your pelvis as the floor of your body. If the floor is off, everything built on top—your spine, shoulders, legs—becomes misaligned.

Here’s the kicker: SI joint issues are often asymptomatic. You might be struggling with shoulder pain, knee discomfort, or tight hip flexors—and never realize the source is pelvic instability rooted in the SI joint.


Why Standard Fixes Don’t Work

Most practitioners don’t fully understand the SI joint. Some even claim it’s not a real joint or that it doesn’t move. That’s not just wrong—it’s dangerous.

The SI joint is a total joint:

  • It has a capsule
  • It contains synovial fluid
  • It has proprioceptors (tiny sensory “computers”)
  • It’s stabilized by key muscles and ligaments

When this area is off, you don’t just lose movement—you lose the ability to communicate with your body.


A Deeper Look: Movement and Dysfunction

Physiologically, the SI joint has one primary movement axis—called the oblique axis. It helps the sacrum and ilium move together smoothly as you walk or bend.

But when dysfunction sets in, the joint can fall into 20+ different pathological movement patterns, leading to all sorts of compensations, from a false leg length discrepancy to upper-body pain.

If your treatment or exercise doesn’t account for these patterns, you’re just treating symptoms—not the cause.


My Journey With the SI Joint

I’ve been in the health and fitness field for 30 years. I started out like most trainers—using standard methods like PT and corrective exercises. But when I injured my own back (L4-L5 disc bulge with sciatic pain), those traditional approaches didn’t help.

That’s when I found osteopathy. It opened my eyes to how the body truly works: as a holistic, interconnected system.

And the SI joint? It was central to the whole picture.


How I Assess and Work With SI Joint Issues

When someone comes into my studio (or online), one of the first places I assess is the SI joint—no matter what pain they report.

Why? Because if the foundation is off, everything else will be too.

Here’s my general approach:

  1. Assessment – Identify which part of the SI joint is involved (lesser arm, greater arm, apex, base, etc.).
  2. Ligament Reboot – Using manual therapy (like TLS and pumping) to reactivate proprioceptors and restore communication.
  3. Fascial Work – Addressing deeper fascial chains that are often involved but ignored.
  4. Specific Exercise – Not just general glute or core work, but targeted movement based on what your body needs.

Muscles involved include:

  • Piriformis
  • Glute Max (deep + superficial)
  • Glute Med
  • Obturatorius
  • Iliopsoas

But again, it’s not just about muscles. It’s about chains. You have to treat the whole system.


Don’t Google “3 Moves for SI Joint Pain” (Please)

Generic exercises might help a little—or they might make things worse.

Why? Because SI joint issues are specific. The dysfunction could be from one of many regions within the joint or even a combination of them. Without proper assessment, you’re guessing.

And in the body, guessing is a great way to stay stuck.


Want to Learn More?

I share more like this every week—so subscribe, share, and join the conversation. If you’re ready to go deeper:

Don’t let a misunderstood joint hold back your potential. Fix the foundation—so the rest of your body can finally thrive.

it’s not just working out, it’s building a foundation for a better life.

Find out more @

Facebook

BlueSky

Pinterest

Instagram

Youtube

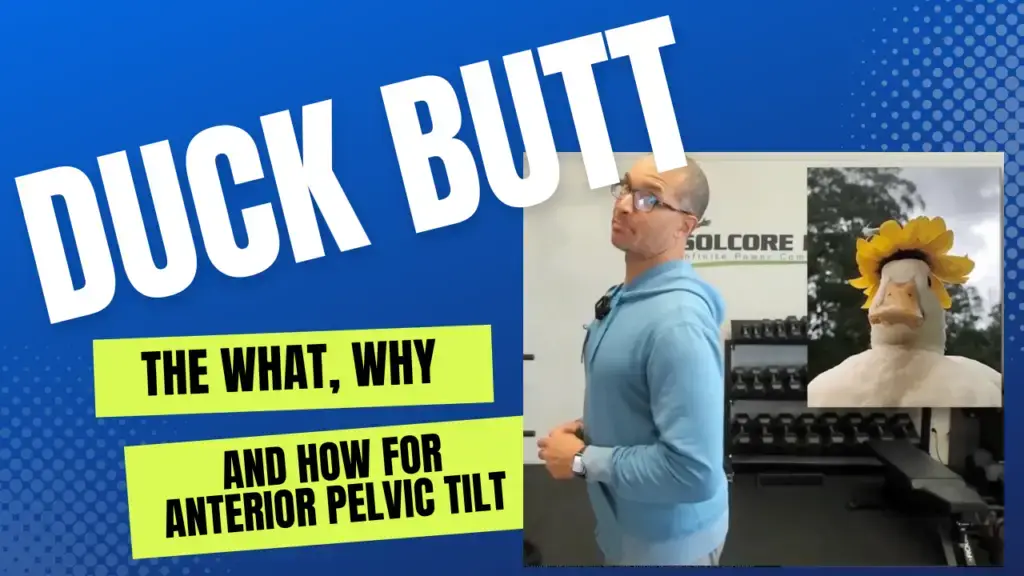
Discover the Hidden Dangers of Anterior Pelvic Tilt

“Duck butt” might sound funny, but anterior pelvic tilt is no joke.

It’s a common postural issue where your pelvis tilts too far forward—and it’s one of the main reasons people suffer from chronic lower back pain, disc bulges, SI joint instability, and more.

I’m Ekemba Sooh, SomaTherapist and SomaTrainer. I had anterior pelvic tilt myself—and it played a major role in my L4-L5 disc bulge and sciatic pain. No trainer, therapist, or doctor ever told me the tilt was the root cause.

They were treating symptoms. Not the source.

Click on the image to watch

What Is Anterior Pelvic Tilt?

Your pelvis naturally tilts slightly forward to support upright movement. But anterior pelvic tilt happens when this angle becomes exaggerated and stuck—creating a “duck butt” posture.

This tilt disrupts your body’s alignment and sets the stage for chronic compensation patterns. Over time, these compensations become permanent dysfunctions.


How It Becomes a Problem

Your body is a biotensegrity structure—meaning it’s designed to distribute force efficiently across the entire system. If one area tightens or weakens, your body adjusts to keep you moving. That’s compensation.

Compensation isn’t bad at first. But if left unchecked, it snowballs into bigger problems:

  • Chronic lower back pain
  • Lumbar disc issues (bulges, herniations, stenosis)
  • SI joint dysfunction
  • Pelvic floor and organ dysfunction
  • Reduced performance and poor energy transfer

It all stems from the inability to attenuate force efficiently—because the structure is compromised.


What Causes Anterior Pelvic Tilt?

Too much sitting is a big culprit. It shortens the hip flexors (especially the psoas) and weakens the posterior chain (glutes, hamstrings, spinal stabilizers).

Over time, your body learns this dysfunctional position—and your nervous system adopts it as your default.

For some, it’s even genetic. But genetics just mean you have to be more intentional—not that you’re doomed.


Why Most Approaches Fail

Typical solutions focus on isolated muscles. But your body doesn’t work in isolation—it moves as an integrated system through fascia.

That’s why general exercise, yoga, and stretching routines often fail. You feel good temporarily, but your body snaps right back to the same pattern the next day.

Why? Because you didn’t train the fascia to support a new pattern.


The Real Solution: Train Fascia + Function

To fix anterior pelvic tilt, you need to retrain your entire structure:

  • Stretch the shortened hip flexors (especially the psoas)
  • Strengthen the weakened glutes, hamstrings, and back muscles
  • Activate fascia chains, not just muscles, to build intelligent, whole-body control

The best tools I’ve found for this are osteopathic-based etiology exercises—like the ELDOA and my full training system. These methods respect how the body actually works: as a connected, intelligent, adaptable structure.


When to Start? Now.

If you’re in your 20s or 30s—start now and prevent future issues.
If you’re in your 40s, 50s, or 60s—and already feeling pain—this needs to be your primary focus.

You can’t afford to ignore anterior pelvic tilt. It’s not just a posture issue—it’s a performance killer, a pain amplifier, and a hidden driver of long-term health problems.


What to Do Next

If this resonates, here are a few ways to go deeper:


Final Thought

Anterior pelvic tilt is a structural dysfunction—but it’s also an opportunity.

It’s your body’s way of asking for smarter input. When you respond with the right training, you’ll not only relieve pain—you’ll become stronger, more mobile, and more connected to your body than ever before.

Don’t wait until things break down. Train holistically. Train intelligently. Train to support the life you want to live..

Building a foundation for a better life.

Find out more @

Facebook

BlueSKy

Pinterest

Instagram

Youtube

The Surprising Truth About Iliopsoas Muscle Pain

If you’re dealing with iliopsoas muscle pain—sometimes called psoas pain—you’re not alone. The iliopsoas plays a critical role in how your spine, pelvis, and hips move… and when it’s tight, weak, or dysfunctional, it can cause low back pain, hip pain, bursitis, pelvic issues, and more.

But here’s the real problem:
Most people—and even many professionals—oversimplify it. They give you generic psoas stretches or strengthening exercises that don’t address the full picture.

Let’s change that.

Click on the image to watch

What Is the Iliopsoas Muscle?

The iliopsoas is a deep muscle made of multiple parts: the psoas major, psoas minor, and iliacus. It doesn’t just run from your spine to your hip—it has multiple attachments at the spine, pelvis, and upper leg, making it a true tensegrity muscle in the osteopathic model.

That means it plays a central role in connecting and coordinating movement between your upper and lower body.
It also means problems with your iliopsoas don’t stay localized—they can ripple out into your spine, pelvis, or even internal organs through fascial connections.


Why Basic Psoas Stretches Don’t Work

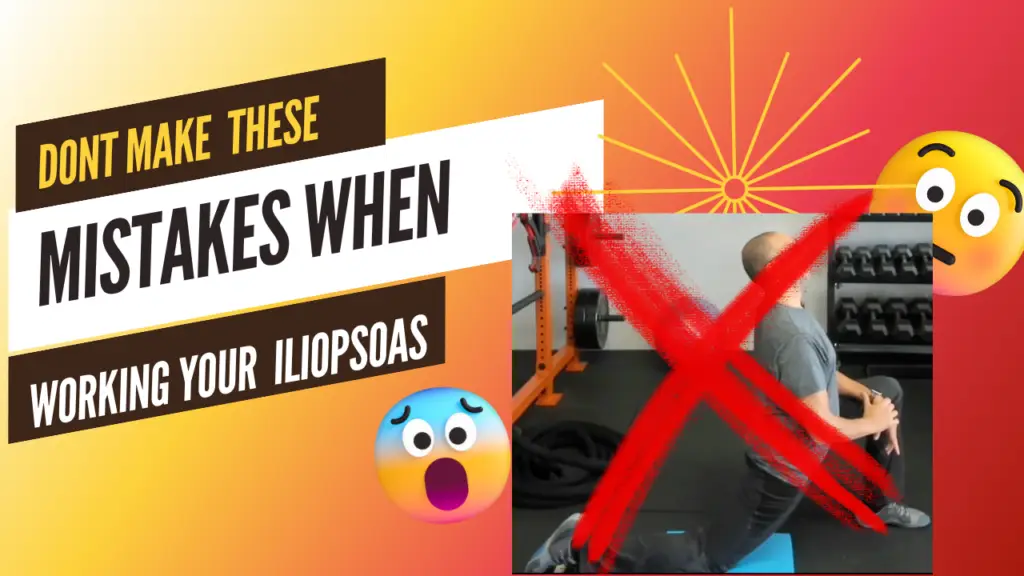
Search the internet and you’ll see the same stretch everywhere: kneeling lunge, arms overhead, arch the back, slide forward.

Sounds familiar?

Here’s what’s wrong with it:

  • It ignores the multiple fiber directions and attachment points of the iliopsoas
  • It reinforces poor spinal positioning and can compress the lumbar discs
  • It fails to address fascia, which is key for actual lengthening and balance
  • It’s based on basic anatomy—not the complex interconnections that actually matter

Worse, these stretches can aggravate spinal conditions and reinforce patterns that caused your pain in the first place.


A Holistic Way to Work With the Iliopsoas

To truly improve iliopsoas muscle function, you need a program that goes beyond muscle alone.

Enter Hill’s Muscle Model:

A true holistic approach includes:

  • The muscle itself
  • The fascia that supports and connects it
  • The ligaments and joints it influences

All three work together. You can’t isolate one and expect long-term results.


What I Do Instead

As a Soma therapist and trainer with 30 years of experience—18 under the osteopathic model—I help people move and heal holistically.

Here’s how I work with the iliopsoas:

  1. Normalize the fascia
    Fascia surrounds and runs through the psoas like a spiderweb. If it’s twisted or adhered, the muscle can’t function correctly. Manual therapy helps unwind these patterns.
  2. Myofascial stretching
    Instead of basic stretches, I use biomechanically precise postures that account for all attachments and fiber directions. These target the whole chain, not just one part.
  3. Postural release
    Sometimes, just hanging in a specific posture allows the psoas to release more deeply than any active stretch. I show clients how to do this safely and effectively.
  4. Strengthen it—correctly
    A tight muscle can also be weak. I use movement patterns that strengthen the iliopsoas in the right directions, based on how it truly functions.
  5. Address the surrounding system
    That includes spinal stabilizers like the transverse spinalis, longissimus, iliocostalis, and lats. Muscles don’t work in isolation—they work in systems.

Want to Try a Simple Postural Release?

Here’s a safe, passive way to begin releasing the iliopsoas:

  • Sit on the edge of your bed or a bench
  • Lie back and hold one knee to your chest
  • Let the other leg hang off the edge
  • Hold for as long as is comfortable
  • Switch sides

This gentle release works with the body rather than forcing it.


Ready for Deeper Change?

Most iliopsoas issues don’t get better with surface-level fixes.
You need to work with the cause, not just the symptoms.

If this resonates with you, I have a few resources:
Free ResourceTo Get Mobile, Get Out of Pain, and Live the Life of Your Dreams
Consultation – Want to work together? Book a time via the Calendly link

You’re capable of more than you think. Allow the process to change you—and you’ll be amazed at what your body can do.

Building a foundation for a better life.

Find out more @

Facebook

BlueSky

Pinterest

Instagram

Youtube

Discover the Game-Changing Solution for SI Joint Dysfunction

SI joint dysfunction can be miserable—constant pain in different places, no clear answers, and “fixes” that don’t work. It’s one of the most stubborn and misunderstood issues in the body. But there is a solution.

Check out the full video below by clicking the image.

Understanding Your SI Joint

Let’s start with the basics.
SI stands for sacroiliac. Your sacrum (the triangle bone between your glutes) connects to your ilium (your hip bones) at two SI joints, shaped like boomerangs.

Many people confuse SI joint dysfunction with low back pain. But they’re not the same—and mislabeling it can send you down the wrong treatment path.

Your SI joint is a true joint with cartilage, a capsule, ligaments (like the anterior and posterior sacroiliac ligaments), and muscular support from the piriformis, glutes, psoas, obturator internus, and more.

This joint moves—primarily in oblique torsions—but it can also develop 20+ pathological movements (and infinite combinations of dysfunction).


Why SI Joint Issues Don’t Go Away

Your SI joint takes on ascending and descending forces through your body. It’s involved when you sit, stand, walk, squat—pretty much everything. So when it’s not functioning well, everything suffers.

In my own case, I had no SI joint pain at first. But a small dysfunction there led to L4-L5 disc compression, sciatic pain, and long-term compensation patterns.

The problem? Most people treat symptoms, not causes. And SI joint dysfunction is often the hidden cause behind hip, knee, foot, and even spinal issues.


What Doesn’t Work (And Why)

  • Popping it back into place
  • Rolling on a foam roller
  • Generic exercise routines
  • “Fused” joint logic that ignores anatomy
  • Thinking your SI joint doesn’t move

These approaches either oversimplify the problem or completely miss it.


What Actually Works

  1. Assessment First – You need someone who understands the full range of SI joint pathologies.
  2. Work With Ligaments – Smart ligaments become “dumb” when dysfunctional. Treatment and manual therapy must re-educate them.
  3. Use Targeted Exercise – The most powerful SI joint reset tool I’ve found is the ELDOA method. These postural exercises use fascial tension and soft tissue to normalize the joint and retrain proprioception.

The SI joint doesn’t exist in isolation. It’s part of a complex network—and requires a fascia-based, integrative strategy that honors how the body truly works.


If you were hoping for a one-size-fits-all “SI joint routine,” I won’t insult your intelligence.

That’s not how the body works—and it’s why so many people stay stuck.


What to Do Instead

If you want to address your SI joint dysfunction at the root, here are three free ways to take the next step:

📘 Download the Free Guide:
“How to Move Better, Get Out of Pain, and Live the Life of Your Choosing.”
Instant access. Zero fluff.

💬 Book a Free Consultation:
Tell me where you are, what you’re doing, and where you want to go. I’ll find the holes in your system and help you chart a real path forward. No obligations—just clarity.


You don’t have to guess. You don’t have to suffer. And you don’t have to keep trying things that don’t work.

You just need a system that sees the whole picture—and a guide who understands how to help you work with it.

Let’s get started.

it’s not just working out, it’s building a foundation for a better life.

Find out more @

Facebook

BLuesky

Pinterest

Instagram

Youtube

Why Most Hip Flexor Stretches Don’t Work

Just the other day, I was talking to a client about tight hip flexors—a problem a lot of people develop after years at a desk job. He showed me several stretches he’d picked up from physical therapy, yoga, or the internet, but none were delivering the relief or mobility he needed.

Here’s the thing: not all stretches are created equal, especially if you want precise, lasting results. For muscles to lengthen properly, you need a fixed point—something to “anchor” against. Imagine trying to stretch a rope without one end tied down; you might feel something, but nothing real changes.

Common moves like standing quad pulls or basic yoga lunges don’t always get the job done. The standing quad pull lacks a stable anchor, so it doesn’t target the hip flexors well. The yoga lunge opens up the front of the hip area, but may only create a general stretch, missing the key muscles you want: the psoas and rectus femoris.

Both muscles cross multiple joints and require different positions to stretch them properly. The psoas needs your spine lengthened and tall; the rectus femoris needs both the hip and knee under tension—pulling your heel to your glute with the hip extended. Each area demands its own unique approach.

Bottom line: copying popular stretches doesn’t guarantee improvement. You need to understand what you’re targeting and how to position your body for change. If you feel stuck or aren’t seeing progress, it’s time to seek deeper education—or ask questions below!

Ready to learn the right way? Inside [Myofascial Stretching: The Best Total Body Active Stretches], you’ll get clear, actionable instructions to unlock your hips and improve your mobility for good.

It’s not just working out, it’s building a foundation for a better life.

Find out more @

Facebook

LinkedIn

Pinterest

Instagram

Youtube

Bluesky

Leg Length Discrepancy DO You Have It? WHY It Matters. WHAT To Do.

leg length discrepancy

Ever feel like your body is off-balance one hip higher, your shoes wear unevenly, or odd aches pop up in your knees, hips, or back? If so, you might have a leg length discrepancy and yes, it matters more than you think. This issue can have a direct impact on movement, posture, and discomfort throughout your body.

[The Ultimate Guide For A Holistic Exercises And Fitness Program]

Why Does Leg Length Discrepancy Matter?

When one leg is longer or shorter than the other—even by a small margin—it can throw your whole body out of balance. This can create issues wherever your body is weakest: hips, knees, feet, spine, or even in your digestion or thinking (thanks to nervous system compensation). Research estimates that 90% of people have some difference, but most are mild. About 20% of adults have a difference above 9mm (about 3/4 inch), which is significant enough to need support.

True vs. Functional Leg Length Discrepancy

  • True Discrepancy: One leg bone is physically shorter or longer, due to genetics, injuries, or surgeries (congenital, trauma, or after hip replacements).
  • Functional (Apparent) Discrepancy: The legs are structurally equal, but soft tissue, joint misalignments (like in your SI joint), or muscle imbalances make one leg “act” shorter. This is far more common, and easily misdiagnosed.

How Do You Know Which Kind You Have?

  • True: Only confirmed by measurements between bony landmarks (greater trochanter to lateral knee, or by X-ray).
  • Functional: May appear shorter/longer with some measurements, but really reflect pelvis, SI joint, or muscle tightness.

What Causes Leg Length Discrepancy?

  • Congenital structural differences (from birth)
  • Traumas/fractures or damage to growth plates (especially in childhood)
  • Hip or knee replacements, bone infections, tumors
  • Muscle or ligament tightness (especially hip rotator cuff, SI joint imbalance)

How Much Is Too Much?

Small differences (<10mm or 1/2 inch) rarely cause problems. Above 10mm, you’ll likely feel symptoms—back/hip/knee pain, uneven wear on shoes, or even poor posture and gait changes. Significant differences may require lifts, physical therapy, or, rarely, surgery.

What Should You Do?

1.     Test & Measure
·       Compare both bone length (greater trochanter to ankle; not just ASIS-to-malleolus, due to joint effects).
·       Assess for SI joint or pelvic involvement: Often, a rotated or flared pelvis mimics a true discrepancy. Address this with appropriate therapy, not just a heel lift.
2.     Address Functional Discrepancies First
·       Target soft tissue and muscle imbalances, especially pelvic muscles and deep rotators (obturators, gemelli, piriformis, quadratus femoris).
·       Stretch AND strengthen—each muscle may need a different “counteraction” exercise. Check both sides to keep your pelvis balanced.
·       Avoid using heel lifts for purely functional causes, as they can reinforce imbalance.
3.     Stretching & Mobility Work
·       Find which stretches are hardest for you—those are probably your critical areas.
·       Don’t just focus on the “short” side—balance both.
4.     Know When to Involve a Specialist
   If you truly have a bone length difference >1/2 inch and symptoms persist, a skilled therapist or ortho can guide treatment, which may involve lifts, therapy, or rarely surgery.

Key Takeaway

Don’t assume all leg length differences need a “fix.” Find out whether yours is structural or functional, treat what you can, and always address muscle and joint imbalances alongside any other interventions. Your entire body from head to toe will thank you.

it’s not just working out, it’s building a foundation for a better life.

Find out more @

Facebook

LinkedIn

Pinterest

Instagram

Youtube

Bluesky

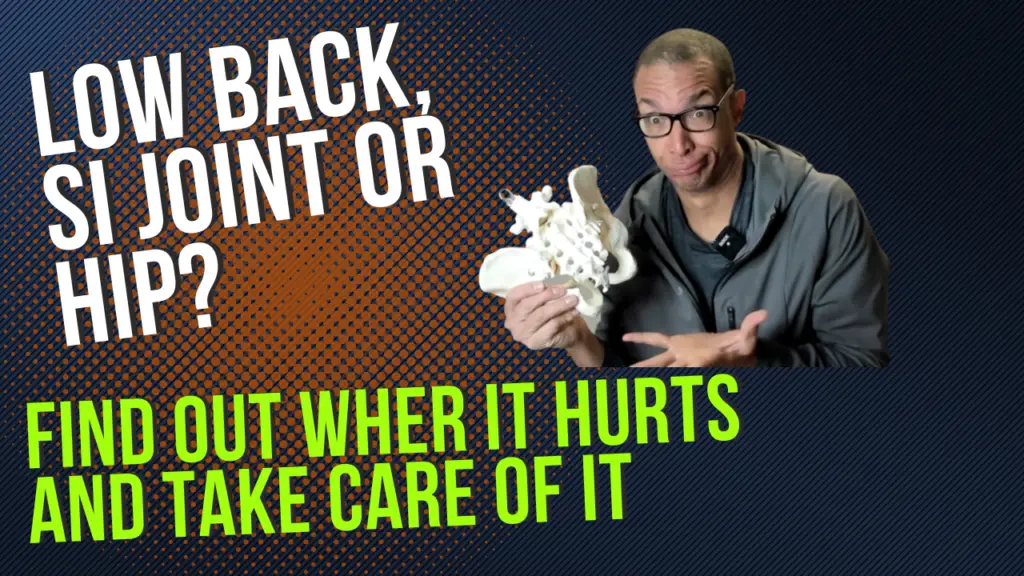
How to Tell if It’s Low Back, SI Joint, or Hip Pain

back pain diagnosis

Click on the image to watch the full video

Ever feel a nagging ache, sharp jolt, or deep stiffness somewhere around your lower back, hip, or pelvis—but can’t tell exactly where it’s coming from? You’re not alone. These areas are interconnected and can easily “refer” pain to each other. Pinpointing the true source is key—since the wrong approach may not only fail to solve your pain, but actually make it worse.

Why Accurate Diagnosis Matters

Each area low back, SI joint, hip has its own causes, pain patterns, and best next steps. Back pain can show up from disc/herniation, strained ligaments, facet joints, or nerve compression, often signaled by pain with bending, twisting, or sitting. SI joint issues cause sharp or aching pain at the dimples above your buttocks, sometimes radiating to the hip or thigh, usually worse with transitions like standing, stairs, or getting up from a chair. Hip pain tends to show deep, achy, or sharp pain in the groin, outer hip, or buttock, and is aggravated by walking, weight bearing, or rotating the leg.

[OMT: Osteopathic Manual Therapy]

Where Does Your Pain Fit?

  • Low Back: Pain between lower ribs and pelvis, worse with bending/lifting, may radiate down into the buttocks or leg (sciatica).
  • SI Joint: Achy, stabbing pain at the upper buttock “dimples,” worse with sitting, stairs, standing from a chair, or rolling in bed.
  • Hip: Deep, aching or sharp pain in front of the groin, outer hip, or buttock, worse walking or rotating the leg, or standing up.

Because these tissues share nerves and muscle attachments, problems frequently overlap. SI joint instability can create tension and pain in both the low back and hip, and vice versa.

What to Do Next

  • Get Assessed Holistically: A great intake includes physical tests, history, movement screening, posture, past injuries, and lifestyle.
  • Prioritize Mobility and Balance: Include corrective exercises for the suspected culprit, but address every link in the chain—muscles, joints, connective tissue, and posture.
  • Integrate Injury Prevention: Pain in these regions can lead to compensation injuries, so proactive balance, core work, and muscle activation are essential.
  • Choose the Right Help: If your symptoms persist, get help from a pro who specializes in holistic, functional movement (not just isolated fixes).

Takeaway:

The right approach starts with locating your pain and understanding your personal pattern. With clear information and targeted training, you can restore efficient movement without setbacks or guesswork.

it’s not just working out, it’s building a foundation for a better life.

Find out more @

Facebook

LinkedIn

Pinterest

Instagram

Youtube

Bluesky

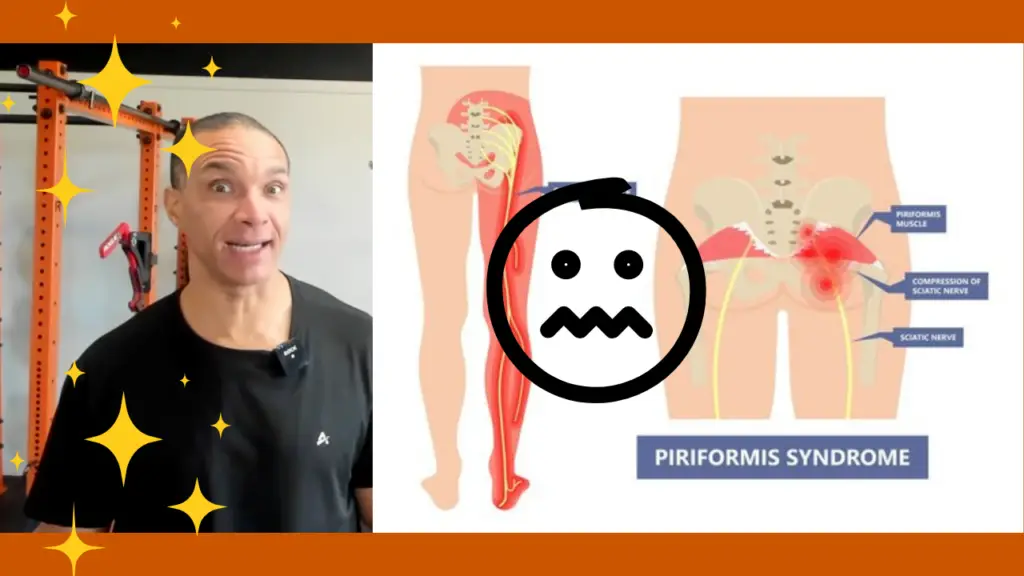
Piriformis Syndrome Treatment: STOP Foam Rolling!

Diagram showing piriformis muscle and sciatic nerve path

Click to watch the full video

If you’ve struggled with pain deep in your glutes, you may have heard the term piriformis syndrome. Many people confuse it with sciatic nerve pain, and unfortunately, one of the most popular “solutions” — foam rolling with a tennis ball often makes the problem worse.

This article will clarify what piriformis syndrome truly is, how to distinguish it from sciatica, why aggressive rolling can be harmful, and what safe, effective treatment really looks like.

The piriformis is a small muscle deep beneath your glute max. It runs from inside your pelvis to your thigh bone’s greater trochanter. It’s crucial for external rotation of the hip and interacts with your pelvic floor muscles including the obturator internus, coccygeus, and levator ani, affecting pelvic balance, posture, and organ support.

The piriformis exits the pelvis via the greater sciatic notch, sharing a delicate passageway with the sciatic nerve itself. Depending on individual anatomy, the nerve may run above, below, or even through the muscle, which helps explain why piriformis dysfunction is often confused with or causes sciatic-type pain.

Osteopathic Manual Therapy

It’s vital to distinguish between true sciatica (usually from lumbar spine issues) and piriformis syndrome. Positive results on the straight leg test often indicate nerve root issues from the spine, while the FAIR test (flexion, adduction, internal rotation) and outward foot rotation when lying supine may reveal piriformis-specific problems.

Should you stretch or strengthen the piriformis? In reality, most people need both. The piriformis often becomes both tight and weak. Its action is external rotation — stretching involves internal rotation, and strengthening involves careful, supported external rotation. Always address these needs within the context of whole-body, fascia-oriented chains.

Why is foam rolling a bad idea? The piriformis is layered among sensitive fascia and ligaments with the sciatic nerve dangerously close. A tennis ball cannot target it accurately and risks compressing nerves and delicate structures, often raising inflammation and aggravating your symptoms.

Instead, sustainable treatment for piriformis syndrome demands:

  • Professional diagnosis (to exclude spinal causes)
  • Targeted stretching and strengthening, done within the body’s connected chains
  • Skilled therapy to restore fascial and joint balance
  • Avoiding movements and modalities that could worsen irritation

The underlying theme is restoring overall structural balance and function not just “treating one muscle.” If you rebalance how your pelvis and hips work, pain and dysfunction often resolve naturally.

If you’re currently frustrated by piriformis syndrome and repeated failed attempts at relief, it’s time for a change. Respect your body’s architecture and fascia, and choose precise, guided exercises and therapy.

Ready for Relief?

If you’re ready to move beyond pain and get clear on lasting solutions, Book a free consult. On your call, we’ll pinpoint what’s holding you back and build a personalized plan to get you strong, mobile, and pain-free.

it’s not just working out, it’s building a foundation for a better life.

Find out more @

Facebook

LinkedIn

Pinterest

Instagram

Youtube

Bluesky