Injury Prevention

Train for the You 10 Years from Now: Preventive Movement for Lasting Health

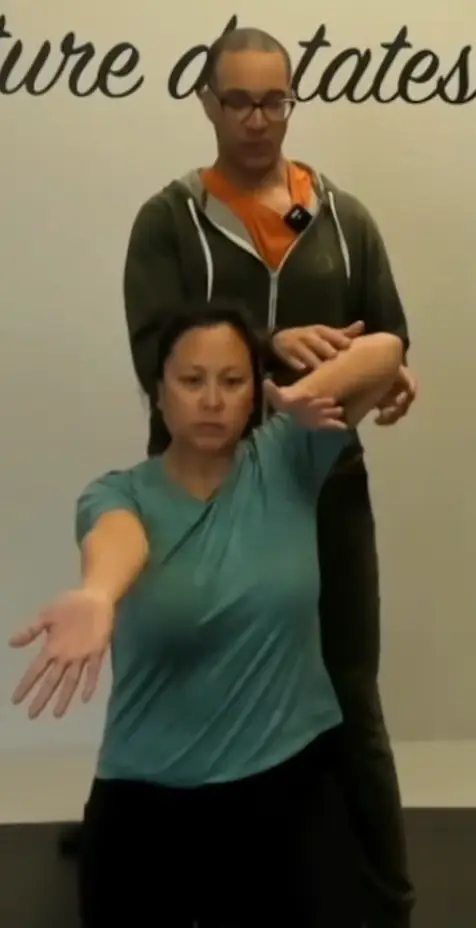
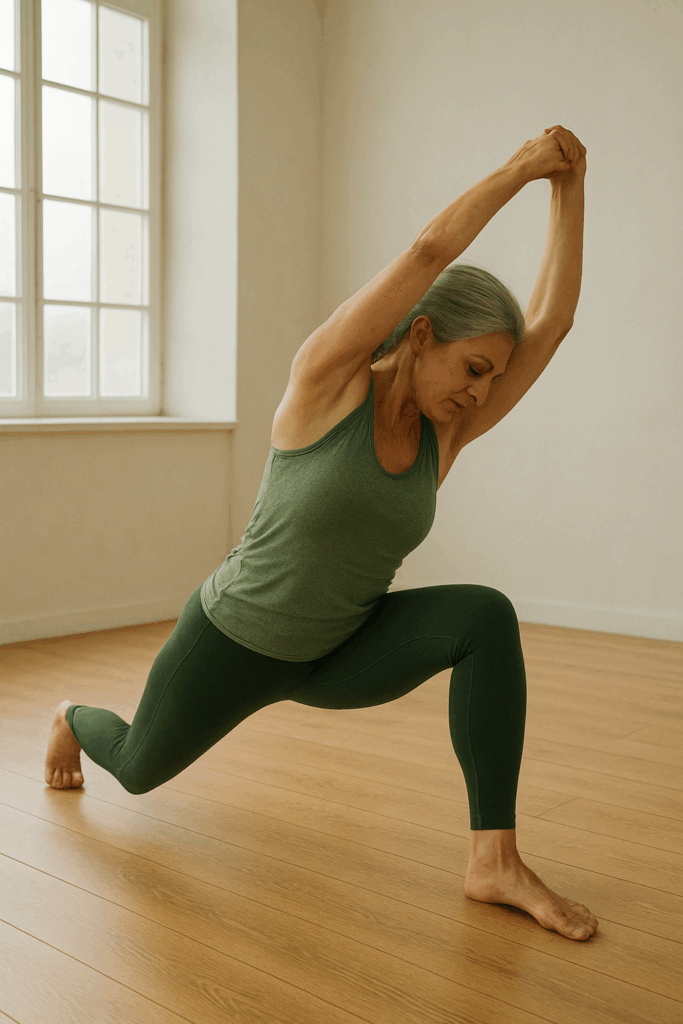
60 year olds doing iliopsoas Myofascial Stretch for preventive training for long-term health

When it comes to your health, the smartest thing you can do is stop thinking short-term. Preventive training for long-term health means investing in how your body functions years from now—before injuries or limitations take hold.

This is the essence of preventive training for long-term health. It’s not reactive. It’s proactive. And it’s one of the most powerful ways you can take control of your aging process—starting today.

You Are Your Future

Here’s the truth: the body you’ll live in 10 years from now is the one you’re building right now—through your habits, your movement, your training, and even your rest.

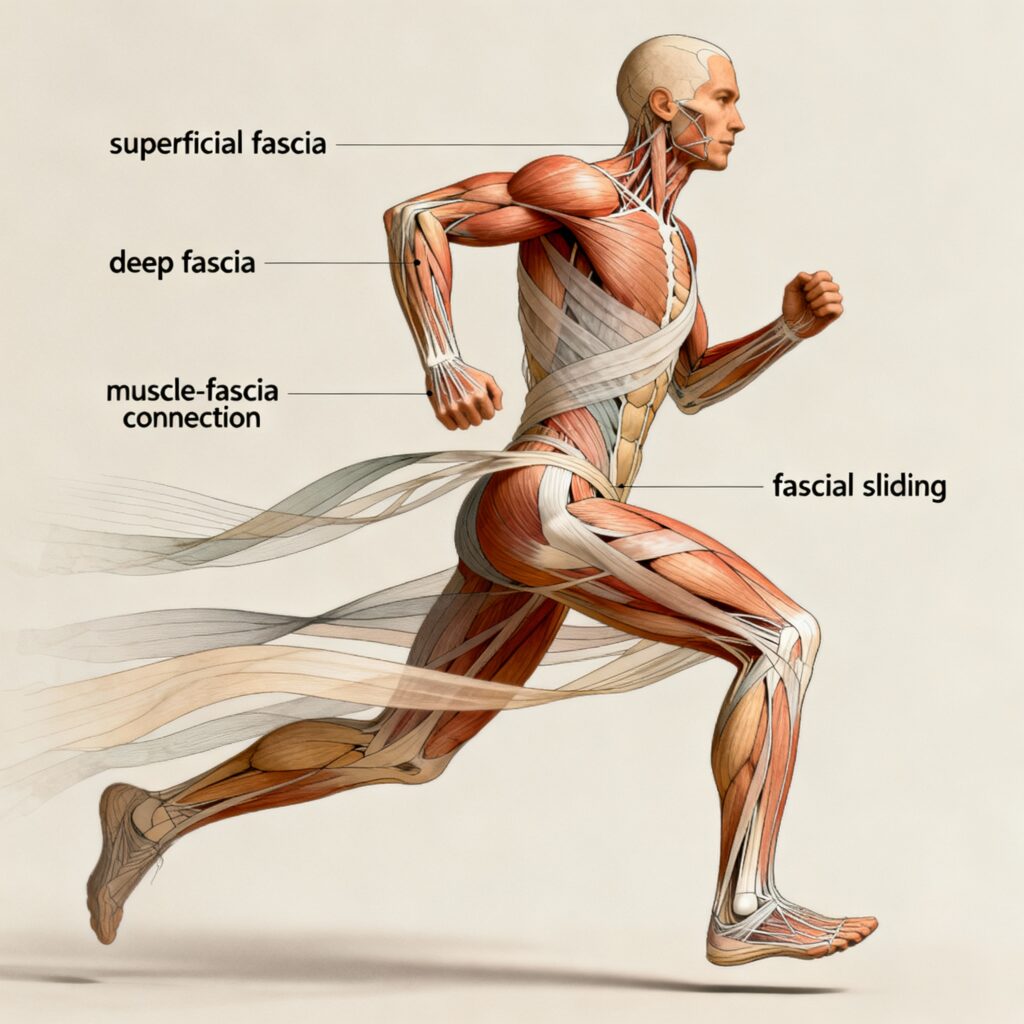
Fascia doesn’t just react to injury. It adapts to how you move and load it every day. This means today’s imbalances become tomorrow’s dysfunction—unless you interrupt the pattern.

That’s why at SolCore Fitness & Therapy, we don’t just train you to feel better now. We teach your body how to age better—intelligently, holistically, and with a deep respect for structure and complexity.

A Holistic Approach = A Long-Term Win

Preventive training isn’t about going harder. It’s about going wiser.

That’s where our fascia-based system shines. Instead of isolated muscles, we work with your full structure. Instead of chasing symptoms, we build resilience from the inside out.

Want to see how it works? Read our Ultimate Guide for a Holistic Fitness Program to get a feel for the principles we use every day.

And here’s a great overview from the National Institute on Aging about the role of physical activity in preventing age-related decline.

Future You Will Thank You

So the real question isn’t whether you should train.

It’s this: What kind of body do you want to live in 10 years from now?

Let’s build that—together.

👉 Book a Complimentary Consultation Today and start moving toward the future you deserve

Why Your Spine Isn’t Rehydrating Overnight — and What to Do About It

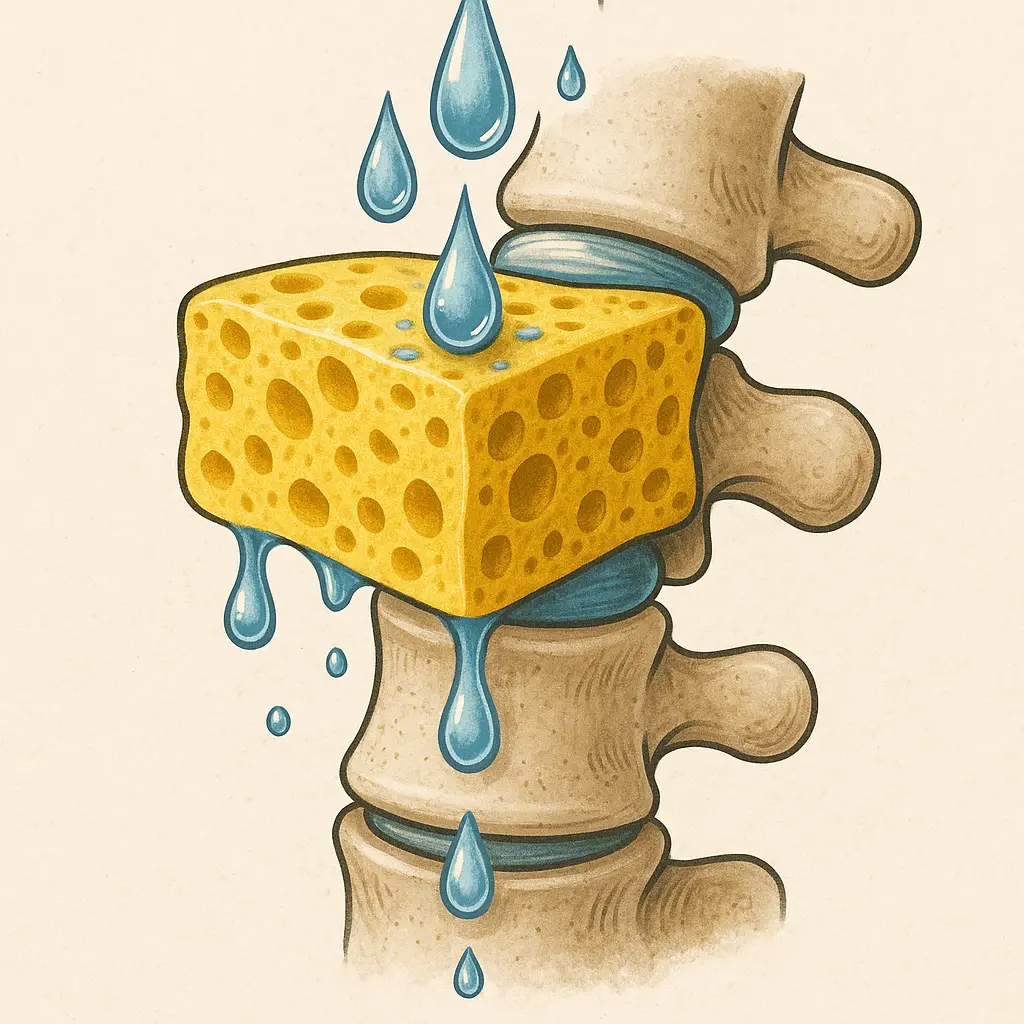
disc hydration ELDOA. Illustration of a yellow sponge between two vertebrae with water droplets rehydrating the spine — metaphor for disc hydration through ELDOA and TV Stretching.

💡 Your spinal disc doesn’t just “recover” with hydration while you sleep. It responds to what you do before you rest.


🟠 Your Discs Aren’t Lazy — They’re Just Dehydrated

Most people think spinal health and disc hydration is a waiting game: take the pressure off, rest a bit, and hope the body “fixes itself.” But that mindset overlooks one of the most basic truths of physiology: structure needs input.

Your intervertebral discs — the soft cushions between each vertebra — don’t have a direct blood supply. They rely entirely on your movement, posture, and hydration mechanics to stay supple and healthy. If you’ve ever felt stiff or achy in the morning despite a “good night’s sleep,” there’s a reason for that.


🧠 The Science of Disc Hydration — in Plain Speak

Discs rehydrate in two ways:

1. Passive Rehydration (Osmotic Pressure)

When you lie down at night, gravity is removed. This creates an osmotic gradient — water is slowly drawn back into the discs. Think of it like setting a sponge in a shallow bowl of water. It’ll eventually soak in… but only as much as its tissue allows.

2. Active Rehydration (Mechanical Stimulus)

When you de-coapt your spine through targeted movement — like ELDOA stretches — you create negative pressure and fascial tension. This primes the disc to pull in more fluid. It’s like squeezing and releasing that sponge right before soaking it — it absorbs far more water when prepped this way.


🌙 Why ELDOA “TV Stretching” Works So Well for Disc Hydration

“TV Stretching” is the term we use for doing your ELDOA decompression work 1–2 hours before bed. This timing allows you to:

  • Decompress your spine actively
  • Prime your discs to absorb water
  • Then follow it with passive overnight rehydration

You’re combining two mechanisms, not relying on just one.

This is especially effective if you’re dealing with:

  • Degenerative disc issues
  • Postural compression from sitting or lifting
  • Chronic stiffness that doesn’t resolve with sleep alone

🛠 Try This Tonight: 2-Step Reset (L5/S1 Focus)

Before bed, try this:

  1. Get into the L5/S1 ELDOA position, but keep your knees bent.
    This protects the popliteal artery, which runs behind the knee and can be compressed during long-duration stretches with extended legs.
  2. Stay in the posture passively — just hold the position and breathe for 5, 10, or even 15 minutes.
    You’re not actively reaching or tensioning yet — just letting the spine settle and decompress through position alone.
  3. Then do a single, focused ELDOA hold — no more than 1 minute.
    Engage the full fascial lines. Create vertical tension. Be precise.
    (Too long and you’ll reverse the effect — ELDOAs are about quality, not duration.)
  4. Lie down and rest.
    This primes your spine for both active and passive hydration during the night.

Try this for a few nights and feel the difference. It’s a strategy rooted in somatic intelligence — not guesswork.


🌀 Recovery Starts with Awareness

This is about more than hydration — it’s about being in your body enough to know what it needs and when.
If you’re curious how body awareness and healing are deeply connected, this Psychology Today overview of somatic therapy breaks it down beautifully. It echoes what we practice here — movement that starts with presence, not just position.


✅ Feel Different in the Morning — Not Just Rested

If you want to feel strong, tall, and fluid in the morning, you don’t need more sleep.
You need smarter pre-sleep recovery.

This approach is simple, targeted, and doesn’t take long. But it’s rooted in deep science and even deeper respect for the body’s rhythms.

🔗 Want help applying this to your specific structure?
Book a free 30–45 minute strategy call and we’ll walk through the right ELDOA and hydration approach for your spine.

Follow the Thread—Where Movement, Fascia, and Freedom Align

Find more insight, reflection, and fascia-informed care across the platforms where we stay connected:

Facebook

Blue Sky

Pinterest

Instagram

Youtube

Your Body Is Not a Tool: It’s a Tensegrity System

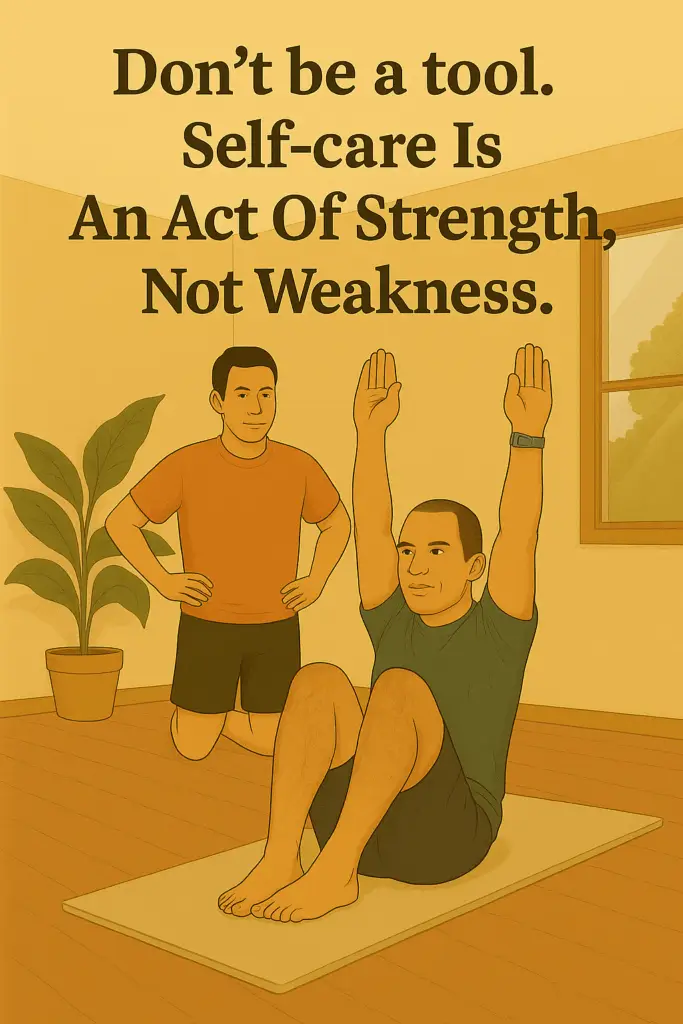
Mens Health. Your Body is not a tool - tensegrity system body

Your Body Is Not a Tool—It’s a Tensegrity System

Most men treat their body like a tool.
Use it. Push it. Sharpen it. And when it breaks—tape it up and keep going.

But what if that’s the wrong model?

What if your body is less like a hammer… and more like a suspension bridge?

🧬 What Is a Tensegrity Structure?

Tensegrity is a principle of architecture and biology that describes how a system holds its shape through tension and compression in balance.

In your body, that means:

  • Fascia suspends bones, not just muscles.
  • Muscles work in continuous loops—not linear pairs.
  • Stability comes from distributed force, not just strong joints.

This concept is well explored in tensegrity structures in the body, where bones float in a sea of soft tissue and movement is the result of dynamic relationships—not rigid levers.

When one area tightens or collapses, everything else has to adjust—sometimes with pain, sometimes with compensation.

🧠 The “Tool Mindset” Is Costly

Most men were taught to push through discomfort, to train harder, and to earn results through effort alone.

But this approach overlooks the systemic balance that your body depends on:

  • Strength in one plane + stiffness in another = injury
  • Big lifts without joint hydration = compression, not growth
  • No fascia prep = poor rebound and reduced circulation

Fascia doesn’t just wrap muscles—it governs how force travels through the body. Fascia’s role in structural balance is central to preventing overload and sustaining performance.

A tensegrity system doesn’t respond well to brute force. It needs strategy.

🔧 The Shift: From Hammer to Suspension Bridge

What if instead of forcing your body, you prepared it?

  • What if warm-ups focused on joint mobility and fascial hydration, not just heat?
  • What if your training helped restore balance before pushing capacity?
  • What if you saw self-care as performance insurance, not a luxury?

🛠️ ELDOA: Biotensegral Fitness in Action

This is where tools like ELDOA, myofascial stretching, and segmental reinforcement come in.

They create:

✅ Precise decompression
✅ Vector-aligned tension
✅ Functional hydration of discs and joints
✅ Endurance without compensation

It’s not flashy. But it works. And it lasts.

In fact, fascia-related dysfunction is often a root cause of training breakdown. Learn more about overuse injuries and movement compensation and how smarter prep can make the difference.

📣 Final Thought: Pride in Structure

During Men’s Health Month and Pride Month, the message is simple:

➡️ Pride in yourself starts with knowing yourself.
➡️ You can’t give what you don’t have.
➡️ A resilient body supports a fulfilling life.

The goal isn’t to push harder—it’s to train smarter.
Your body isn’t a tool. It’s a system. Treat it that way—and it will carry you far.

Want to experience what real body architecture feels like?

Follow the Thread—Where Movement, Fascia, and Freedom Align

Find more insight, reflection, and fascia-informed care across the platforms where we stay connected:

Facebook

Blue Sky

Pinterest

Instagram

Youtube

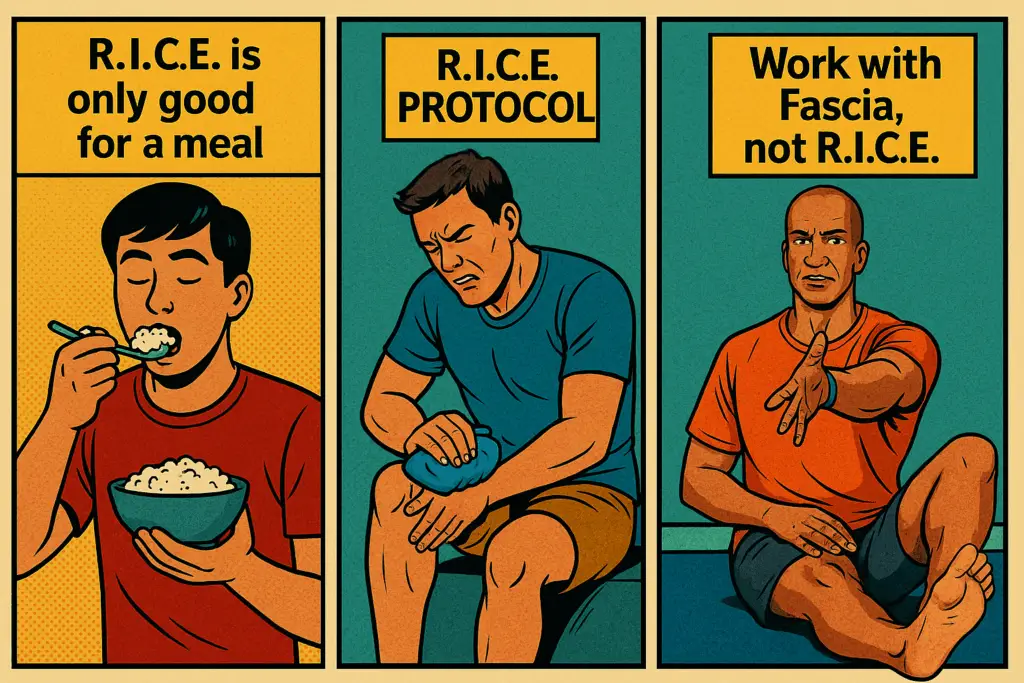
Fascia Healing vs. R.I.C.E: Why Movement Beats Ice for Recovery

R.I.C.E

❄️ Why R.I.C.E. Isn’t the Best Way to Heal

Most of us grew up hearing the same advice when we got hurt:

Rest. Ice. Compress. Elevate.

This is called the R.I.C.E. method—and while it once seemed smart, even Dr. Gabe Mirkin, who coined the term in 1978, has since retracted it. In his article “Why Ice Delays Recovery,” Dr. Mirkin explains that excessive icing can hinder the body’s natural healing process.

Why? Because fascia healing doesn’t happen by stopping the body. It happens through flow.

💡 What’s Wrong With Icing Too Much?

Ice helps right after an injury—for the first 12 to 24 hours.
It slows swelling and bruising, and that’s useful.

But after that? ❌
Too much ice can block the very process your body needs to heal.

It slows blood flow, pushes out the helpful cells, and delays your recovery.

🔬 Fascia Healing Happens in 3 Natural Phases

Let’s break it down simply. When you get hurt or sick, your body starts healing in three steps:

1️⃣ Vascular Phase(2 parts): First Comes the Swelling

When you get hurt, your body quickly sends more blood to the area.
This is called vasodilation, and it’s the first part of the healing process.
All that blood brings oxygen, nutrients, and important “emergency signals” that call for help.

🧊 This is the short window where ice can help.
If there’s a lot of swelling or bruising, icing during the first 12 to 24 hours can slow it down and protect nearby tissues.

But then the second part kicks in…

Now, tiny blood vessels open up and allow special immune helpers to pass through.
These cells begin preparing the area for repair. This part needs flow, not freezing.

So ice is only useful in the very beginning.
After that, movement, hydration, and gentle pressure help your body do its job.

2️⃣ Cellular Phase: The Cleanup Crew Arrives

Next, special immune cells move in.
They clean up the mess, fight off problems, and prepare your body for repair.

But if you keep icing?
It’s like putting a roadblock in front of those helpful cells.

3️⃣ Repair Phase: Tissue Starts to Rebuild

Once your body starts to rebuild, the goal isn’t to stay still—it’s to support the process.

Your fascia, muscles, and joints need:

  • Movement to keep fluids flowing
  • Breath to improve circulation
  • Light pressure to guide repair without overload

These things don’t just “speed up” healing—
They help your body do what it already knows how to do.

Cartoon illustration showing fascia healing response—red immune cells with weapons and green repair cells with tools working together inside the body

At SolCore Fitness we don’t fight the body’s response. We work with it—through guided movement and hands on treatment with methods like ELDOA, myofascial stretching, fascia-based exercise and fascial pumping to help your body heal with its natural rhythm.

These are the tools that work with your fascia, not against it.

This is where fascia healing really begins.
New tissue is built. Fluid clears. Your body restores balance.

But here’s the key:
✅ This only happens if there’s movement, hydration, and gentle pressure.

🧘‍♂️ What Helps Fascia Heal Best?

  • Short-term ice (only in the first 12–24 hours)
  • After that:
    • Breathing
    • Gentle movement
    • Techniques like pumping and stretching

At SolCore Fitness, we use methods like ELDOA, myofascial stretching, and fascial pumping to help your body heal with its natural rhythm.

These are the tools that work with your fascia, not against it.

🚫 Don’t Freeze the Flow. Support It.

Your fascia isn’t just a tissue—it’s a system.
It thrives on movement, hydration, and flow.

The R.I.C.E. method stops that flow.
But fascia healing needs it to recover.

✅ What You Can Do Today

  • Got an old injury that won’t heal?
  • Or a new one you’re icing too long?

Try fascia-first movement instead.
Give your body what it’s really asking for: flow, not freezing.

💆‍♂️ Want to Learn How to Take Better Care of Your Fascia?

If you want to move better, feel stronger, and truly support your body’s natural healing…

Discover the power of Osteopathic Manual Therapy.

It’s one of the most effective ways to restore balance, reduce pain, and help your fascia heal the way it was designed to.

Follow the Thread—Where Movement, Fascia, and Freedom Align

Find more insight, reflection, and fascia-informed care across the platforms where we stay connected:

Facebook

Blue Sky

Pinterest

Instagram

Youtube

Boost Immunity By Working Out Like This

Ever wondered how your body’s connective tissue—your fascia—could be playing a powerful role in your overall health and immune system?

We already know that exercise helps improve strength, posture, mobility, endurance, and even your mood. But what’s often overlooked is this: you can boost immunity by working out… if you do it the right way.

The key is specificity.

Click on the image to watch the full video

SolCore Therapy and Fitness

Why Random Movement Doesn’t Cut It

I call it “random acts of movement.” You go for a walk, take a class, do a few stretches, maybe see a practitioner when something hurts. You’re doing something—but there’s no strategy behind it.

And when there’s no strategy, your body doesn’t respond the way you want. In fact, it can start to fall apart because neglected areas accumulate dysfunction.

If you want better immunity, you need a focused program—just like you’d need one to build strength or endurance.


How Structure Affects Immune Function

Your body functions best when its structure supports its purpose. Muscles, bones, fascia, ligaments, and organs all work together. If you want your body to think better, digest better, move better—and yes, respond better to threats—you need to make sure your structure is aligned and functioning well.

Let’s look at the immune system specifically:

  • Your lymphatic system is a major player in immune defense.
  • It flows through key ganglion points: your clavicles, cysterna chyli (around T12), and cloquet ganglion (pelvic area).
  • These areas are surrounded by fascia, which influences how well everything moves and drains.

If your posture is misaligned—like in a typical forward head posture from sitting all day—you’re compressing areas like the clavicles, reducing lymph flow. That alone limits your immune system’s ability to function.


The Role of Fascia in Immune Health

Your fascia isn’t just “white stuff” between muscles. It’s alive and intelligent, involved in protection, communication, and healing.

But many mainstream techniques abuse it. Take foam rolling: people roll aggressively over their inner thighs where many lymph nodes live, crushing tissue that’s meant to protect you. That’s not recovery—it’s self-sabotage.

To boost immunity by working out, you need to:

  • Understand fascial chains
  • Train with posture and structural integrity in mind
  • Avoid overstimulating or damaging key immune zones
  • Keep fascia hydrated and responsive through motion and therapy—not abuse

It’s About Flow

Think of your immune system like a river. If it flows, it’s healthy. If it stagnates, it festers. Inflammation is your body’s first line of defense, not a bad word. But it needs a clear path.

Your fascia, posture, and muscular balance create—or block—that path.


Real Application: From Concept to Movement

Let’s take the glute medius. It has three fibers, and each is connected via fascia from the foot all the way to the skull. A random clamshell isn’t going to cut it. But if you train that muscle in the context of the full chain—foot to hip to spine to shoulder—you’re strengthening tissue and improving flow.

That’s the difference between isolated training and integrated immunity-supporting training.


Beyond Workouts: Food, Hydration, and Function

Of course, immune health isn’t just about movement. It’s also about:

  • Drinking enough water (half your body weight in ounces daily)
  • Eating clean, organic, pasture-raised, nutrient-dense food
  • Supporting your gut, not just feeding it

But none of this works well if your body can’t absorb it. If your GI tract is twisted from poor structure, your supplements turn into expensive urine. If your fascia is compressed, your organs can’t perform their jobs. That’s why structure dictates function—and why movement must support structure.


Final Thoughts

I’m not going to give you a quick fix or a miracle supplement. That’s not what I do. But I will give you the truth:

You can boost immunity by working out
❌ But not with random activity
✅ It takes a specific, holistic program designed with fascia, posture, and organ function in mind

If you want to learn more, check out the free ebook below. Or book a free call with me—we’ll talk about what’s holding you back and what it would look like to train your body the way it was designed.

Drop any questions in the comments. Stay well—and keep your flow strong.

— Ekemba Sooh, SolCore Fitness & Therapy


📞 Want to Talk? Book a free call and let’s figure out what’s next for you.

building a foundation for a better life.

Find out more @

Facebook

Blue Sky

Pinterest

Instagram

Threads

Youtube

Mastering the Push Pattern: It’s Not Just For Your Pecs

Mastering the push-pattern. The bench press. The chest press. The push-up.

Whatever you call it, this push pattern is one of the seven primal movements—and it’s about a lot more than just building your pecs.

In this post (and video), we’ll explore how mastering the push pattern isn’t just a matter of technique, but of understanding the full-body biomechanics behind it. When you treat it as a holistic movement, you unlock strength, mobility, and injury resilience across your entire body.

Check out the full video by clicking on the image below.

The Push Pattern Is a Full-Body, Compound Movement

Yes, the push pattern trains your pecs—but it also demands the coordination of your:

  • Lats
  • Deltoids
  • Biceps & triceps
  • Forearms, wrists, and hands
  • Elbows, shoulders, and spine
  • Rib cage, sternum, and even your pelvis

When you perform a push correctly, these systems integrate through your fascia to create a strong, stable, and safe motion.

But when you lack strength or coordination in any of these areas, your body compensates. That’s where problems start.


Compensation = Cheating Your Body

Let’s say your pecs are underdeveloped. You can still bench press—but your body cheats by overusing the lats, delts, or even your spine.

Over time, this imbalance leads to:

  • Shoulder pain
  • Poor posture
  • Limited progress
  • Injury

To avoid this, you must train the push pattern segmentally first—then globally.


Segmental Training Before Full Patterns

Instead of jumping straight into compound movements, train the individual components:

  • Pec flies at diagonal angles to match muscle fiber lines
  • Serratus anterior strength (fan-shaped movement)
  • Rhomboid work in glenohumeral-friendly positions
  • Posterior chain and thoracic posture development
  • Psoriatic joint mobilization and therapy (behind shoulder blades)

This builds neuromuscular coordination, muscle mass, blood flow, and fascial integration—giving your body the tools to execute the push without compensation.


Choosing the Right Push Pattern Progression

Once you’ve built the foundation, you can progress the push pattern intelligently:

  • Open chain (free end movement): barbell bench press, dumbbell press
  • Closed chain (fixed end): push-ups from wall, bench, knees, or toes
  • Unilateral (one side): single-arm press
  • With rotation or combination: functional push + twist variations

Start with the basics. Don’t jump into complexity without preparation—your body will guess, and guessing equals injury.


Posture and Scapular Mechanics: Two Common Mistakes

Two things I see people get wrong constantly:

  1. Posture
    • Arching the back during a press
    • Leading with the head during push-ups
    • Lifting the head off the bench
    • Dropping the pelvis or changing spinal curves
    👉 Your posture is your training. What you teach your body under load is how it will behave.
  2. Scapular Mechanics (Shoulder Blade Movement)
    • On the way down (eccentric), scapulae must retract
    • On the way up (concentric), they must protract

If your scapulae can’t glide properly, your shoulders take the hit.


The Serratus Anterior: The Unsung Hero of Push Movements

The serratus anterior is critical for scapular protraction and stabilization. It fans out from the ribs to the shoulder blade and works alongside:

  • Rhomboids (between the scapulae)
  • Psoriatic joint (behind the scapula)

You must train it in multiple planes—not just with “push-ups plus,” but in diagonal and rotational movements to build full range and resilience.

We have a great guide to understanding holistic exercise and fitness


Why Mastering the Push Pattern Matters

This isn’t just about looking better in a t-shirt. The push pattern shows up in:

  • Daily movements (pushing open a door)
  • Sports performance
  • Fall prevention
  • Structural balance
  • Joint health

When you rush into it without preparing the body segmentally, you’re skipping steps—and your body will force you to pay attention later through pain or dysfunction.


Final Thoughts (and Your Next Steps)

Mastering the push pattern means respecting the complexity of your body.

✅ Train weak links first
✅ Stretch and mobilize where needed
✅ Build strength from the ground up
✅ Respect posture, control, and sequencing


📥 Free Resource + Call Option

🎁 Want to train smarter, not harder?
Get my free guide: 4 Steps to a Strong, Pain-Free Body to Live the Life You Choose — instant access.

Building a foundation for a better life.

Find out more @

Facebook

BlueSky

Pinterest

Instagram

Youtube

The Critical Link Between Therapy and Exercise for Peak Performance

Are you frustrated with not being able to perform at your best? Feel like you’re slowing down—even though you’re staying active and getting treatment?

Age might not be the issue.

In fact, one of the most overlooked reasons for stagnation or recurring pain is the lack of specific exercises following therapy. It’s the critical link between feeling better for a moment… and functioning better long term.

Let’s break it down.

Click on the image to watch the full video

Most Treatment Programs Miss This One Thing

I’m Ekemba Sooh, owner of SolCore Fitness and a Soma therapist and Soma trainer with over 30 years of experience. I’ve seen this pattern time and time again.

People receive treatment—massage, chiropractic, acupuncture, or even physical therapy—and then one of two things happens:

  1. They’re sent on their way with no follow-up.
  2. They’re handed a generic exercise sheet that’s not specific to them.

Sound familiar?

These routines might offer temporary relief, but they’re built on a symptom-based system. And that’s the problem. You’re more than your symptom. You’re a whole body.


Symptom-Free ≠ Problem Solved

When pain fades, most people assume the issue is gone. But unless the root cause is addressed, it’s still there—just quiet. And it will come back. It always does.

Worse, each recurrence makes the issue harder to treat. Your body adapts to dysfunction just like it does to training. Without correction, poor structure becomes your new baseline.

That’s why therapy and exercise for peak performance must go hand-in-hand—and both must be specific to you.


Why General Programs Fail (and Make You Worse)

Life brings wear and tear—whether you’re working at a desk, raising kids, or playing sports. That wear accumulates. If you don’t balance your body along the way, the result is:

  • Tight hips
  • Back pain
  • Forward head posture
  • Decreased mobility
  • Chronic injuries

And if you keep exercising on top of this dysfunction—without addressing the imbalance—you’re reinforcing bad patterns.


Example: My Own Injury and the Flawed System

In my 30s, I developed sciatic pain and disc compression at L4/L5, despite doing “everything right.” I was eating well, staying hydrated, and working out. But I wasn’t doing what my body needed.

I was given cookie-cutter solutions: press-ups, clamshells, stretches everyone gets. They didn’t help. In fact, they made it worse.

Only when I found Soma therapy and training—and began addressing my specific structure—did my body begin to change.

I wish I had this great page on OMT to help me see more on what therapy should be like. Check it out


Real Case: IT Band Pain and the Specific Fix

A client came in with IT band pain. The usual answer? Foam roll it. Maybe do clamshells. But that misses the point.

The IT band is part of a fascial network involving the glute med, glute max, TFL, and fascia lata. Each has different fibers and insertion points—and each needs to be treated differently depending on the cause.

Instead of loading an already inflamed area, we focused on:

  • Releasing tension with specific myofascial stretches
  • Avoiding overstimulation
  • Training fiber angles based on posture and tension patterns

That’s the level of specificity you need to actually heal.


A Preventive Approach That Works Long-Term

Imagine you’re 25, starting a desk job, and staying active. If you paired that lifestyle with monthly manual therapy and a 15-minute, personalized movement program 3x per week, you’d stay mostly balanced for years.

Compare that to the common story:

You work hard, never pause to rebalance, train through dysfunction, and wake up at 45 with chronic pain and poor posture. Now, reversing decades of adaptation is a long, frustrating road.

It didn’t have to be that way.


The Takeaway

You can’t train your body like a machine and expect peak performance without maintenance. Your body needs love, balance, and the right kind of input.

✅ Therapy without exercise is incomplete.
✅ Exercise without specificity is damaging.
✅ Together—and done right—they unlock your potential.


💬 What You Can Do Next

If you want a smarter, sustainable path forward, here are your options:

Let’s stop reacting and start building a body that works for the long haul.

it’s not just working out, it’s building a foundation for a better life.

Find out more @

Facebook

BlueSky

Pinterest

Instagram

Youtube

🌟 Unlock Your Full Potential: The Secret Link Between Stretching and Strength! 🌟

Stretching is often seen as a warmup, cooldown, or just something you do when your muscles feel tight. But what if stretching and strength weren’t opposites—but partners?

When done correctly, stretching not only improves mobility—it builds strength by enhancing posture, neuromuscular control, and the structural integrity of your body.

Let’s dive into how this works and why most people are doing it wrong.

Click on the image to watch the full video

Stretching Isn’t Just Passive Relaxation

The kind of stretching you see in most gyms—grabbing your foot, throwing a leg on a bench, or flinging your arm across your chest—is outdated and ineffective.

At best, it temporarily increases range of motion. At worst, it disrupts how your body generates strength.

But with the right approach, stretching can actually improve strength by working with the body’s connective tissue system—specifically, your fascia.


Stretching vs. Warming Up: Know the Difference

Let’s clear this up:

  • Warm-up: Prepares your body for activity
  • Stretching: Helps normalize tissues after activity
  • Foam rolling: Neither warming up nor stretching—and often harmful to fascia

Warm-ups increase your current potential. Stretching expands what’s possible over time. That’s why you should never stretch before intense activity—only after.


Why Fascia Matters for Strength

Fascia is the body’s connective tissue matrix. It wraps every muscle, nerve, and organ—creating structure, transmitting force, and supporting movement.

If your fascia is:

  • Dehydrated
  • Stressed
  • Tangled from poor posture or injury

…it will limit how your muscles function. Stretching properly hydrates, aligns, and restores fascia—giving your muscles a better “container” to generate force from.


The Science Behind It: Tensegrity + Hill’s Muscle Model

Your body works through tensegrity—a balance of tension and compression. When fascia is out of balance, your strength output suffers.

According to Hill’s Muscle Model, true strength depends on:

  1. Muscle fibers
  2. Tendons
  3. Fascia

Most programs only train the first two. The third component—fascia—is what holistic stretching trains directly.


Myofascial Stretching: What It Actually Does

Done correctly, myofascial stretching:

✅ Aligns fascial chains across the body
✅ Improves posture and neuromuscular communication
✅ Boosts coordination within strength movements
✅ Reduces injury risk by improving structural integrity

Think of it as strengthening from the inside out.


Why Most People Miss This

Stretching that leads to strength isn’t generic. You can’t Google a “hip flexor stretch” and expect it to improve your squat.

You need to:

  • Know which chain the muscle belongs to
  • Line up posture and joints correctly
  • Understand how it connects to your fascia and nervous system

That’s why working with someone who understands fascia is so important. I help clients do just that.


Take Care of Your Fascia Like This:

  1. Hydrate – Plain water, ½ your body weight in ounces daily, away from meals
  2. Manage stress – Nature, meditation, journaling, breathing
  3. Stretch with fascia in mind – Post-activity, aligned to your body’s specific needs

Want to Learn How to Do This Right?

If you’re just going through the motions or skipping stretching altogether, you’re missing a huge piece of the strength puzzle.

✅ Download my free guide: 4 Steps to a Strong, Pain-Free Body
Book a free consult: Let’s assess your body, your routine, and see what’s really holding you back
✅ Keep learning: Explore my channel and blog—everything here is built around a holistic, fascia-first approach

Let me know in the comments: Are you using stretching to support your strength? Do you train with myofascial chains in mind?

See you next week.

it’s not just working out, it’s building a foundation for a better life.

Find out more @

Facebook

BlueSky

Pinterest

Instagram

Youtube

Avoid These Common Mistakes When Doing Lunges

The lunge is one of the seven primal movements — foundational patterns your body needs to perform life’s activities. It shows up in everything from walking up stairs to playing sports. But despite its importance, most people do it wrong. And improper lunges can lead to dysfunction, pain, and eventually injury.

Let’s break this down holistically — the way your body is meant to be understood.

Click on the image to watch the full video

Why Lunges Matter (And Why Most People Get Them Wrong)

Lunges are a global movement, meaning they involve many joints, muscles, and fascia chains working together. But too many people skip the prep work and just jump into reps. That leads the body to “cheat” the movement — finding ways to make it happen, but not necessarily the right way.

And those cheats? They lead to bad movement patterns, compensation, and eventually breakdowns like knee pain or low back strain.

Before doing lunges, your body needs to be trained for them — especially in the areas that stabilize and coordinate your leg and pelvis.


Key Muscles You’re Probably Not Training Properly

Two of the most important muscles for safe, strong lunges are the glute medius and adductor longus. These muscles are opposites — one on the outside of the hip and one on the inside of the thigh — and they work together to stabilize your leg and pelvis.

Most people train the glute med with exercises like the “clam.” But here’s the issue:

  • The clam only targets part of the glute med (there are three fibers).
  • It usually involves hip external rotation, which recruits the piriformis — not what you want if you’re trying to isolate glute med.
  • It doesn’t train the fascia chain that connects the glute med to your entire body.

A better approach? Train each fiber of the glute med specifically, and in a position that mimics how your body moves in life — like during a lunge.

The same goes for the adductor longus. To train it properly, use motions that involve hip flexion, internal rotation, and adduction — not just squeezing your legs together.


Lunges don’t fail because your quads aren’t strong. They fail because one link in your movement chain is weak or misfiring. That’s why I teach segmental training — working specific muscles in their purest form so they can do their job when it matters.

You’re only as strong as your weakest link. If the glute med can’t stabilize your pelvis, no amount of squats, step-ups, or lunges will fix the imbalance.


Micro Movements Drive Macro Success

The lunge isn’t just a bend of the hip and knee — it involves rotation, weight transfer, balance, and fascia coordination. That’s why I always say:

“The micro movements manage the macro movements.”

When you walk or lunge, your foot and knee rotate slightly — it’s subtle, but critical. If that rotational control isn’t trained first, you’re building a house on a shaky foundation.


Fascia: The Secret Ingredient

Your fascia — the connective tissue that wraps around and links your muscles — plays a huge role in lunging. For example, the tractus iliotibial (IT) band connects fascia from the glute med, thigh, and hip down to your knee.

If that fascial line isn’t trained, it guesses what to do — which means your knee may twist, shift, or compensate.

Training fascia means educating it — not smashing it with foam rollers. That’s why our method incorporates myofascial stretches and specific movements that guide the fascia to behave correctly.


Mastering the Lunge (Once Your Body’s Ready)

Once your body is prepared, here’s how to progress your lunge safely:

🔹 Supported Lunge

Start with one leg forward, most of your weight on the front leg (90/10 split). Let the front knee bend first, followed by the back. Focus on clean, vertical motion — no tipping or twisting.

🔹 Stepping Lunge

Now add movement. Step out with your heel first, not your toe (avoid “ballerina steps”). Your step should be slightly longer than a normal stride for better alignment and control.

🔹 Multiplanar Lunges

Life doesn’t happen in a straight line — neither should your training. Practice lunges:

  • Forward
  • Diagonal forward
  • Lateral
  • Diagonal backward
  • Backward

This prepares your body for real-world movements like hiking, skiing, or playing with your kids.


Lunges Are More Than a Gym Exercise

When done right, lunges teach your body to move efficiently, absorb force, and transfer energy through your whole system. But when done wrong — with poor prep or misaligned form — they cause more harm than good.


Need Help Getting This Right?

If you want expert guidance tailored to your body, I’ve got two options for you:

See you next week — and take care of your movement!

Building a foundation for a better life.

Find out more @

Facebook

BlueSky

Pinterest

Instagram

Youtube

Gardening. The Unwanted Effects On Your Body.

🌱 Gardening Hurts? How to Protect Your Body While Doing What You Love

Gardening brings joy to so many people — the satisfaction of growing your own food or flowers, the quiet peace of working in the soil. But for many, it also brings back pain, neck stiffness, sore knees, or overall fatigue. It doesn’t have to be that way.

I’m Ekemba Sooh, owner of SolCore Fitness. I’ve been in the health and fitness field for over 30 years, working under the osteopathic model. And here’s what I want you to know:

Gardening is a sport. It’s physically demanding. And like any sport, if you don’t prepare your body for it, you’ll pay for it.

In this blog, I’ll break down:

Simple things you can do to avoid injury and feel better

Why gardening leads to pain

What’s really happening to your knees, back, and spine

Click on the image to watch the video

🌻 Gardening is More Demanding Than You Think

Here’s what most people miss: gardening places a huge load on the body.

You’re squatting, bending, twisting, lifting, and often holding these positions for long periods. That’s a combination of:

  • External load (heavy pots, rocks, plants)
  • Postural load (static crouching, awkward angles)
  • Repetitive strain (hours of weeding, digging)

One of my clients — an art teacher — came to me years ago with chronic pain. After months of work, she felt great and was living her life again… until one weekend she gardened for five hours straight. No warm-up. No cool-down. She undid months of progress in one afternoon.

This isn’t about fear — it’s about awareness.


🦵 Your Knees: Why Squatting Hurts Later

Gardening involves constant squatting, both dynamic and static. The knee joint is most stable at 90 degrees — but once you drop lower, things start to rub.

A law in biomechanics called Delpech’s Law tells us that high pressure on a surface leads to the body producing more tissue. In the knees, this can lead to roughened cartilage, causing pain, grinding, and inflammation — especially if you do it over and over without support.


🧍‍♂️ Your Lower Back: Lever Arms & Fascia Fatigue

Ever notice how heavy things feel when you’re bent forward? That’s the lever arm principle. The further out the weight (or your torso), the more strain on your lower back.

From your belly button to your pelvis, you don’t have bones to hold things together. Your fascia — soft tissue layers — does the job. But fascia needs to be hydrated, supple, and trained to support load.

If your fascia isn’t prepped, long hours in bent-over positions can overwhelm it. That leads to tightness, spasms, or worse.


🌀 Your Spine: Why Flexing and Twisting Are Dangerous

Most gardening tasks involve two risky combinations:

  • Flexion + Rotation (scooping dirt, weeding)
  • Extension + Rotation (reaching up and twisting)

Both compress the spine’s joints and increase the risk of disc issues like bulges, herniations, or pinched nerves — especially if your spine isn’t stabilized by surrounding muscles and fascia.

This isn’t about avoiding movement. It’s about training your body to handle those movements safely.


🏋️‍♀️ What You Can Do to Prevent Gardening Injuries

Here are the three keys to keeping your body pain-free while gardening:

1. Train Like It’s a Sport

You wouldn’t try to deadlift 500 pounds without a program, right? Gardening is no different. Your body needs a holistic strength and mobility plan based on what you’re asking it to do — not just general workouts, but targeted prep for your spine, knees, pelvis, and fascia.

2. Warm Up Before Gardening

Your body is like an old car — it needs a few minutes to “rev the engine.” A proper warm-up turns on your muscular and neurological systems, thins out the fluids in your joints and fascia, and helps prevent injury.

Here’s a short warm-up that targets the most stressed areas:

👣 Knees

  • Knee Circles (clockwise and counterclockwise)
  • Figure 8s (vertical and horizontal)
    These gentle movements lubricate the joint and prep ligaments for squatting.

🧘 Pelvis

  • Pelvic Rocks in a wide-stance position with knees bent and torso upright. Helps activate the hips and lumbar spine.

🌀 Spine

  • Torso Translations & Tilts with arms in external rotation. Warms the ribcage and mid-back while protecting from over-compression.

Just 5–7 minutes of this can drastically improve how your body handles the demands of gardening.

3. Recover After Gardening

You’ve loaded the system — now you have to unload it. Stretch the areas you used. Use fascia-specific movements or myofascial stretches to rebalance the body. Don’t just sit down and let it tighten up.


🌿 Want to Keep Gardening for Life?

If gardening brings you joy, it’s worth protecting. And if you want help, I’ve got 3 easy ways to start:

Let me help you garden smarter, not harder — and keep doing what you love for years to come.

Building a foundation for a better life.

Find out more @

Facebook

BlueSky

Pinterest

Instagram

Youtube