physical therapy

Regaining Independence: Mary’s Journey to Freedom

Solcore Fitness & Therapy Review. independence through holistic healing

When you think about independence, you might picture financial freedom or the ability to travel. But for many, independence means something much more personal: the ability to move, explore, and live life without being trapped by pain.

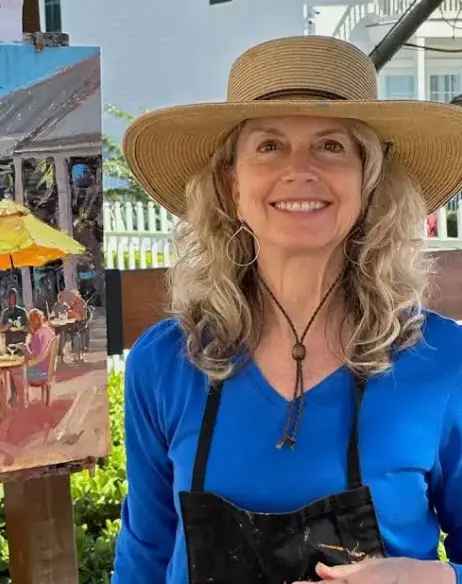
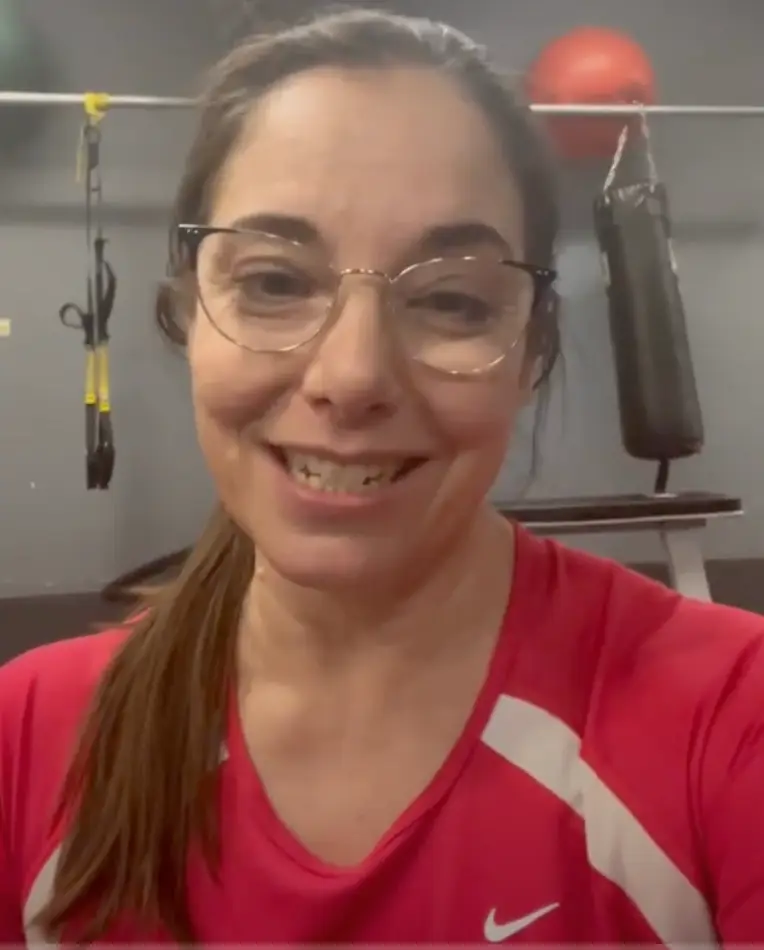
This is Mary’s story.

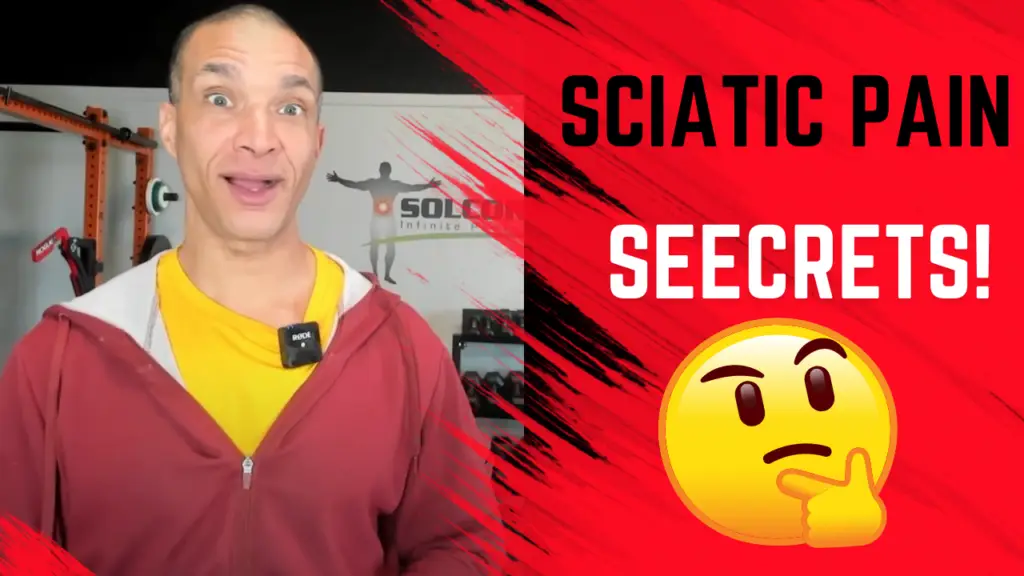
Finding Freedom from Pain

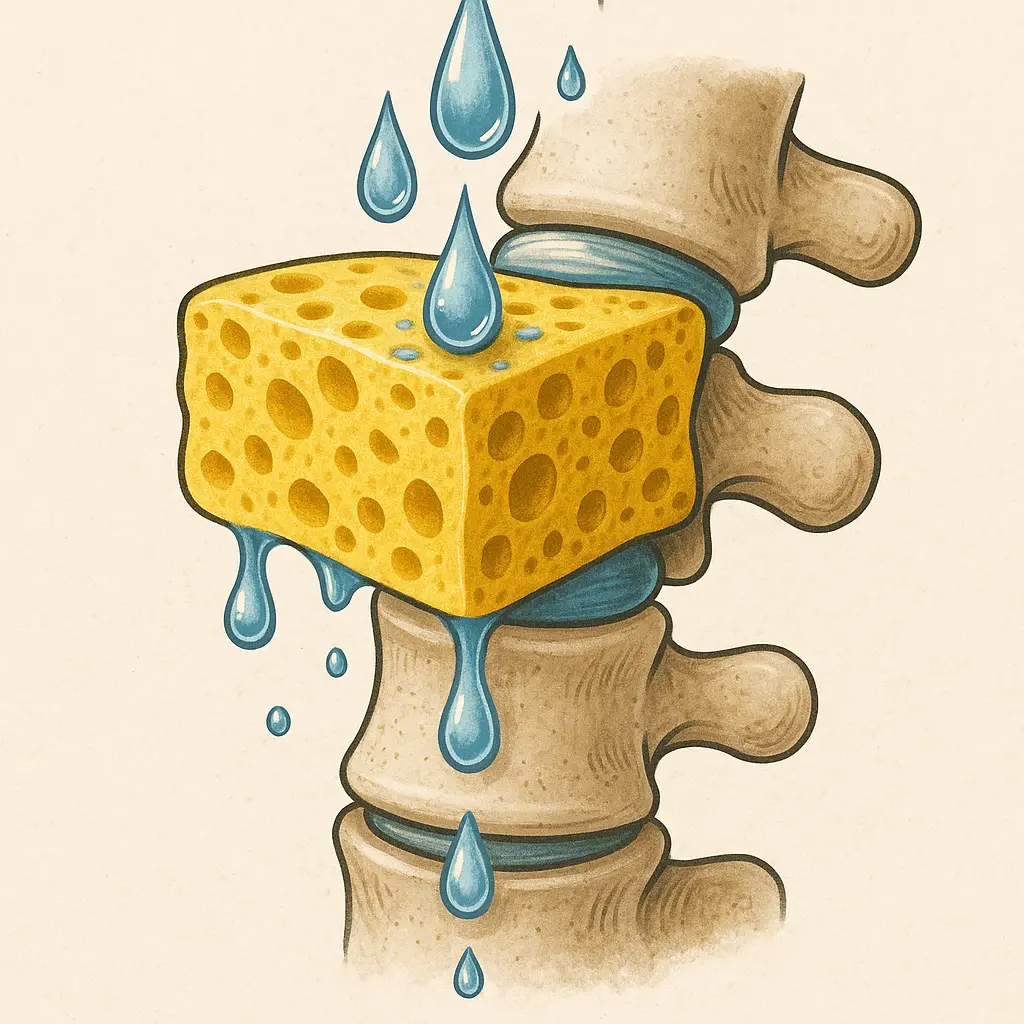
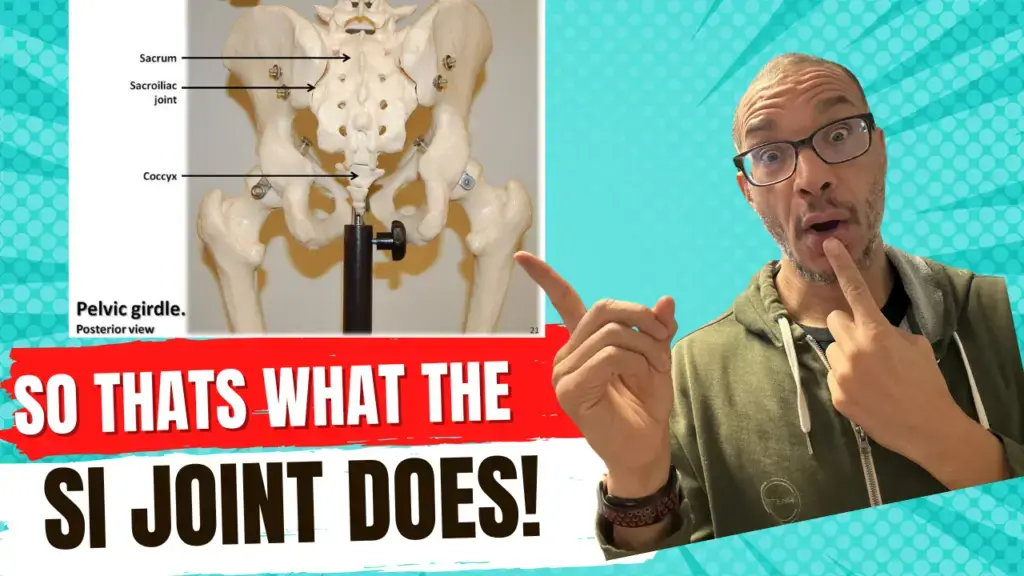
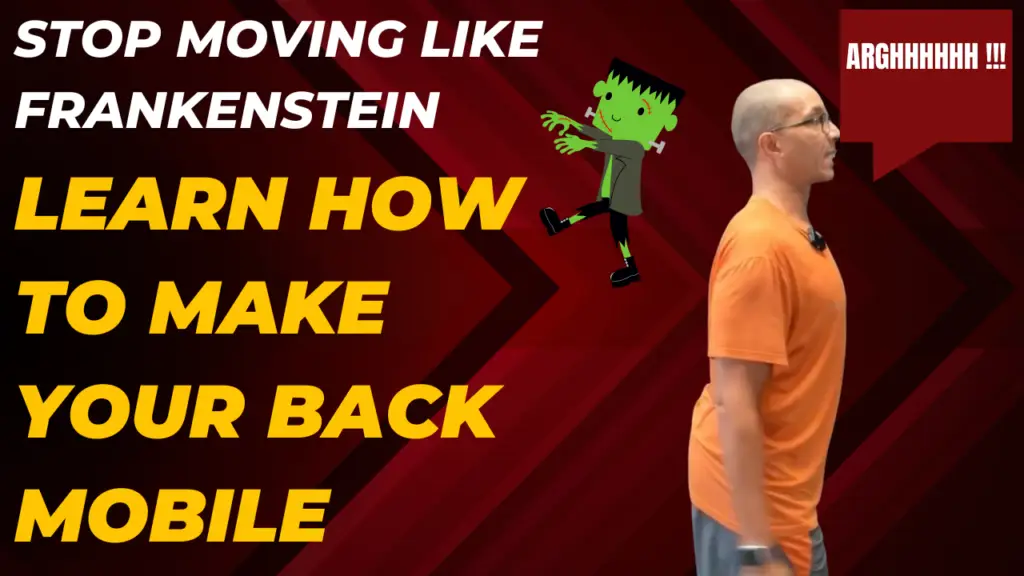
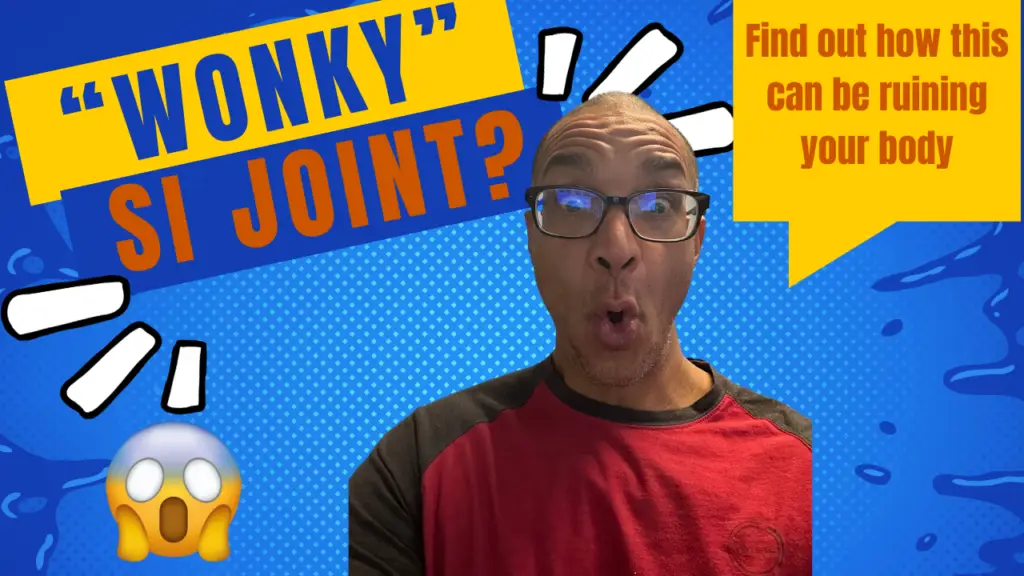
As an active person, Mary was deeply frustrated when scoliosis and SI joint issues sidelined her. The doctors told her she wasn’t a surgical candidate, and the physical therapy covered by her insurance barely scratched the surface.

Like many people, she was desperate for relief—but traditional approaches weren’t enough.

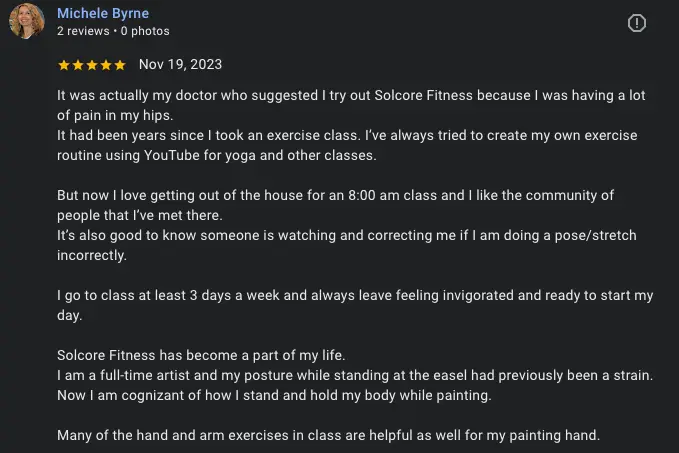
That’s when Mary found SolCore Fitness & Therapy. She was immediately drawn to our fascia-focused, holistic approach that addresses the root causes—not just the symptoms.

She joined our group classes and began private therapy sessions that worked directly with the source of her pain.

A Path to True Independence

The workouts were challenging, but never out of reach. Step by step, Mary began to rebuild her body.

Her pain decreased. Her mobility returned. Her confidence grew.

After a year and a half of committed work, Mary achieved something that once felt impossible—she completed a rugged 6-mile hike, a milestone that symbolized the independence she thought she had lost forever.

“I achieved results beyond my dreams.” — Mary

Holistic Healing That Works

Mary’s journey is a powerful reminder that when you address your body as a whole system—when you work with fascia, postural balance, and integrated movement—true independence becomes possible.

You don’t have to accept limited movement as your new normal.
You don’t have to settle for treatments that only scratch the surface.

There is a path to freedom.

👉 Watch Mary’s Full Story on YouTube

[Link to full testimonial video]

🎯 Ready to Start Your Own Journey?

If you’re ready to regain your independence and move without pain, we’d love to help.

👉 Click here to schedule your complimentary consult and see how holistic, fascia-focused training can change your life.

Follow the Thread—Where Movement, Fascia, and Freedom Align

Find more insight, reflection, and fascia-informed care across the platforms where we stay connected:

Facebook

Blue Sky

Pinterest

Instagram

Youtube

Why Your Spine Isn’t Rehydrating Overnight — and What to Do About It

disc hydration ELDOA. Illustration of a yellow sponge between two vertebrae with water droplets rehydrating the spine — metaphor for disc hydration through ELDOA and TV Stretching.

💡 Your spinal disc doesn’t just “recover” with hydration while you sleep. It responds to what you do before you rest.


🟠 Your Discs Aren’t Lazy — They’re Just Dehydrated

Most people think spinal health and disc hydration is a waiting game: take the pressure off, rest a bit, and hope the body “fixes itself.” But that mindset overlooks one of the most basic truths of physiology: structure needs input.

Your intervertebral discs — the soft cushions between each vertebra — don’t have a direct blood supply. They rely entirely on your movement, posture, and hydration mechanics to stay supple and healthy. If you’ve ever felt stiff or achy in the morning despite a “good night’s sleep,” there’s a reason for that.


🧠 The Science of Disc Hydration — in Plain Speak

Discs rehydrate in two ways:

1. Passive Rehydration (Osmotic Pressure)

When you lie down at night, gravity is removed. This creates an osmotic gradient — water is slowly drawn back into the discs. Think of it like setting a sponge in a shallow bowl of water. It’ll eventually soak in… but only as much as its tissue allows.

2. Active Rehydration (Mechanical Stimulus)

When you de-coapt your spine through targeted movement — like ELDOA stretches — you create negative pressure and fascial tension. This primes the disc to pull in more fluid. It’s like squeezing and releasing that sponge right before soaking it — it absorbs far more water when prepped this way.


🌙 Why ELDOA “TV Stretching” Works So Well for Disc Hydration

“TV Stretching” is the term we use for doing your ELDOA decompression work 1–2 hours before bed. This timing allows you to:

  • Decompress your spine actively
  • Prime your discs to absorb water
  • Then follow it with passive overnight rehydration

You’re combining two mechanisms, not relying on just one.

This is especially effective if you’re dealing with:

  • Degenerative disc issues
  • Postural compression from sitting or lifting
  • Chronic stiffness that doesn’t resolve with sleep alone

🛠 Try This Tonight: 2-Step Reset (L5/S1 Focus)

Before bed, try this:

  1. Get into the L5/S1 ELDOA position, but keep your knees bent.
    This protects the popliteal artery, which runs behind the knee and can be compressed during long-duration stretches with extended legs.
  2. Stay in the posture passively — just hold the position and breathe for 5, 10, or even 15 minutes.
    You’re not actively reaching or tensioning yet — just letting the spine settle and decompress through position alone.
  3. Then do a single, focused ELDOA hold — no more than 1 minute.
    Engage the full fascial lines. Create vertical tension. Be precise.
    (Too long and you’ll reverse the effect — ELDOAs are about quality, not duration.)
  4. Lie down and rest.
    This primes your spine for both active and passive hydration during the night.

Try this for a few nights and feel the difference. It’s a strategy rooted in somatic intelligence — not guesswork.


🌀 Recovery Starts with Awareness

This is about more than hydration — it’s about being in your body enough to know what it needs and when.
If you’re curious how body awareness and healing are deeply connected, this Psychology Today overview of somatic therapy breaks it down beautifully. It echoes what we practice here — movement that starts with presence, not just position.


✅ Feel Different in the Morning — Not Just Rested

If you want to feel strong, tall, and fluid in the morning, you don’t need more sleep.
You need smarter pre-sleep recovery.

This approach is simple, targeted, and doesn’t take long. But it’s rooted in deep science and even deeper respect for the body’s rhythms.

🔗 Want help applying this to your specific structure?
Book a free 30–45 minute strategy call and we’ll walk through the right ELDOA and hydration approach for your spine.

Follow the Thread—Where Movement, Fascia, and Freedom Align

Find more insight, reflection, and fascia-informed care across the platforms where we stay connected:

Facebook

Blue Sky

Pinterest

Instagram

Youtube

The Pelvic Floor: A Holistic Approach to Strength and Mobility

Whether you’re a man or a woman, your pelvic floor is essential for a strong, mobile body — yet it’s one of the most overlooked systems in human movement. Your pelvic floor isn’t just “down there” — it’s the foundation for your spine, hips, and core.

But here’s the truth: Most people don’t know how to train it. They rely on outdated approaches or ignore it completely… until something goes wrong.

So let’s take a look at what your pelvic floor really does — and how to support it through a truly holistic approach.

Click on the image to watch the full video

Your Pelvic Floor: A Dynamic Foundation

Think of your pelvic floor like the foundation of a house. It needs to be solid to support everything above — and adaptable to handle pressure from above and below.

Every day, your pelvic floor supports both:

  • Descending forces — gravity, body weight, internal organ pressure
  • Ascending forces — from walking, standing, lifting, and movement

If your pelvic floor isn’t strong and balanced, your whole body compensates.


Why Most Pelvic Floor Training Fails

Most people only hear about Kegels — and usually just for women. But men need pelvic floor training too. And even then, Kegels alone won’t fix dysfunction.

A true pelvic floor program:

  • Goes beyond isolated contraction
  • Addresses the muscles, fascia, and ligaments
  • Respects the nervous system and joint balance (especially the SI joint)

What Muscles Make Up the Pelvic Floor?

It’s more than just one muscle. Your pelvic floor includes:

  • Levator Ani group (puborectalis, pubococcygeus, iliococcygeus)
  • Coccygeus
  • Piriformis & Obturator Internus (side/posterior pelvic walls)
  • Glute max (deep fibers)
  • Iliopsoas (passing through the pelvis to your spine)

These all work together. But they don’t function in isolation. You must also consider the fascia and ligaments that interconnect everything.


Ligaments: The “Smart Tissue” That Guides Your Body

Ligaments do more than hold bones together. They’re the intelligent sensors that tell your body how to move — or how not to.

Key ligaments affecting your pelvic floor:

  • Cooper’s ligament (connects pelvic fascia to hip stabilizers)
  • Pubofemoral ligament
  • The sacro-recto-genital-vesicle-pubic ligament (yes, that’s one ligament!)
  • Anterior sacroiliac ligaments
  • Iliolumbar & pubic ligaments

These aren’t just structural — they’re sensory. If your ligaments aren’t healthy, your body loses its ability to move smartly.


Fascia: The Connective Highway

Fascia connects your pelvic floor to:

  • Your diaphragm
  • Your spine
  • Your abdominal wall
  • Your hips, legs, and shoulders

That’s why holistic pelvic floor care can’t stop at squeezing muscles. You must address how fascia tensions pull and support the whole structure.


Start Here: How to Rebuild Pelvic Floor Health

1. Begin With the Ligaments

Healthy ligaments guide healthy movement. In my osteopathic practice, I use manual therapy techniques like pumping and double TLS to:

  • Improve fluid flow
  • Activate proprioceptors
  • Reset the tissue’s baseline tone

This sets the stage for real, sustainable strength.


2. Use ELDOA to Reinforce & Integrate

ELDOA (a unique form of fascial tension exercise) is one of the best ways to train the joints, ligaments, and fascia together.

It helps:

  • Open restricted spaces
  • Activate deep stabilizers
  • Improve spinal and pelvic floor communication

3. Strengthen and Stretch the Muscles (Holistically)

Once the ligaments are awake, you can start training the key muscles:

  • Piriformis
  • Obturator internus
  • Glute max (medial fibers)
  • Iliopsoas

Use Hill’s Muscle Model: work the fibers, the fascia, and the ligament to train effectively.


4. Now Add Kegels — the Right Way

Only once you’ve built a strong base should you begin isolated Kegel contractions. And even then, you must avoid compensation patterns.

When doing Kegels:

  • Do not squeeze your glutes, abs, or adductors
  • Train your brain to activate just the pelvic floor
  • Separate contractions from surrounding muscle groups
  • Progress to coordination patterns using glutes, adductors, and diaphragm separately

This is crucial — especially for women during childbirth or anyone recovering from dysfunction.


Final Thoughts: The Pelvic Floor Is a Whole-Body System

Most people treat the pelvic floor like a switch — either it’s “on” or it’s “off.” But the truth is, your pelvic floor reflects your entire body’s condition.

If your SI joint is off, if your glutes are weak, if your diaphragm is tight — your pelvic floor will suffer. And if you ignore it? You’ll feel the effects in your strength, mobility, and long-term health.


Ready to Train Smarter?

If you’re ready to go deeper — not just with your pelvic floor, but your whole-body health and longevity — I’ve got 3 free ways to help:

Let’s stop isolating and start integrating.

See you next week.

it’s not just working out, it’s building a foundation for a better life.

Find out more @

Facebook

Twitter

Pinterest

Instagram

Youtube

The Untold Truth About the SI Joint (And Why Most Fixes Fail)

The sacroiliac joint—or SI joint—is one of the most misunderstood areas in the body. And yet, it plays a massive role in your ability to move, feel good, and stay injury-free.

If you’ve ever looked for SI joint exercises or ways to relieve SI joint pain, chances are the info you found was generic, over-simplified, or just wrong. And that’s a problem.

A dysfunctional SI joint can prevent you from gaining strength, limit your mobility, and leave you stuck in a loop of recurring pain or injury.

Let’s fix that.

What Is the SI Joint (And Why Should You Care)?

The SI joint connects your sacrum (the base of your spine) to your ilium (your pelvic bones). You have two of them—left and right—and together they form the foundation of your pelvis.

Think of your pelvis as the floor of your body. If the floor is off, everything built on top—your spine, shoulders, legs—becomes misaligned.

Here’s the kicker: SI joint issues are often asymptomatic. You might be struggling with shoulder pain, knee discomfort, or tight hip flexors—and never realize the source is pelvic instability rooted in the SI joint.


Why Standard Fixes Don’t Work

Most practitioners don’t fully understand the SI joint. Some even claim it’s not a real joint or that it doesn’t move. That’s not just wrong—it’s dangerous.

The SI joint is a total joint:

  • It has a capsule
  • It contains synovial fluid
  • It has proprioceptors (tiny sensory “computers”)
  • It’s stabilized by key muscles and ligaments

When this area is off, you don’t just lose movement—you lose the ability to communicate with your body.


A Deeper Look: Movement and Dysfunction

Physiologically, the SI joint has one primary movement axis—called the oblique axis. It helps the sacrum and ilium move together smoothly as you walk or bend.

But when dysfunction sets in, the joint can fall into 20+ different pathological movement patterns, leading to all sorts of compensations, from a false leg length discrepancy to upper-body pain.

If your treatment or exercise doesn’t account for these patterns, you’re just treating symptoms—not the cause.


My Journey With the SI Joint

I’ve been in the health and fitness field for 30 years. I started out like most trainers—using standard methods like PT and corrective exercises. But when I injured my own back (L4-L5 disc bulge with sciatic pain), those traditional approaches didn’t help.

That’s when I found osteopathy. It opened my eyes to how the body truly works: as a holistic, interconnected system.

And the SI joint? It was central to the whole picture.


How I Assess and Work With SI Joint Issues

When someone comes into my studio (or online), one of the first places I assess is the SI joint—no matter what pain they report.

Why? Because if the foundation is off, everything else will be too.

Here’s my general approach:

  1. Assessment – Identify which part of the SI joint is involved (lesser arm, greater arm, apex, base, etc.).
  2. Ligament Reboot – Using manual therapy (like TLS and pumping) to reactivate proprioceptors and restore communication.
  3. Fascial Work – Addressing deeper fascial chains that are often involved but ignored.
  4. Specific Exercise – Not just general glute or core work, but targeted movement based on what your body needs.

Muscles involved include:

  • Piriformis
  • Glute Max (deep + superficial)
  • Glute Med
  • Obturatorius
  • Iliopsoas

But again, it’s not just about muscles. It’s about chains. You have to treat the whole system.


Don’t Google “3 Moves for SI Joint Pain” (Please)

Generic exercises might help a little—or they might make things worse.

Why? Because SI joint issues are specific. The dysfunction could be from one of many regions within the joint or even a combination of them. Without proper assessment, you’re guessing.

And in the body, guessing is a great way to stay stuck.


Want to Learn More?

I share more like this every week—so subscribe, share, and join the conversation. If you’re ready to go deeper:

Don’t let a misunderstood joint hold back your potential. Fix the foundation—so the rest of your body can finally thrive.

it’s not just working out, it’s building a foundation for a better life.

Find out more @

Facebook

BlueSky

Pinterest

Instagram

Youtube

Discover the Hidden Dangers of Anterior Pelvic Tilt

“Duck butt” might sound funny, but anterior pelvic tilt is no joke.

It’s a common postural issue where your pelvis tilts too far forward—and it’s one of the main reasons people suffer from chronic lower back pain, disc bulges, SI joint instability, and more.

I’m Ekemba Sooh, SomaTherapist and SomaTrainer. I had anterior pelvic tilt myself—and it played a major role in my L4-L5 disc bulge and sciatic pain. No trainer, therapist, or doctor ever told me the tilt was the root cause.

They were treating symptoms. Not the source.

Click on the image to watch

What Is Anterior Pelvic Tilt?

Your pelvis naturally tilts slightly forward to support upright movement. But anterior pelvic tilt happens when this angle becomes exaggerated and stuck—creating a “duck butt” posture.

This tilt disrupts your body’s alignment and sets the stage for chronic compensation patterns. Over time, these compensations become permanent dysfunctions.


How It Becomes a Problem

Your body is a biotensegrity structure—meaning it’s designed to distribute force efficiently across the entire system. If one area tightens or weakens, your body adjusts to keep you moving. That’s compensation.

Compensation isn’t bad at first. But if left unchecked, it snowballs into bigger problems:

  • Chronic lower back pain
  • Lumbar disc issues (bulges, herniations, stenosis)
  • SI joint dysfunction
  • Pelvic floor and organ dysfunction
  • Reduced performance and poor energy transfer

It all stems from the inability to attenuate force efficiently—because the structure is compromised.


What Causes Anterior Pelvic Tilt?

Too much sitting is a big culprit. It shortens the hip flexors (especially the psoas) and weakens the posterior chain (glutes, hamstrings, spinal stabilizers).

Over time, your body learns this dysfunctional position—and your nervous system adopts it as your default.

For some, it’s even genetic. But genetics just mean you have to be more intentional—not that you’re doomed.


Why Most Approaches Fail

Typical solutions focus on isolated muscles. But your body doesn’t work in isolation—it moves as an integrated system through fascia.

That’s why general exercise, yoga, and stretching routines often fail. You feel good temporarily, but your body snaps right back to the same pattern the next day.

Why? Because you didn’t train the fascia to support a new pattern.


The Real Solution: Train Fascia + Function

To fix anterior pelvic tilt, you need to retrain your entire structure:

  • Stretch the shortened hip flexors (especially the psoas)
  • Strengthen the weakened glutes, hamstrings, and back muscles
  • Activate fascia chains, not just muscles, to build intelligent, whole-body control

The best tools I’ve found for this are osteopathic-based etiology exercises—like the ELDOA and my full training system. These methods respect how the body actually works: as a connected, intelligent, adaptable structure.


When to Start? Now.

If you’re in your 20s or 30s—start now and prevent future issues.
If you’re in your 40s, 50s, or 60s—and already feeling pain—this needs to be your primary focus.

You can’t afford to ignore anterior pelvic tilt. It’s not just a posture issue—it’s a performance killer, a pain amplifier, and a hidden driver of long-term health problems.


What to Do Next

If this resonates, here are a few ways to go deeper:


Final Thought

Anterior pelvic tilt is a structural dysfunction—but it’s also an opportunity.

It’s your body’s way of asking for smarter input. When you respond with the right training, you’ll not only relieve pain—you’ll become stronger, more mobile, and more connected to your body than ever before.

Don’t wait until things break down. Train holistically. Train intelligently. Train to support the life you want to live..

Building a foundation for a better life.

Find out more @

Facebook

BlueSKy

Pinterest

Instagram

Youtube

Amber SolCore Fitness and Therapy Success

Sometimes, what you’re doing just stops working. For Amber, it took years of yoga, chronic pain, and a sudden breakdown to realize her body needed something different. This is her story—and how SolCore Fitness helped her shift from injury to healing.

When Pain Overrides the Pose

Amber had been practicing yoga since she was 19. It was more than a workout—it was a lifestyle. She loved the wildness, the philosophy, the breath work, and the physicality.

But over time, yoga shifted. The deeper, spiritual practice faded, replaced by fast-paced, athletic movements. Like many, Amber had flexibility—but not mobility or strength. She could move into poses, but her body couldn’t support them.

Eventually, her back gave out.

“It was the day after Thanksgiving. I stepped out of the car and literally couldn’t move. I crawled up the stairs to my mom’s house. It was terrifying.”

That moment wasn’t random. It was the result of years of compensation, strain, and bypassing the body’s needs. Her long-time bodyworker warned her:

“You’re too stretchy. You need real strength.”


Why Yoga Alone Couldn’t Help

Amber loved yoga. But she realized she had been using it to avoid—not address—her deeper structural issues. Like many, she thought movement alone was enough. But flexibility without strength, and effort without direction, only made things worse.

“I didn’t want to bash yoga. But I had to admit—it wasn’t working. My body needed something more holistic, structured, and biomechanically sound.”

Enter SolCore Fitness.


A New Approach: Structured, Subtle, and Demanding

Amber admits it wasn’t easy at first.

SolCore’s program required consistency and re-learning. The exercises were unfamiliar and subtle—but also deeply challenging.

“It was counterintuitive. I had to unlearn how I’d been moving for decades. But the subtlety was powerful. Within six months, I was 75% better.”

Through personalized training and a focus on fascia, mobility, strength, and proprioception, Amber rebuilt her foundation. The back pain lessened. Her posture improved. Her nervous system regulated.

And maybe most importantly, she reclaimed her relationship with her body.


Lasting Changes and a New Way Forward

Amber still has a desk job. She still feels occasional pain. But now she knows how to manage it. She’s no longer dependent on yoga poses to feel “better.”

She’s walking more, doing breathwork, meditating again—and she can sit in silence without discomfort.

“This has helped me return to the real yoga: presence, breath, and awareness. I found a better balance.”

Her advice?

“Don’t wait until things break down. Be willing to change. What worked in your 20s won’t work forever. Find a system that evolves with you.”


Want to Explore a Better Path for Your Body?

Amber’s story is one of many. At SolCore Fitness & Therapy, we help people get out of pain and into possibility through a method that combines manual therapy, fascia-based training, and deep biomechanical insight.

💬 Curious if it’s right for you? Click here to schedule a free consult.

📄 Want the case study version? Click here to download.

Building a foundation for a better life.

Find out more @

Facebook

Bluesky

Pinterest

Instagram

Youtube

Back Mobility: Why Stretching Alone Isn’t the Answer

Click on the image to watch

If your back feels stiff and stuck—and you’re tired of moving like Frankenstein—it’s time to look at back mobility from a deeper perspective.

Most routines you see online might feel good temporarily, but they don’t address the root cause.
And in many cases, they can actually make things worse.

Here’s why.


What Is Mobility, Really?

Mobility is the ability of your joints and tissues to move freely in all the directions they were designed to move.

It’s not the same as flexibility.
You can be flexible (like touching your toes) without having true mobility (like moving smoothly under load or rotation).

Mobility is functional.
It helps your body perform well, stay pain-free, and move with strength.

But it requires more than a few stretches.
You need structure. You need muscle. And you need balance.


The Anatomy of Real Back Mobility

Your back isn’t just one unit.
It’s a coordinated system of:

  • Four spinal curves (sacral, lumbar, thoracic, cervical)
  • Deep and superficial core muscles
  • Fascia, joints, and connective tissues

If you lose the natural curves in your spine—say your lumbar spine flattens—you lose structural integrity.
Your spine becomes weaker, more fragile, and less mobile.

Mobility isn’t about forcing range.
It’s about having the right alignment and the right strength to support movement.

At SolCore Fitness, we rebuild that foundation with a fascia-first lens—using tools like segmental strengthening and osteopathic training principles.


Why Routines Alone Don’t Work

Most YouTube videos show the same spinal twists and cobra stretches.
They feel good—for a moment.

But twisting a compressed spine can make things worse.

That’s because twisting compresses the discs between vertebrae. If your spine lacks space or alignment, you’re grinding into vulnerable tissue every time you rotate.

Over time, this leads to:

  • Herniated discs
  • Nerve impingement
  • Chronic tension and compensation

Before you stretch or twist, your spine needs:

  1. Proper space and alignment
  2. Muscular balance and activation
  3. Awareness of how your body compensates

The Real Process for Unlocking Back Mobility

If you want lasting mobility, follow this sequence:

1. Rebuild Spinal Curves and Space

Mobility requires decompression. Without space between vertebrae, movement will always be restricted.
We use ELDOA, myofascial techniques, and postural re-education to reintroduce this space.

2. Strengthen in All Directions

Your core isn’t just abs. It includes obliques, transverse abdominis, spinal stabilizers, and many supporting muscles.

You need to strengthen in rotation, side-bend, extension, and flexion—not just planks.
Back and front must work together, not in isolation.

This approach is central to our personalized therapy and training plans.

3. Move with Intention

Only after steps 1 and 2 can you begin applying movement patterns that support your mobility.
Even then, it’s not about routines—it’s about selecting movements that fit your body’s needs and structural state.

That’s why we don’t give cookie-cutter programs.
You’re not a cake. Your body isn’t built from a recipe.


You Need a System, Not a Shortcut

You’ve probably tried a few of those “10-minute mobility fixes.”
Maybe they felt good… until they didn’t.

True mobility is sustainable. It works with your body—not against it.
And it honors the complexity of your spine, fascia, and nervous system.

Want to learn what a real back mobility program looks like?

Start with our free holistic fitness guide, or book a consult and we’ll walk through what’s keeping you stuck and what needs to change.


You’re not meant to live in restriction.

With the right strategy, your back can feel strong, mobile, and free—so you can move the way life intended.

it’s not just working out, it’s building a foundation for a better life.

Find out more @

Facebook

Twitter

Pinterest

Instagram

Youtube

Discover the Game-Changing Solution for SI Joint Dysfunction

SI joint dysfunction can be miserable—constant pain in different places, no clear answers, and “fixes” that don’t work. It’s one of the most stubborn and misunderstood issues in the body. But there is a solution.

Check out the full video below by clicking the image.

Understanding Your SI Joint

Let’s start with the basics.
SI stands for sacroiliac. Your sacrum (the triangle bone between your glutes) connects to your ilium (your hip bones) at two SI joints, shaped like boomerangs.

Many people confuse SI joint dysfunction with low back pain. But they’re not the same—and mislabeling it can send you down the wrong treatment path.

Your SI joint is a true joint with cartilage, a capsule, ligaments (like the anterior and posterior sacroiliac ligaments), and muscular support from the piriformis, glutes, psoas, obturator internus, and more.

This joint moves—primarily in oblique torsions—but it can also develop 20+ pathological movements (and infinite combinations of dysfunction).


Why SI Joint Issues Don’t Go Away

Your SI joint takes on ascending and descending forces through your body. It’s involved when you sit, stand, walk, squat—pretty much everything. So when it’s not functioning well, everything suffers.

In my own case, I had no SI joint pain at first. But a small dysfunction there led to L4-L5 disc compression, sciatic pain, and long-term compensation patterns.

The problem? Most people treat symptoms, not causes. And SI joint dysfunction is often the hidden cause behind hip, knee, foot, and even spinal issues.


What Doesn’t Work (And Why)

  • Popping it back into place
  • Rolling on a foam roller
  • Generic exercise routines
  • “Fused” joint logic that ignores anatomy
  • Thinking your SI joint doesn’t move

These approaches either oversimplify the problem or completely miss it.


What Actually Works

  1. Assessment First – You need someone who understands the full range of SI joint pathologies.
  2. Work With Ligaments – Smart ligaments become “dumb” when dysfunctional. Treatment and manual therapy must re-educate them.
  3. Use Targeted Exercise – The most powerful SI joint reset tool I’ve found is the ELDOA method. These postural exercises use fascial tension and soft tissue to normalize the joint and retrain proprioception.

The SI joint doesn’t exist in isolation. It’s part of a complex network—and requires a fascia-based, integrative strategy that honors how the body truly works.


If you were hoping for a one-size-fits-all “SI joint routine,” I won’t insult your intelligence.

That’s not how the body works—and it’s why so many people stay stuck.


What to Do Instead

If you want to address your SI joint dysfunction at the root, here are three free ways to take the next step:

📘 Download the Free Guide:
“How to Move Better, Get Out of Pain, and Live the Life of Your Choosing.”
Instant access. Zero fluff.

💬 Book a Free Consultation:
Tell me where you are, what you’re doing, and where you want to go. I’ll find the holes in your system and help you chart a real path forward. No obligations—just clarity.


You don’t have to guess. You don’t have to suffer. And you don’t have to keep trying things that don’t work.

You just need a system that sees the whole picture—and a guide who understands how to help you work with it.

Let’s get started.

it’s not just working out, it’s building a foundation for a better life.

Find out more @

Facebook

BLuesky

Pinterest

Instagram

Youtube

Michele Byrne SolCore testimonial

Michele Byrne SolCore testimonial

Real Progress from Real Commitment: Michele Byrne’s SolCore Story

When Michele Byrne first came to SolCore Fitness & Therapy, she wasn’t sure what to expect. Like many people, she was used to exercising at home — yoga classes on YouTube, quick stretches, and the occasional bike ride. But after her doctor recommended something more targeted to help with her hip tightness and posture challenges, she gave SolCore a try.

And it stuck.

“I just knew right away this would be good for me,” Michele shared.
“It’s not far from my house, and I had no excuse not to come!”

Michele is an artist who’s spent over 30 years working solo. Just getting out of the house and into a structured environment was a shift — but the results spoke for themselves. She noticed the difference not just during classes, but in the way she moved throughout her day.

From struggling to sit upright with her legs outstretched, to now practicing the 90/90 and figure-four stretches every morning, Michele’s transformation came from consistency, awareness, and dedication.

“Some of the stretches are really difficult,” she said.
“But I feel so much better after class. I’m more aware of my posture all day — and I can tell I’m getting better.”

She had tried physical therapy before, but it wasn’t until she combined specific fascia-based training with a supportive class environment that things really started to click.

Now, she comes to class regularly — Monday, Wednesday, Friday, and sometimes Saturday — and even finds herself practicing at home.
That’s a big deal.

Michele’s story is about more than flexibility. It’s about reconnecting with your body and giving it what it needs to function better — through smart training, community, and expert guidance.


📍Ready to Hear More?

If Michele’s experience resonates with you and you’re curious about what this kind of training could do for you, check out her full case study:

👉🏽 Watch Michele’s full story here

Then download her case study here.

Building a foundation for a better life.

Find out more @

Facebook

Blursky

Pinterest

Instagram

Youtube

Knee pain After Running. Don’t Forget These 3 Areas!

Is knee pain after running, slow you down? Are you having to take breaks and only to have it flare up again? Are you frustrated because you are doing what you think you should be doing for preventive and corrective exercises, but it still keeps coming back? Well, you’re not wrong. You’re just missing three parts of your body that are very important to make sure you don’t have knee pain after running.

I am on a mission to show people that there’s a better way to train and treat your body. That’s commonly found in life. It’s a very a specific, targeted, holistic way to train and treat all the different areas of your body so that you function at your best, which means that you have no pain, you move freely, you can keep going with the activities that you love and workouts that you love to do. You can stay active and play with your family.

So, if you like the content here, please subscribe, and then don’t forget to hit that bell, so you’re notified when new videos come out.

The why on knee pain after running

Getting that pain in your knee during or after a run is super frustrating. It seems to come out of nowhere. All of a sudden you feel good, now you don’t feel good. Why is it?

Well, there’s a lot of different factors, but once it happens, you go through your acceptable ways of taking care of it. Ice it, maybe do some foam rolling, maybe do some PT, take some anti-inflammatories and pain meds, all the above, just stay off of it.

And it may help a little bit, but ultimately, more than likely, it’s going to come back. That’s because your focus was to get rid of the pain, not correct why it’s having the pain. Running is part of the issue.

Unless you had some sort of trauma happen to your knee, falling down, getting hit, some weird twerk when you’re running, something like that, more than likely it’s an overuse type of an injury.

Now that overuse injury could have been happening for decades, and now it leads to the more acute. But generally you want to make sure that your… This is your Patella, your kneecap and this is your Femur, your leg bone.

Generally, you want to run nice and even, the Patella over the Femur, with some space in between. That’s how you want your knee to move. But over time, unless you go out and correct those issues or prevent those issues by doing some sort of exercise and therapy, eventually that Patella is going to slowly get closer to the Trochlea, you have less padding left, less liquid.

And then also if your quads aren’t balanced properly, if it’s the outside of the thigh, this is the inside thigh, your Patella’s going to start to move more to the outside.

There’s a lot of different names to this Patellofemoral Syndrome, Chondromalacia, you could hear by lateral checking of your Patella, arthritis of your knee, a lot of different names from basically kind of the same thing. Okay? The main thing you want to know is that, how do I stop it from going. I want you to understand how dynamic running is. Running or any type of ambulatory movement, walking, jogging, whatever uses a lot. It uses your foot hitting to the ground, front part of your shin, back part of your shin. It uses your quads, your hamstrings, the front and back part of your thigh. It uses your Pelvis in your SI joint, is your spine, is your shoulder girl.

There’s a lot going on when you run. And running produces a lot of force through your body. An example of, just walking, if you’re just walking and you’re about average weight and you’re doing your 10,000 steps per day, that’s several tons of force that go through your body, tons with a T. So when you run, multiply that by your force, how tall you are, weight, all that fun stuff. Basic point is you got a lot of stuff going through your body. And if it doesn’t flow through your body, from the step to the kick, to the movement of the arms, it’s going to stop in weird places. And if those muscles, tendons, ligaments, and more importantly, the fascial chains are not lined up. Those forces move incorrectly, right? So it’s like a car that’s out of alignment. You can drive a car that’s slight out of alignment, but the more you drive it, the more it goes out alignment, the worse your tires get.

It’s the same thing with your knees. Are you struggling with knee pain after running? Do you have Runner’s Knee? Are you trying different solutions, but not getting sustained results? Give yes or no for both parts in the comments. So first or foremost, you want to make sure you take care of your body specific to running. Before you run, you want to have some sort of warmup. You want to warm not only your Cardiovascular system up and your Circulatory system up, but you want to warm up the areas of your body, that your body use. Ankles, knees, hips, and spine. A warmup is a constant activity that you do to basically wake up your body and get more importantly, get the fluids in your body, more liquid and less viscous so they can transport nutrition, take away the bad stuff and your function properly. So you want to stretch those areas and keep it working properly.

That’s going to include some sort of stretching. Myofascial is my preference. The shins, the interparietal, your calves, your soleus, your three hamstrings, specifically your biceps femoris, your deep rotators of the hip, specifically the obturator externus, or maybe the piriformis, your glutes, more specifically probably your glute max, but also your spine. Because as you walk and run, your tension between your upper limb and lower limb is right through your trunk. So you want to make sure you warm your body up and then also you want to normalize it or do some stretching afterwards. So now when you go through your body, it needs to be addressed specifically. Don’t just go online or Runner’s Magazine or some random YouTube video and show you the stretches you’ve seen for the past three decades. There’s a better way. Your body has a lot of different lines of force.

You must be specific in training you knee to get out of pain

And for you too, use your body specifically. You have to follow these lines of force. A good example is stretching your calves. Generally, this is seen as step put on your foot on a step and let your heel hang down or just put in one foot behind the other and push your foot to the ground. There’s a problem for that. One for the first one, when you let your foot just hang off a step, those same muscles that you’re trying to stretch, the gastrocnemius of calves, are now also supporting you because you have no fixed point, because your heels not touching anything. Unless I have a fixed point on the ground, that’s solid, I can’t pull or push or do anything because I have no area to focus on. So for the calf, we know you have two calves, right? You have a lateral calf and a medial calf.

So to stretch that specifically, either turn your foot in for lateral, out for medial. Then you want to make sure that chain is under tension, which means pull your toes up, lock your knee, tuck it powers, get tough through your spine and then reach that same side arm up. Now you’re not only stretching one of those two calves, but you’re stretching a chain that’s involved. That’s the most effective way to stretch. You can do that for all your muscles. I don’t want to get into every single muscle, but that’s how you start thinking about it. That’s why I’m talked about at beginning, there’s a more specific, holistic way to address your body. I’m going to give you an example of a person. So I had a lady who was a runner and she did her running routine. She got her routines from Runner’s Magazine or track coach.

And they did those basic stretches that you see, everybody has a pull your leg up and throw your leg on something and lean forward or whatever else they do, right? Those aren’t enough. And they’ve done it the wrong time. Because usually they do it before the run, which is absolutely not what you want to do. You want to do your stretching afterwards or warm up before. She came in with knee pain, it was Patellofemoral Syndrome or Chondromalacia.

That simply means that her knee kept us running over top of her thigh. It is not a big mystery as to what to do. You need to stretch that quad muscle and pump up the fluid underneath the knee through some specific exercises, which I’ll get to in a little bit more. After she did that for about three months, her knee pain completely went away. But more importantly, she told me… She was about my age, about 49 at the time. She got out of bed feeling younger than ever. She wasn’t feeling like she was some crippled old woman anymore. All right. For argument’s sake, let’s say you’re taking care of your body, you’re very, very specific of all the areas that you need to work on but you’re still having issues at your knee.

The 3 areas you need to train for knee pain

That’s because you’re missing the three most important areas. Your Patellofemoral Joint, your VMO and your Articular Genu.

Patella Femoral joint

Your Patellofemoral Joint is a joint between your Patella, your knee cap, and your femur to form the Patellofemoral Joint. Like all joints, it needs to be awake and it needs to be fluid. It needs to be awake because it communicates to your spine and brain through effort signals to understand how your knee is moving and what’s going with the rest of the body. It needs to be fluid because of the synovial membrane, the synovial fluid with inside, it needs to be able to move properly, to allow for proper range of motion and also to allow for proper waste removal and nutrition brought in. Like all joints, in all years of body, it can be trained.

There’s an exercise for that. You need to train the Patellofemoral Joint in some sort of balance type exercise, but you need to make sure that the Patellofemoral is doing the work, not your other tendons and ligaments, muscles, what have you. So you need to put yourself in position so that it does the majority of the work to keep yourself balanced, telling your brain, “This joint needs to work to help me do this job”. So when a Patellofemoral Joint is awake in doing its job, it communicates to the brain spinal cord, to tell it, “I need the need to move properly along the trochlea of the femur”. This is how it should move. If it’s asleep, it just kind of starts moving towards being pulled. So to have that joint move properly, you need to have the joint awake.

VMO(Vastis Medialias Oblique)

So your VMO is part of your quad complex.For argument’s purposes, we’re going to talk about the six quads not the four, that you need to be concerned about and that can cause issues when you’re running. So your VMO stands for your Vastus Medialis Obliquus. It’s part of the VML, but it stops and takes a quick turn dangling to insert towards your kneecap. So if your VML, which is Vastus Medialis Longitudinal, your VMO, Vastus Medialis Obliquus, your Rec fem, vastus laterals, vastus intermedius, articular genu. Almost all those quads, will pull your kneecap to the outside when walking or running. The VMO is the only one where it’s job to say, “No kneecap you stay in place so that when that Patella runs over the trochlea, it runs over properly”, because it’s in place. It’s holding it, stopping it from going too far to the outside. It does that through the direction of fibers. And also because there’s separate innovation in that area to tell that VMO to do its job and to keep the Patella aligned.

So while the joints working properly, you also need the VMO to hold it in place so that kneecap runs over trochlea nice and smooth. So to strengthen your VMO, respecting the oblique orientation of the direction fibers, you can’t do what’s properly found on the interweb. There’s an exercise where they have you pulling your leg up and out to work the VML, thinking that’s the same thing as working the VMO, but it’s not. You can just simply look at the fiber directions of the VML and then fiber directions of the VMO and see that it takes a different type of action. This action is kind of like a soccer kick. So that’s where you see soccer players have gigantic quads on the inside, that’s their VMO. But you can do that on your own through some sort of resistance band or somebody put their hand on your foot and do a simple soccer kick.

Articular Genu

Your articular genu means articular to movement, genu means knee. It help to move the knee. It is deep on your thigh, almost a continuation of that Vastus Intermedius and it connects to the synovial membrane underneath the kneecap. If you remember from the top before with the Patellofemoral Joint, that synovial membrane is very important to be mobile and to produce the synovial fluid, to help with waste removal and to bring nutrition. With articular genu if it’s inflexible or if it’s strong, it doesn’t help pump that synovial area to produce the movement as it produce in the synovial membrane. You won’t find any exercises on internet about the articular genu. But like all exercises structures, there needs to be a fixed point. So you need fix the kneecap, because it attaches underneath the cap, and to flex the articular genu only, not all of your quads, to makes you stimulate those fibers to either strengthening through reps or stretching through holding for three times 30 seconds.

There you go. Those three really small but important areas and how they should be incorporated into your corrective preventive recovery routine. Remember you’re not going to be helping your knee by the rest of your body, when you do the exercises and keep your knee healthy. It’s going to keep you active. There’s also going to keep you in life because we’re only as strong as our weakest link. And if our knee is the weakest link, then our need is going to hinder us in everything we do. Not just running, just in life, playing with your kids, going to the grocery store, wherever have you, it’s going to slowly become the bane of your existence but you can stop that by training it properly.

If you’re interested more in how to train yourself properly, to get mobile, to get out of pain and get back to the activities that you love, then I’ve got a free resource for you. In the description below, there’s a link on how to access it. Click the link, put in information and you’ll get instant access. Stay tuned for this next video on how to stretch for mobility. Please don’t forget to subscribe and hit that bell. And if you found this video beneficial, please like and share. That way the YouTube algorithm will share with more people who will also find it beneficial. Please remember it’s not just working out, it’s opportunity to build a foundation for a better life.

Let me know your thought below.

it’s not just working out, it’s building a foundation for a better life.

Find out more @

Facebook

Twitter

Pinterest

Instagram

Youtube